
Company Setup
Inviting new users
Expand your team by inviting colleagues and assigning them specific roles to manage customer communications.
Adding new team members to Qpien ensures your customer support is handled efficiently and collaboratively. You can easily invite new colleagues, assign them appropriate access levels, and get them onboarded in just a few clicks.
In this article:
Inviting a new user
Inviting multiple users at once
Joining the team (For invited users)
💡 Tip: Before inviting a new user, you need an available user seat. To learn more about how licenses and billing cycles work, check out our Seats article.
Inviting a new user
As an administrator, you can send workspace invitations directly from your dashboard.
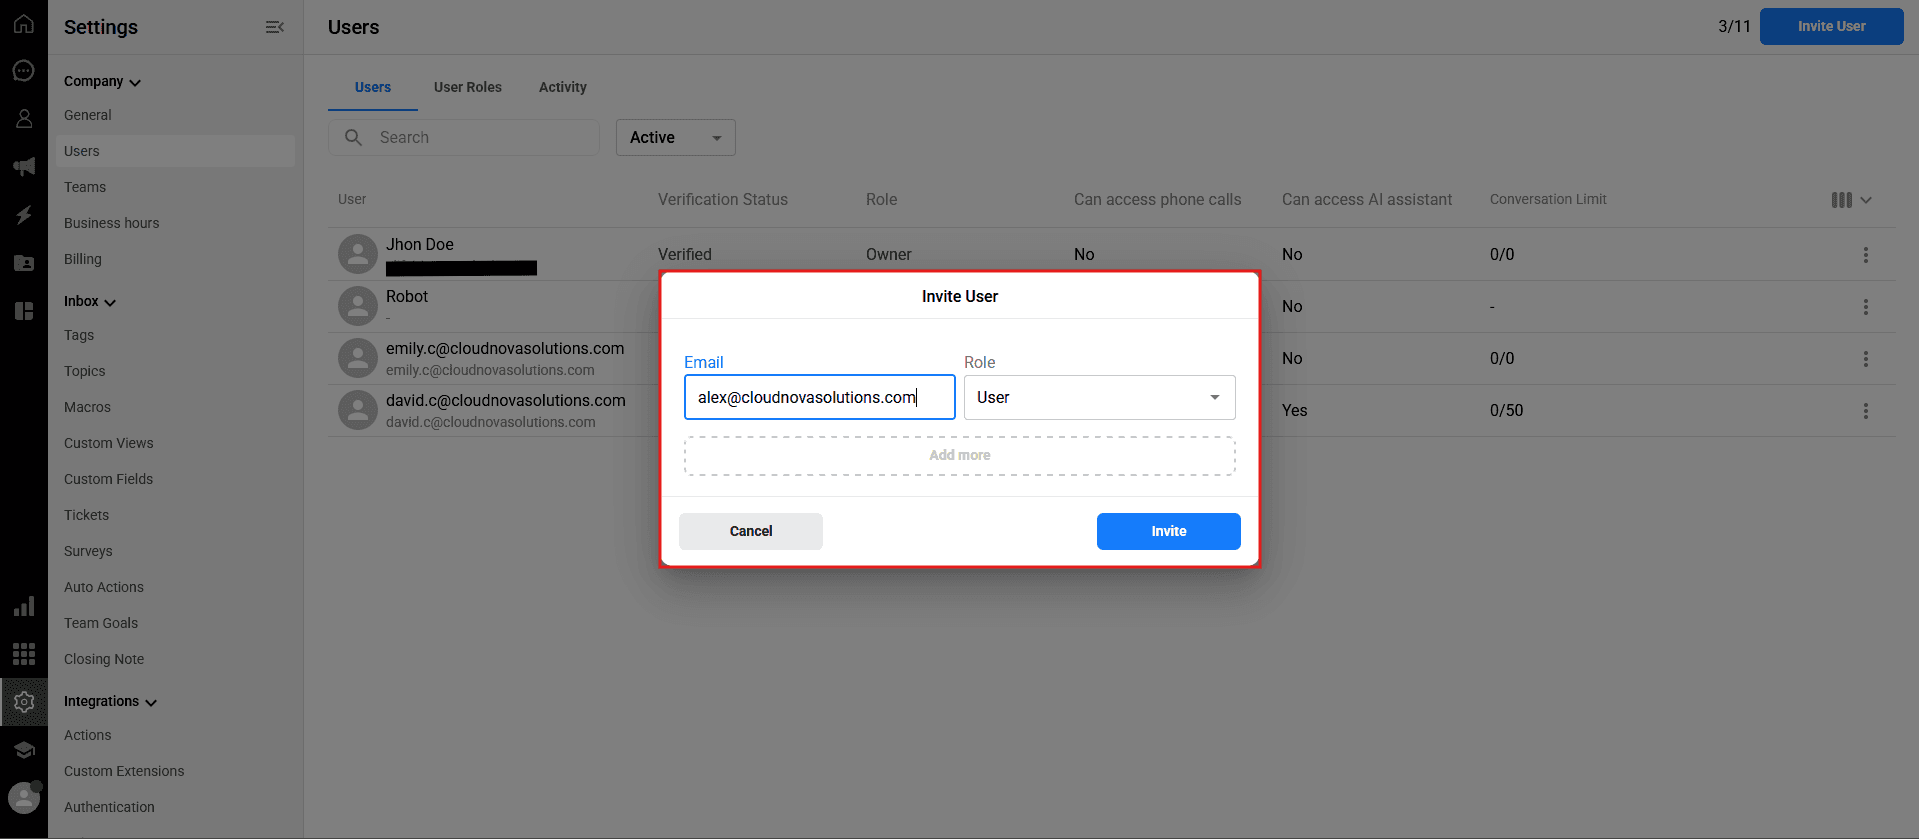
-> Navigate to Settings > Company > Users from the left sidebar.
-> Click the blue Invite Userbutton located in the top right corner of the page.

Add Email: Enter the company email address of the person you want to invite.
Role Selection: Choose the appropriate role (e.g., Admin, User, Limited User) for this person from the dropdown menu.
-> Click the blue Invite button to send the invitation.
Inviting multiple users at once
If you are onboarding an entire team, you do not need to send invitations one by one.
Inside the invite modal, click the "Add more" option.
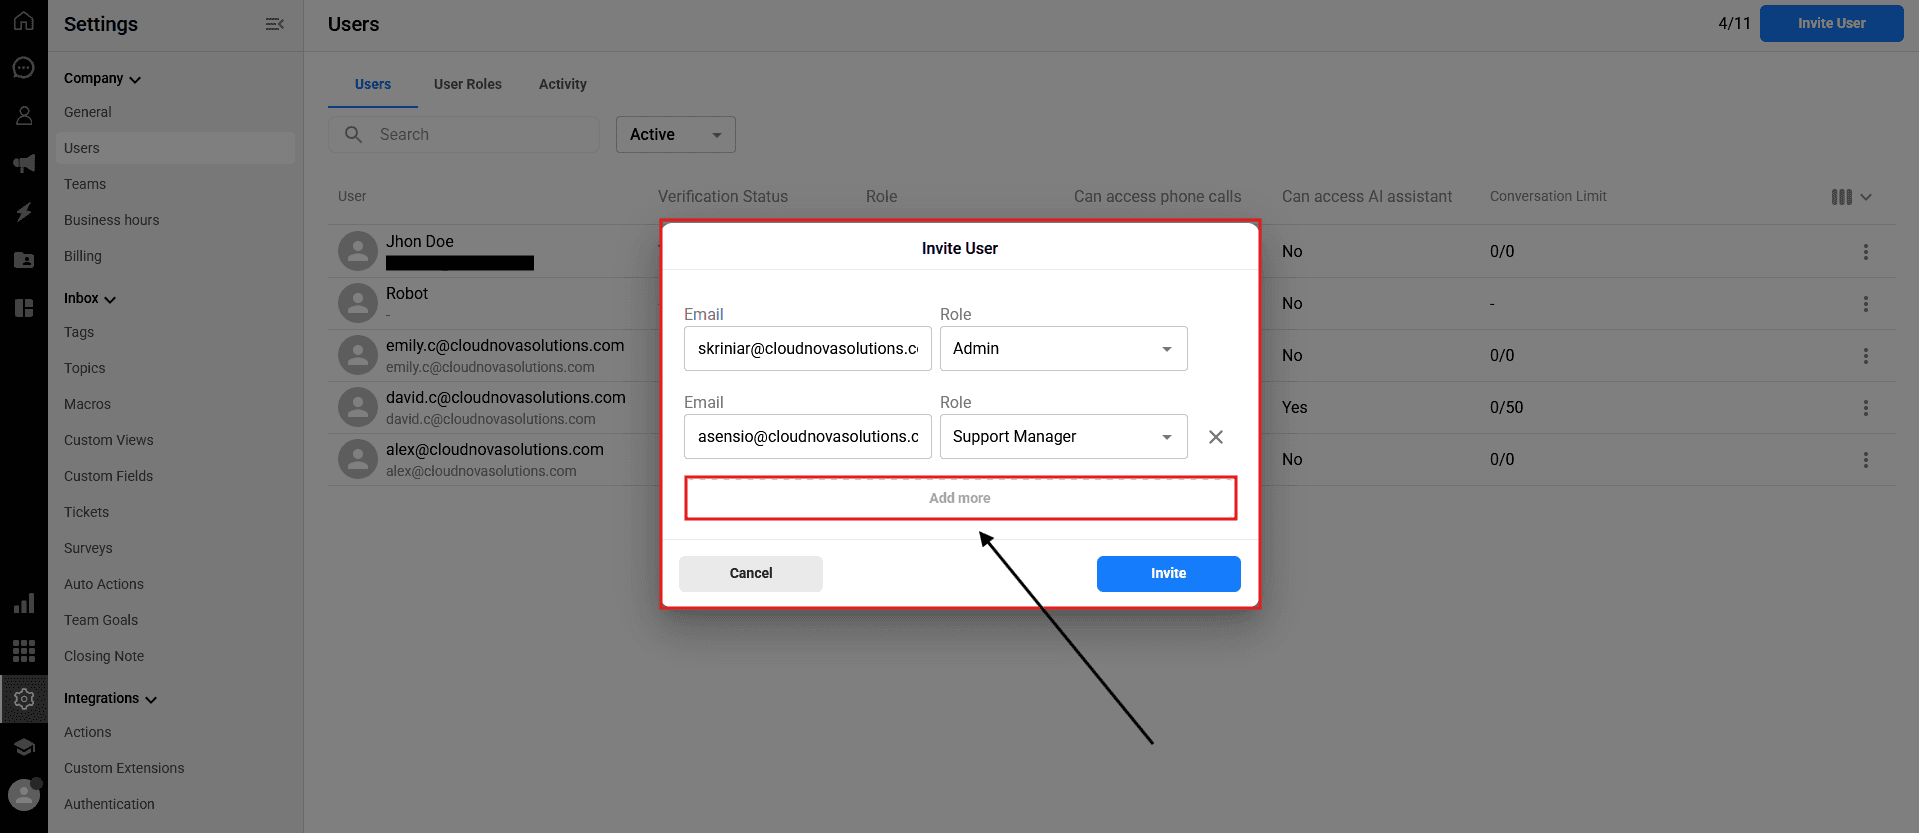
A new row will appear. Enter the email address and select the role for the next user.
You can repeat this process to invite several team members simultaneously before clicking
Invite.
Joining the team (For invited users)
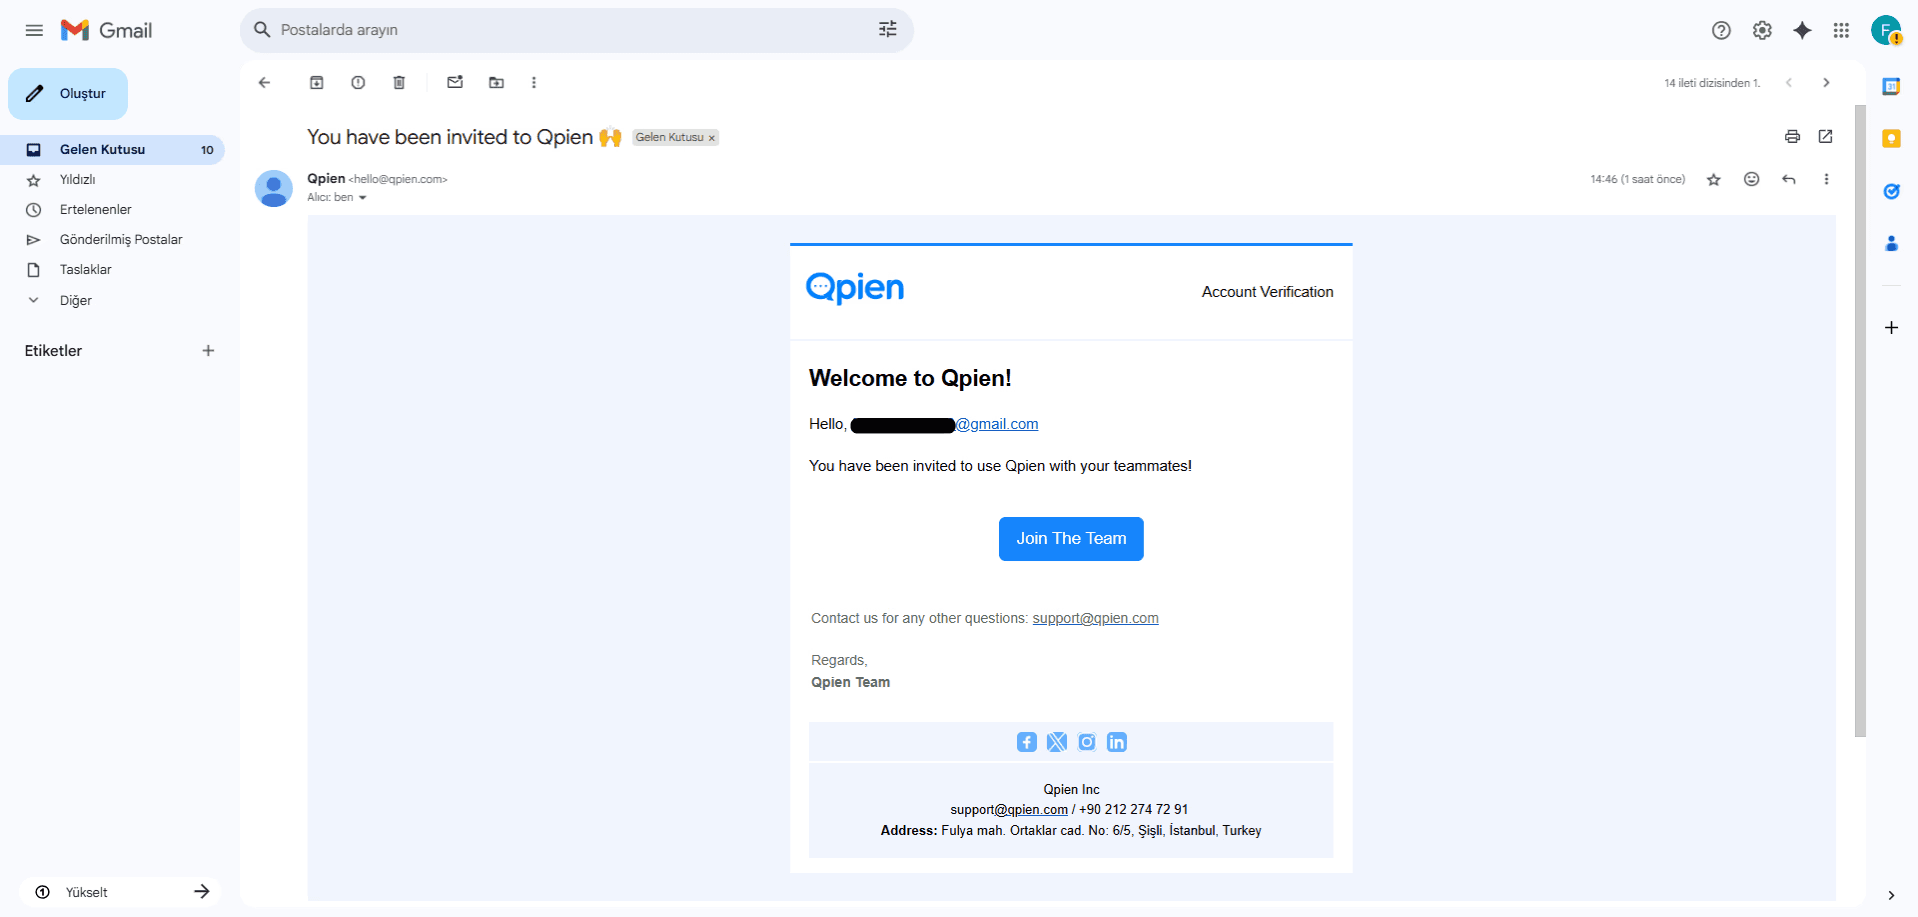
Once you send the invitation, the new user must accept it to verify their email and access the workspace. Here is what they need to do:
Check their email inbox (and the Spam/Junk folder) for the invitation email from Qpien.
Open the email and click the blue "Join The Team" button.
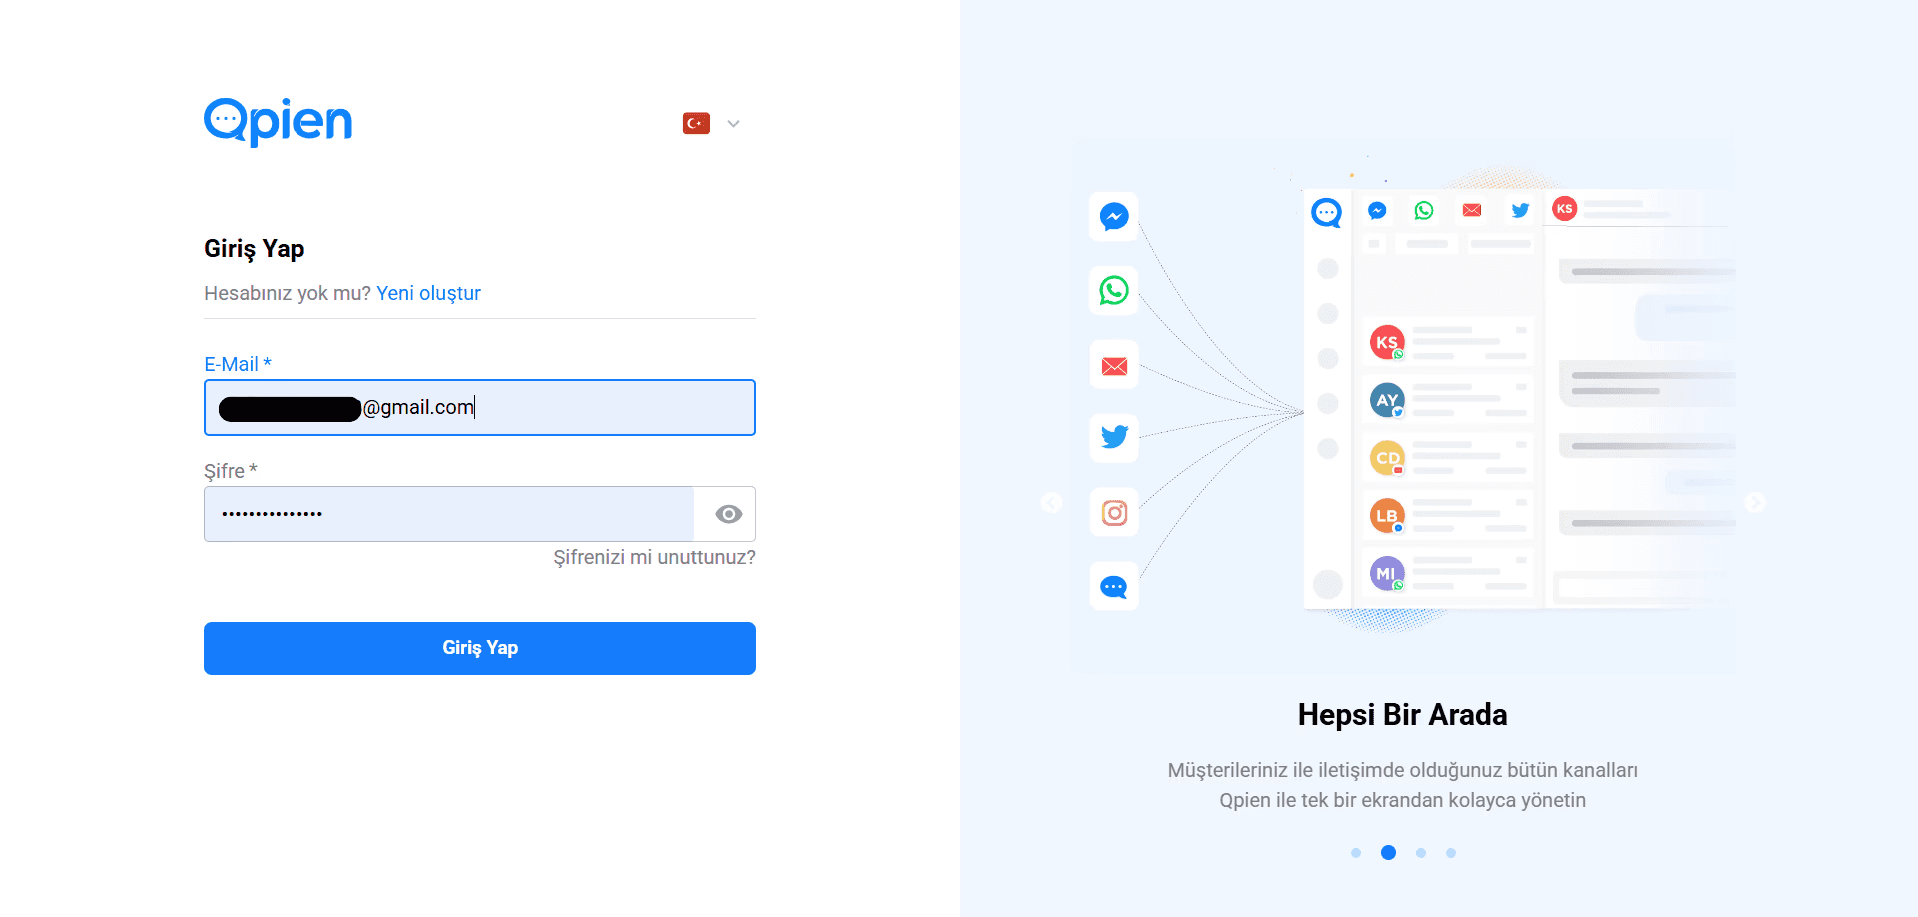
They will be redirected to a setup page.
If they do not have a Qpien account: They must enter their first name, last name, phone number, and create a password to set up their account.

If they already have a Qpien account: They can simply log in with their existing credentials.
Once logged in, their account is officially created, verified, and linked to your workspace with the permissions you assigned.
Adding new team members to Qpien ensures your customer support is handled efficiently and collaboratively. You can easily invite new colleagues, assign them appropriate access levels, and get them onboarded in just a few clicks.
In this article:
Inviting a new user
Inviting multiple users at once
Joining the team (For invited users)
💡 Tip: Before inviting a new user, you need an available user seat. To learn more about how licenses and billing cycles work, check out our Seats article.
Inviting a new user
As an administrator, you can send workspace invitations directly from your dashboard.
-> Navigate to Settings > Company > Users from the left sidebar.
-> Click the blue Invite Userbutton located in the top right corner of the page.
Add Email: Enter the company email address of the person you want to invite.
Role Selection: Choose the appropriate role (e.g., Admin, User, Limited User) for this person from the dropdown menu.
-> Click the blue Invite button to send the invitation.
Inviting multiple users at once
If you are onboarding an entire team, you do not need to send invitations one by one.
Inside the invite modal, click the "Add more" option.
A new row will appear. Enter the email address and select the role for the next user.
You can repeat this process to invite several team members simultaneously before clicking
Invite.
Joining the team (For invited users)
Once you send the invitation, the new user must accept it to verify their email and access the workspace. Here is what they need to do:
Check their email inbox (and the Spam/Junk folder) for the invitation email from Qpien.
Open the email and click the blue "Join The Team" button.
They will be redirected to a setup page.
If they do not have a Qpien account: They must enter their first name, last name, phone number, and create a password to set up their account.
If they already have a Qpien account: They can simply log in with their existing credentials.
Once logged in, their account is officially created, verified, and linked to your workspace with the permissions you assigned.
Previous
Configuring your notification preferences
Next
Next
Understand how billing works for a monthly or annual subscription
Try Qpien free for 14 days! 🎉
Ready to take control of all your support channels?
Empower your customer interactions with Qpien! Boost sales and elevate satisfaction with every conversation.
Try Qpien free for 14 days! 🎉
Ready to take control of all your support channels?
Empower your customer interactions with Qpien! Boost sales and elevate satisfaction with every conversation.
Try Qpien free for 14 days! 🎉
Ready to take control of all your support channels?
Empower your customer interactions with Qpien! Boost sales and elevate satisfaction with every conversation.