
Company Setup
Managing user roles
Learn about default system access levels and how to create custom roles to securely manage your team's permissions.
Providing the right level of access to your team members is essential for maintaining security and operational efficiency. Qpien offers pre-defined default roles to cover standard organizational needs, while also allowing you to create highly specific custom roles with granular permissions tailored exactly to your workflow.
In this article:
Accessing the User Roles tab
Understanding default roles
Creating a custom user role
Editing or deleting custom roles
Accessing the User Roles tab
To manage system roles and permissions, navigate to Settings > Company > Users from the left sidebar of your dashboard, and then click on the User Roles tab at the top.
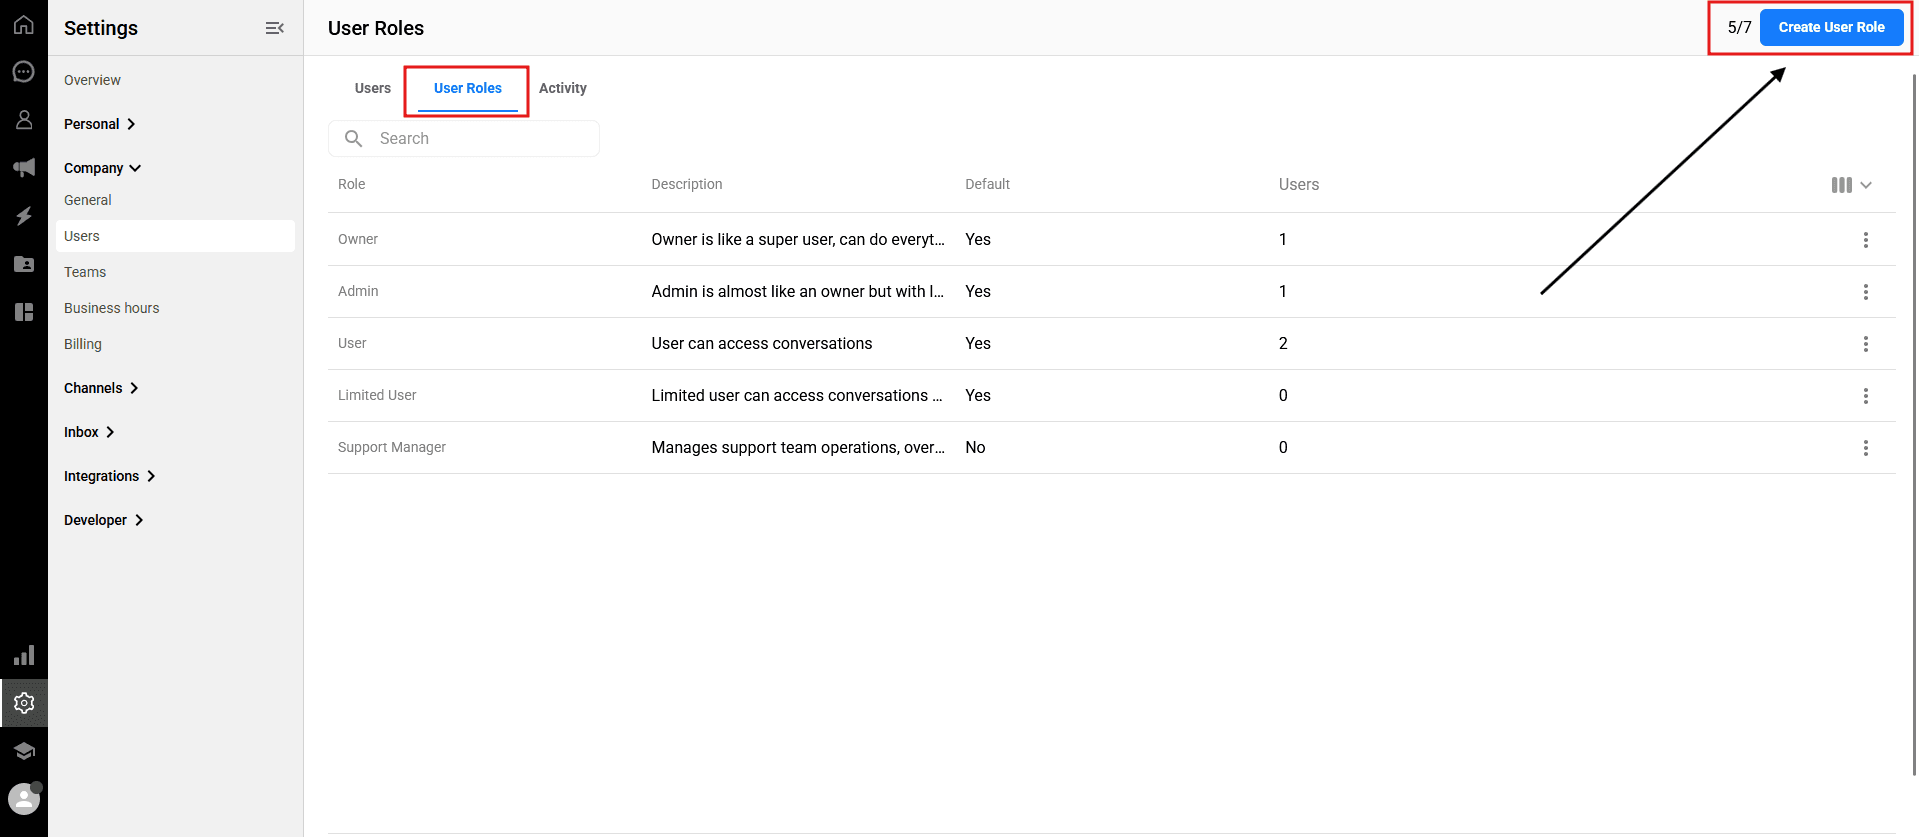
Understanding default roles
Qpien comes with four built-in default roles. It is important to note that default roles cannot be edited or deleted; you can only view their details.
Here is what each default role can do:
Owner: The ultimate super-user. The Owner has absolute full access to everything the platform offers, including billing, all settings, and complete account management.
Admin: An Administrator operates almost exactly like an Owner, with full access to settings and management tools, but with a slight restriction: Admins do not have access to Webhooks.
User: Designed for standard team members. A User can access the Chat Page and Dashboard, view all messages sent to their assigned teams, and assign conversations to themselves or other agents.
Limited User: Designed for restricted access. A Limited User can only view the Chat Page and Dashboard, and can only respond to chats specifically assigned to them. They cannot view the general pool of unassigned messages.
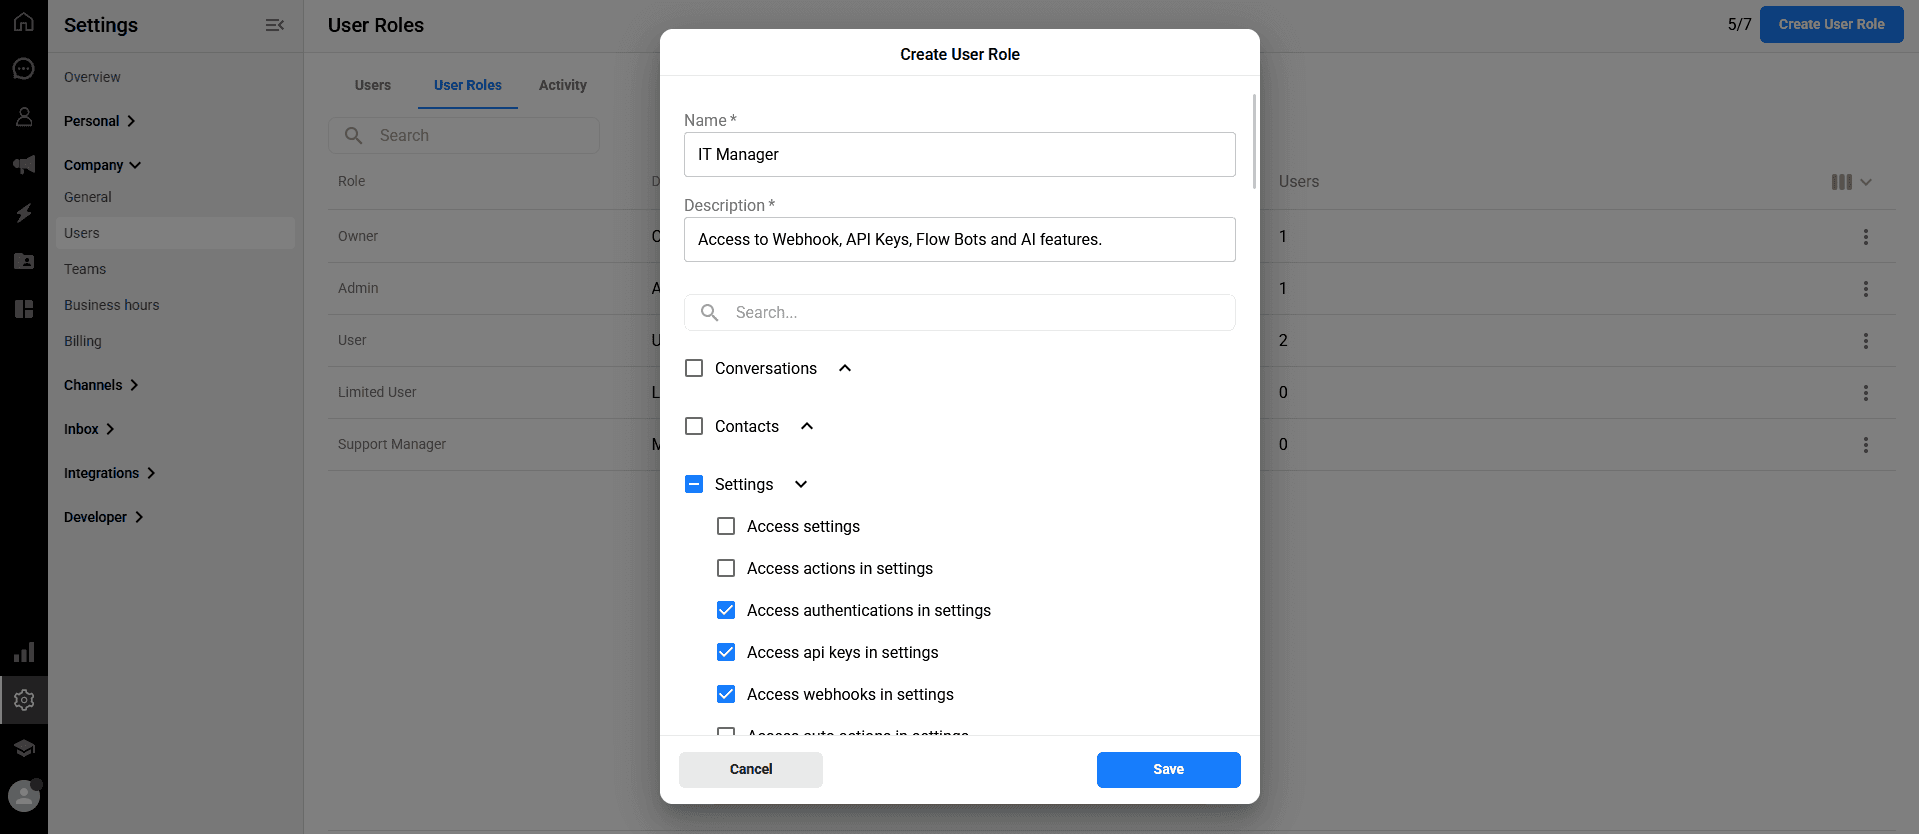
Creating a custom user role
If the default roles do not fit your specific needs, you can create a custom role with a unique combination of permissions.
On the User Roles tab, click the blue "Create User Role" button in the top right corner.
In the panel that opens, enter a Name and a brief Description for this new role.
Scroll through the permission tree (e.g., Conversations, Settings, etc.) and check the boxes next to the specific permissions you want to grant to this role.
Click the blue
Savebutton to finalize the creation process.
Editing or deleting custom roles
Unlike default roles, any custom role you create can be updated or permanently removed at any time.
Locate the custom role you want to manage in the list.
Click the three dots (⋮) icon located on the far right side of that role's row.

To update the role, select "Edit". The settings panel will open, allowing you to change its name, description, or toggle permissions on and off. Click "Save" when finished.
To remove the role, select "Delete". A confirmation window will appear. Enter the required confirmation text into the box exactly as shown, and click the red "Delete" button to permanently remove the role from the system.
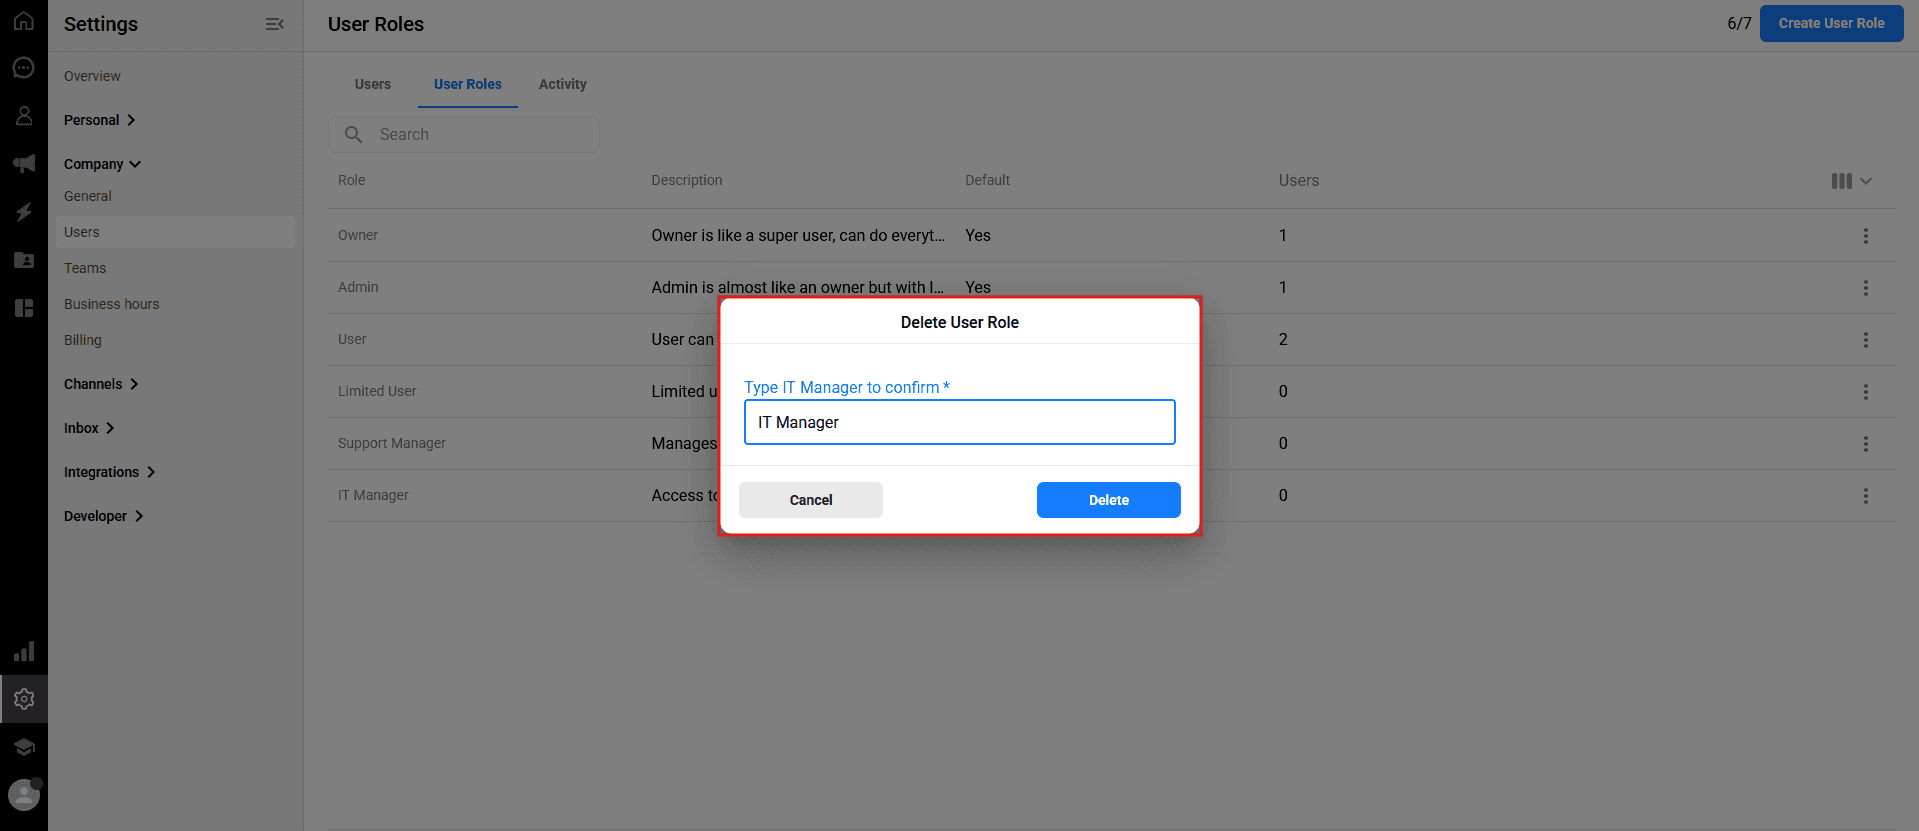
⚠️ Important Note: You cannot delete a custom role if it is currently assigned to any active user. To delete the role, you must first reassign those users to a different role (e.g., changing them back to a "User" or "Admin" role) so that the custom role is no longer in use.
💡 Tip: Once you have configured your roles, learn how to manage and archive your team members in our Managing Users article. (Note: Link will be added here once the second article is published.)
Providing the right level of access to your team members is essential for maintaining security and operational efficiency. Qpien offers pre-defined default roles to cover standard organizational needs, while also allowing you to create highly specific custom roles with granular permissions tailored exactly to your workflow.
In this article:
Accessing the User Roles tab
Understanding default roles
Creating a custom user role
Editing or deleting custom roles
Accessing the User Roles tab
To manage system roles and permissions, navigate to Settings > Company > Users from the left sidebar of your dashboard, and then click on the User Roles tab at the top.
Understanding default roles
Qpien comes with four built-in default roles. It is important to note that default roles cannot be edited or deleted; you can only view their details.
Here is what each default role can do:
Owner: The ultimate super-user. The Owner has absolute full access to everything the platform offers, including billing, all settings, and complete account management.
Admin: An Administrator operates almost exactly like an Owner, with full access to settings and management tools, but with a slight restriction: Admins do not have access to Webhooks.
User: Designed for standard team members. A User can access the Chat Page and Dashboard, view all messages sent to their assigned teams, and assign conversations to themselves or other agents.
Limited User: Designed for restricted access. A Limited User can only view the Chat Page and Dashboard, and can only respond to chats specifically assigned to them. They cannot view the general pool of unassigned messages.
Creating a custom user role
If the default roles do not fit your specific needs, you can create a custom role with a unique combination of permissions.
On the User Roles tab, click the blue "Create User Role" button in the top right corner.
In the panel that opens, enter a Name and a brief Description for this new role.
Scroll through the permission tree (e.g., Conversations, Settings, etc.) and check the boxes next to the specific permissions you want to grant to this role.
Click the blue
Savebutton to finalize the creation process.
Editing or deleting custom roles
Unlike default roles, any custom role you create can be updated or permanently removed at any time.
Locate the custom role you want to manage in the list.
Click the three dots (⋮) icon located on the far right side of that role's row.
To update the role, select "Edit". The settings panel will open, allowing you to change its name, description, or toggle permissions on and off. Click "Save" when finished.
To remove the role, select "Delete". A confirmation window will appear. Enter the required confirmation text into the box exactly as shown, and click the red "Delete" button to permanently remove the role from the system.
⚠️ Important Note: You cannot delete a custom role if it is currently assigned to any active user. To delete the role, you must first reassign those users to a different role (e.g., changing them back to a "User" or "Admin" role) so that the custom role is no longer in use.
💡 Tip: Once you have configured your roles, learn how to manage and archive your team members in our Managing Users article. (Note: Link will be added here once the second article is published.)
Previous
Managing your billing details
Next
Next
Qpien features explained
Try Qpien free for 14 days! 🎉
Ready to take control of all your support channels?
Empower your customer interactions with Qpien! Boost sales and elevate satisfaction with every conversation.
Try Qpien free for 14 days! 🎉
Ready to take control of all your support channels?
Empower your customer interactions with Qpien! Boost sales and elevate satisfaction with every conversation.
Try Qpien free for 14 days! 🎉
Ready to take control of all your support channels?
Empower your customer interactions with Qpien! Boost sales and elevate satisfaction with every conversation.