
Company Setup
Creating and managing teams
Organize your workspace by grouping your teammates into specific teams. Learn how to create, edit, and delete teams to efficiently route conversations from different channels to the right people.
By grouping your users, you can ensure that messages coming from specific platforms are directed only to the relevant staff members, keeping your workspace organized and efficient.
In this article:
Accessing the Teams page
Creating a new team
Editing team organization
Deleting a team
Accessing the Teams page
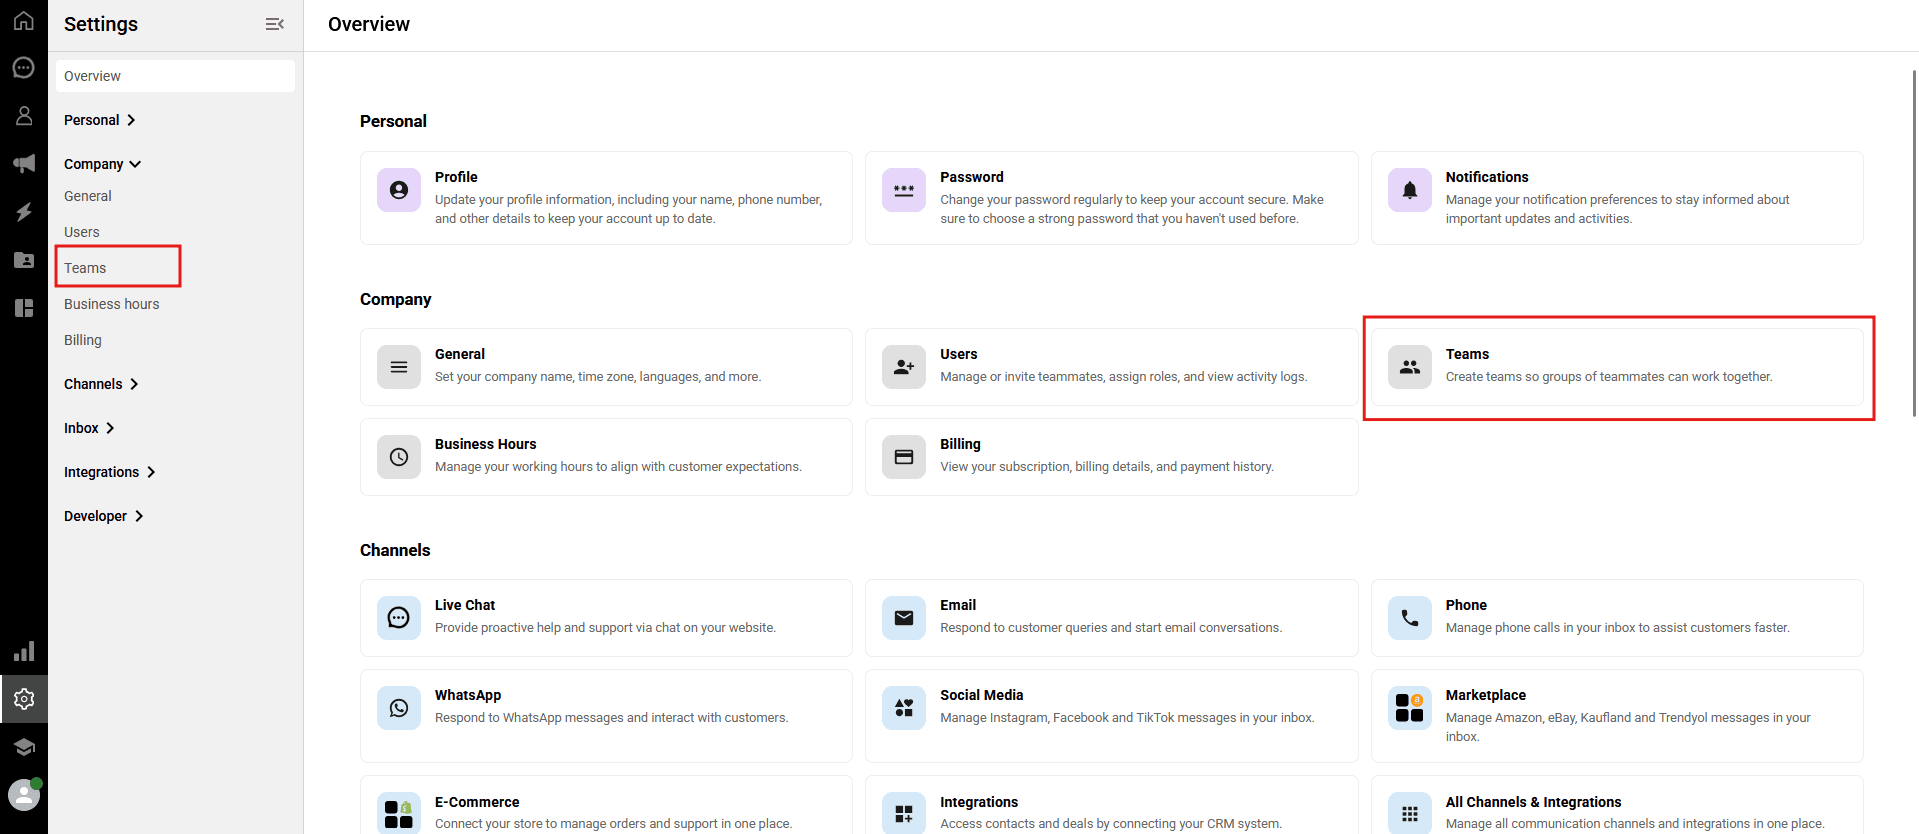
To manage your groups, navigate to Settings > Company > Teams from the left sidebar. Alternatively, you can easily access this section by clicking the "Teams" card on the new Settings > Overview page.
Creating a new team
You can create multiple teams to handle different aspects of your customer support or sales processes.
💡 Tip: After opening your first Qpien account, a default team named "Main Team" is automatically created for you.
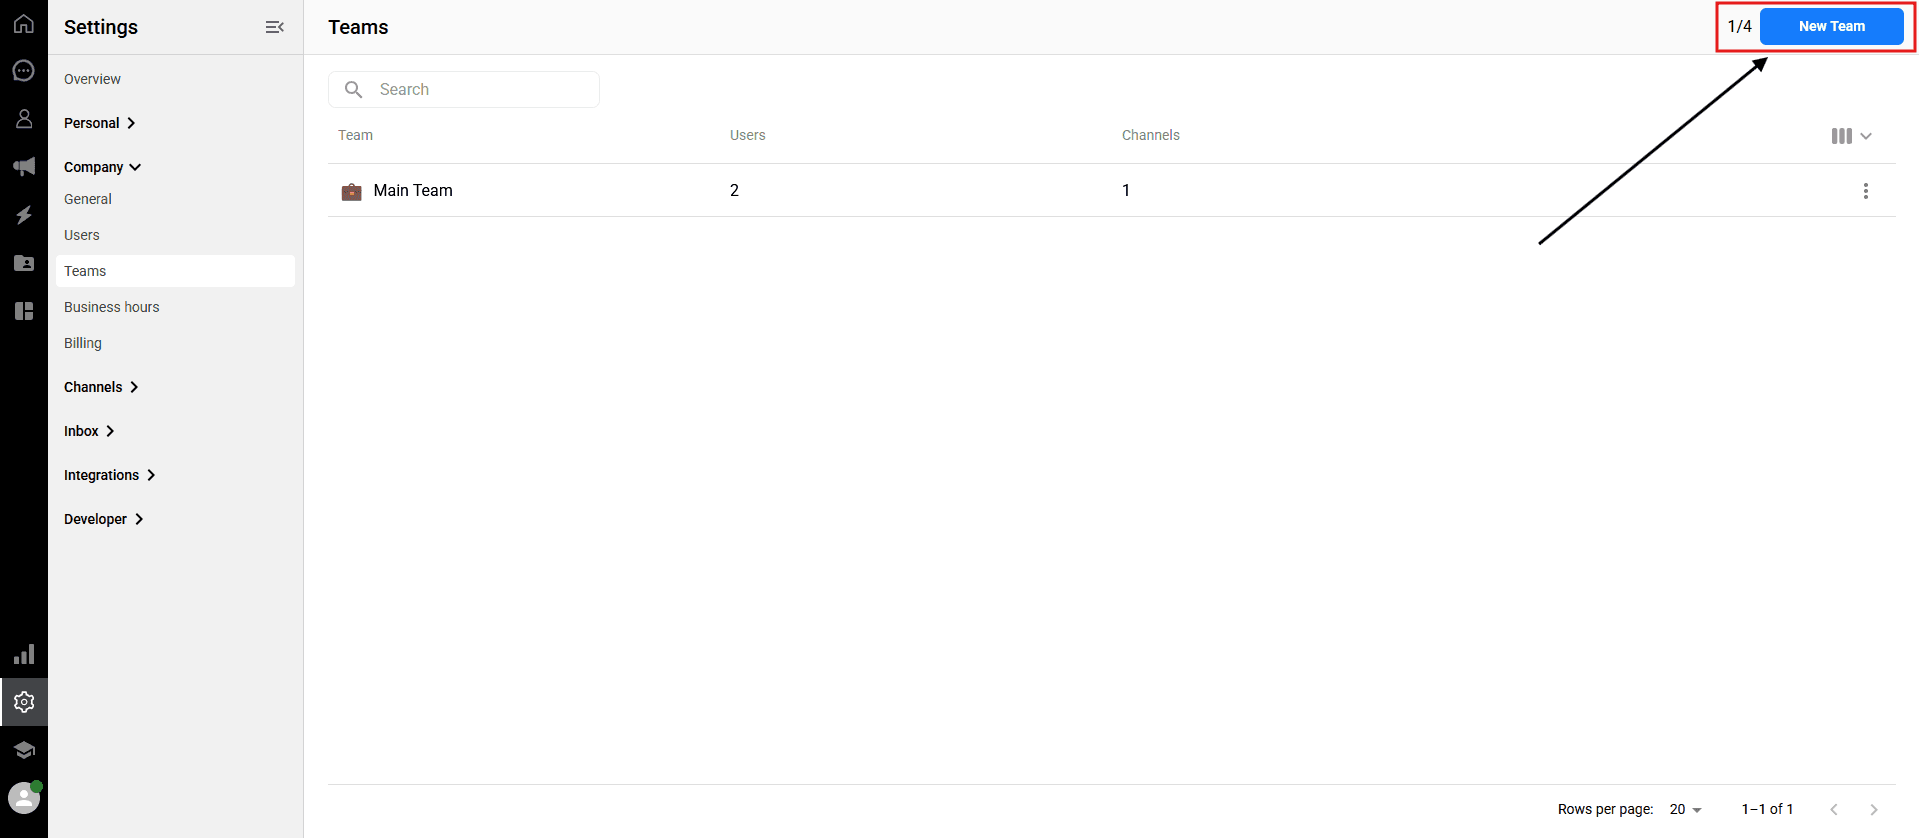
-> On the Teams page, click the blue "New Team" button in the upper right corner.
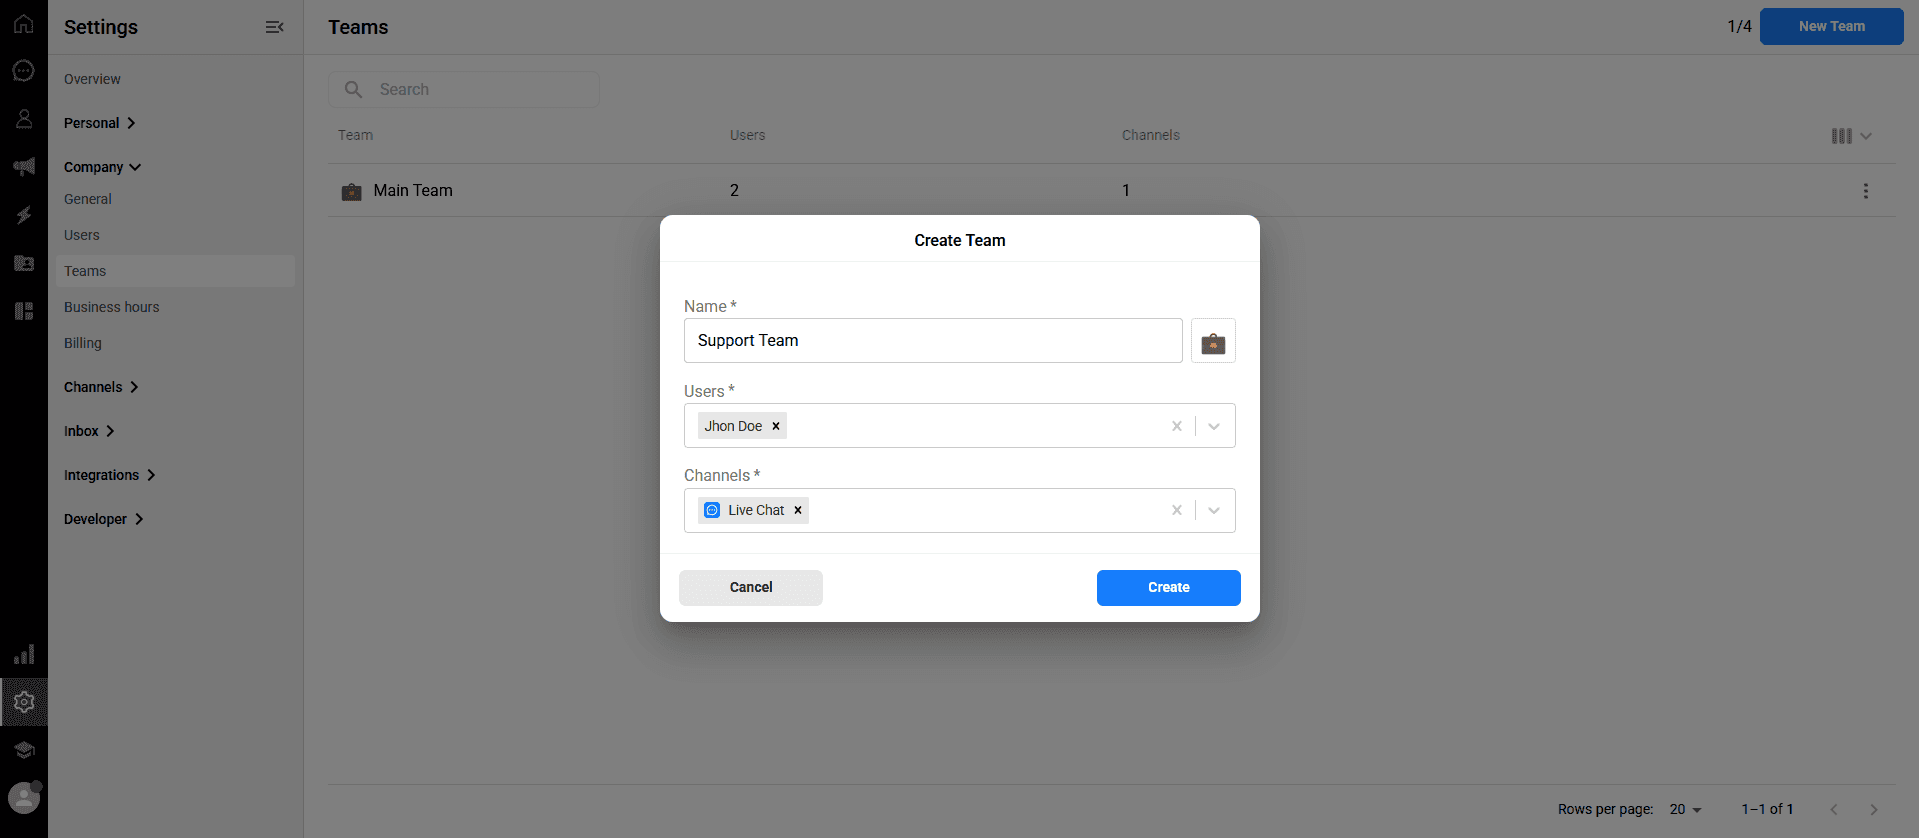
A "Create Team" window will appear. Fill in the following details:
Name: Enter a clear, identifiable name for your team.
Emoji Selection: Click on the briefcase/emoji icon next to the name field to select an icon that suits your team's purpose.
Users: Select the users you want to add to this team from the dropdown menu.
Channels: Select which connected message channels (e.g., WhatsApp, Instagram, Trendyol) will be forwarded to this team.
After entering all the information, click the blue "Create" button.
Editing team organization
You can update your team's name, assigned members, or connected channels at any time to adapt to your changing workflow.
💡 Tip: The fraction visible in the upper right corner next to the New Team button (e.g., "1/4") indicates your team limit. It shows the "number of teams created / maximum number of teams allowed" in your current plan.
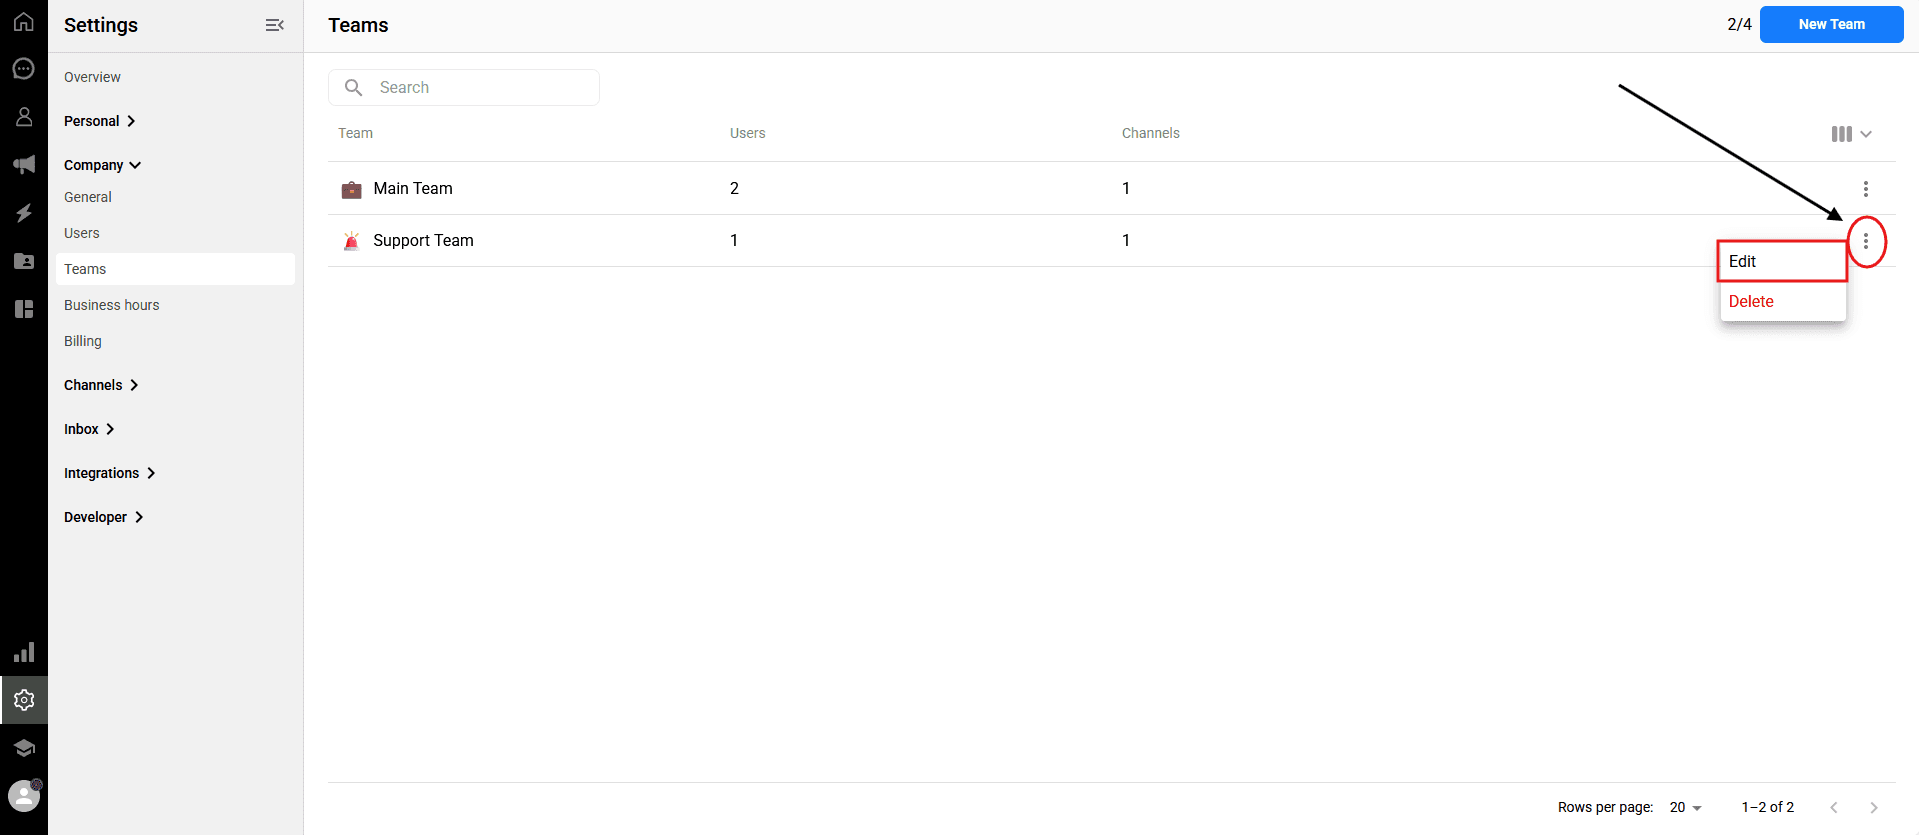
-> Locate the team you want to edit in the list.
Click the three dots (⋮) icon on the far right of that team's row.
Select "Edit" from the dropdown menu.
In the editing screen, you can update the team name, assigned users, connected channels, and the emoji.
After making your updates, click the "Update" button. The changes take effect immediately, and your team will appear in the list with the updated information.
Deleting a team
If a specific group is no longer needed, you can permanently remove it from your workspace.
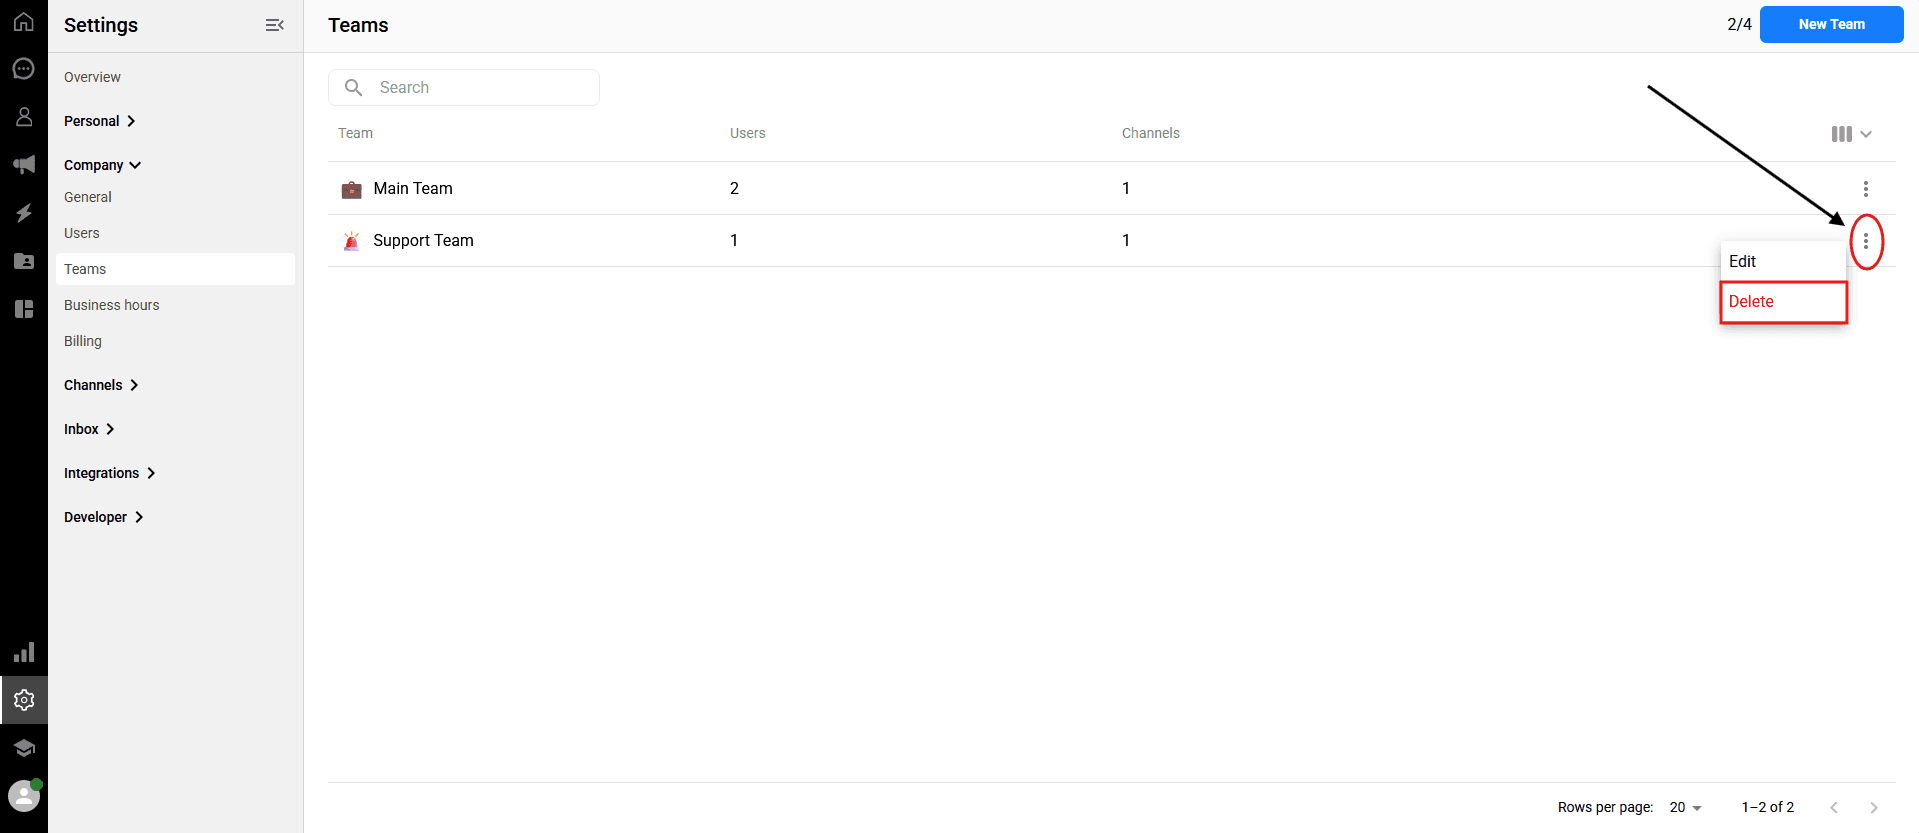
Click the three dots (⋮) icon located on the far right of the row of the team you want to delete.
Select "Delete" from the dropdown list.
A confirmation window will appear. For security purposes, enter the specified confirmation text into the relevant field.
Finally, click the "Delete" button to complete the process.
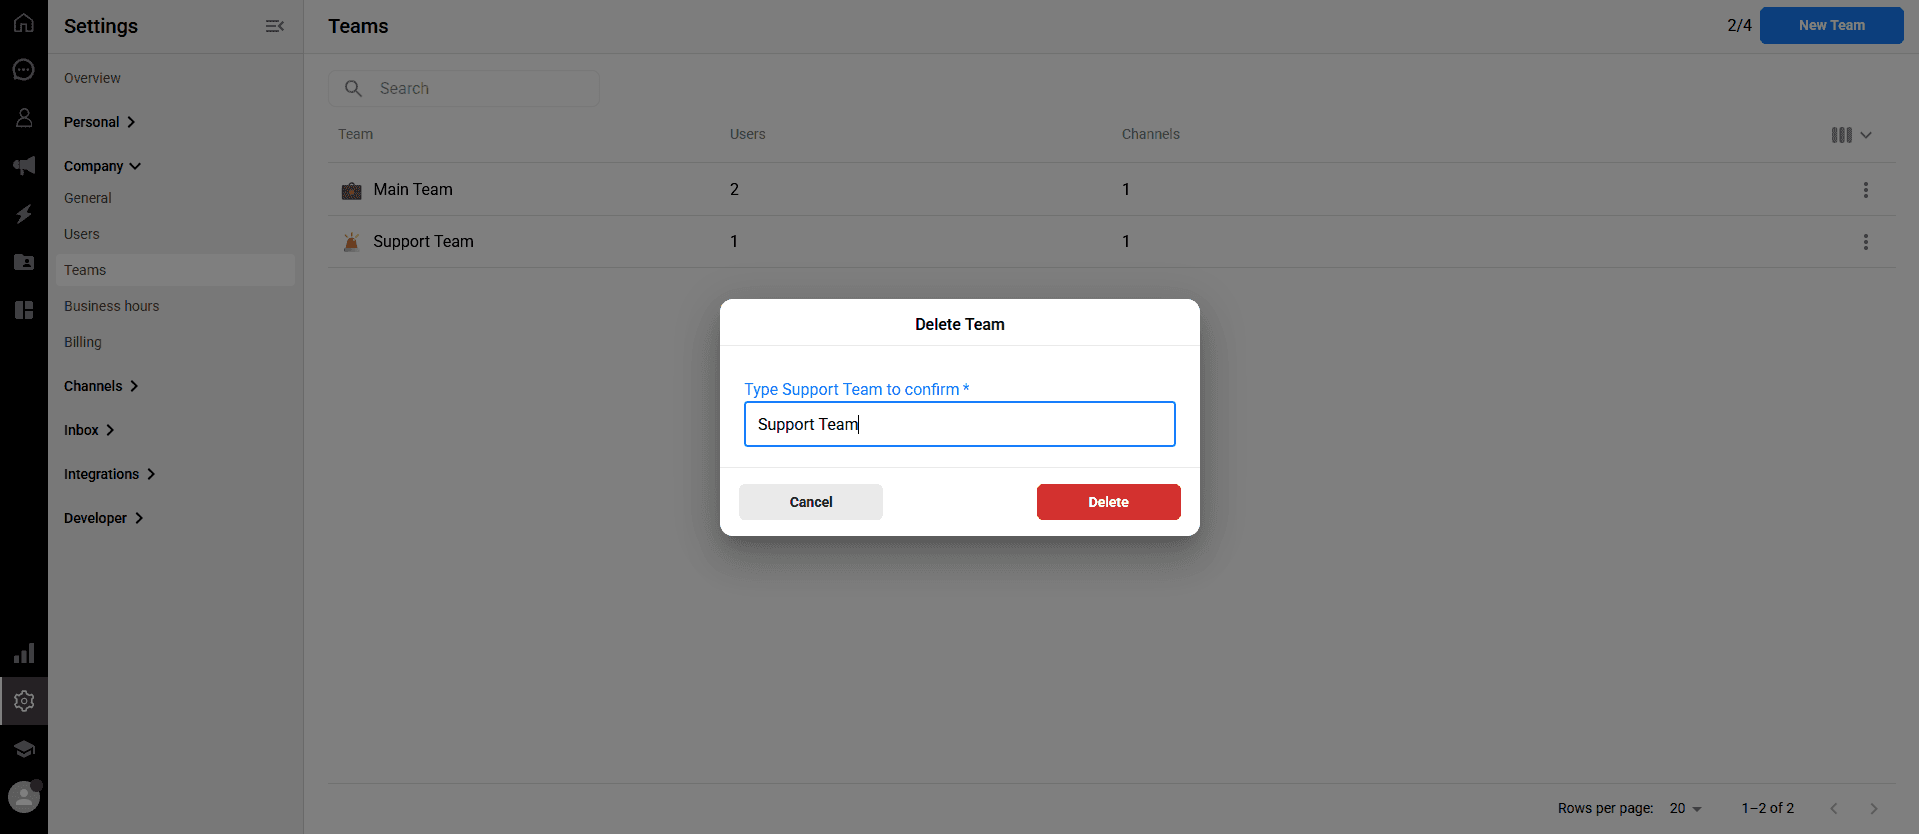
⚠️ Important Note: Deleted teams are permanently removed and cannot be recovered. The "Delete" button will remain inactive, and the deletion process cannot be performed unless the correct confirmation message is entered.
By grouping your users, you can ensure that messages coming from specific platforms are directed only to the relevant staff members, keeping your workspace organized and efficient.
In this article:
Accessing the Teams page
Creating a new team
Editing team organization
Deleting a team
Accessing the Teams page
To manage your groups, navigate to Settings > Company > Teams from the left sidebar. Alternatively, you can easily access this section by clicking the "Teams" card on the new Settings > Overview page.
Creating a new team
You can create multiple teams to handle different aspects of your customer support or sales processes.
💡 Tip: After opening your first Qpien account, a default team named "Main Team" is automatically created for you.
-> On the Teams page, click the blue "New Team" button in the upper right corner.
A "Create Team" window will appear. Fill in the following details:
Name: Enter a clear, identifiable name for your team.
Emoji Selection: Click on the briefcase/emoji icon next to the name field to select an icon that suits your team's purpose.
Users: Select the users you want to add to this team from the dropdown menu.
Channels: Select which connected message channels (e.g., WhatsApp, Instagram, Trendyol) will be forwarded to this team.
After entering all the information, click the blue "Create" button.
Editing team organization
You can update your team's name, assigned members, or connected channels at any time to adapt to your changing workflow.
💡 Tip: The fraction visible in the upper right corner next to the New Team button (e.g., "1/4") indicates your team limit. It shows the "number of teams created / maximum number of teams allowed" in your current plan.
-> Locate the team you want to edit in the list.
Click the three dots (⋮) icon on the far right of that team's row.
Select "Edit" from the dropdown menu.
In the editing screen, you can update the team name, assigned users, connected channels, and the emoji.
After making your updates, click the "Update" button. The changes take effect immediately, and your team will appear in the list with the updated information.
Deleting a team
If a specific group is no longer needed, you can permanently remove it from your workspace.
Click the three dots (⋮) icon located on the far right of the row of the team you want to delete.
Select "Delete" from the dropdown list.
A confirmation window will appear. For security purposes, enter the specified confirmation text into the relevant field.
Finally, click the "Delete" button to complete the process.
⚠️ Important Note: Deleted teams are permanently removed and cannot be recovered. The "Delete" button will remain inactive, and the deletion process cannot be performed unless the correct confirmation message is entered.
Previous
Managing your Qpien subscription plan
Next
Next
Qpien formunu Shopify sayfanıza ekleyin
Try Qpien free for 14 days! 🎉
Ready to take control of all your support channels?
Empower your customer interactions with Qpien! Boost sales and elevate satisfaction with every conversation.
Try Qpien free for 14 days! 🎉
Ready to take control of all your support channels?
Empower your customer interactions with Qpien! Boost sales and elevate satisfaction with every conversation.
Try Qpien free for 14 days! 🎉
Ready to take control of all your support channels?
Empower your customer interactions with Qpien! Boost sales and elevate satisfaction with every conversation.