
Company Setup
Setting up your company profile and business hours
Learn how to configure your company identity, manage support access, enforce organization-wide security, and define your business hours.
Your company profile is the core of your organization’s identity on Qpien. As an administrator, this section allows you to manage branding, set regional preferences, enforce security protocols for all team members, and define operational schedules like your business hours to ensure smooth communication.
In this article:
Accessing general company settings
Configuring company identity
Managing Qpien support access
Enforcing Two-Factor Authentication (2FA) company-wide
Setting up business hours
Accessing general company settings
To manage your organization's core details, navigate to Settings > Company > General from the left sidebar.
Configuring company identity
On the General settings page, you can update your basic company information:
Company logo: Click on the avatar icon at the top to upload or update your company logo.
Company details: Click on the Company/Brand name, E-Mail, and Phone fields to enter or update your contact information.
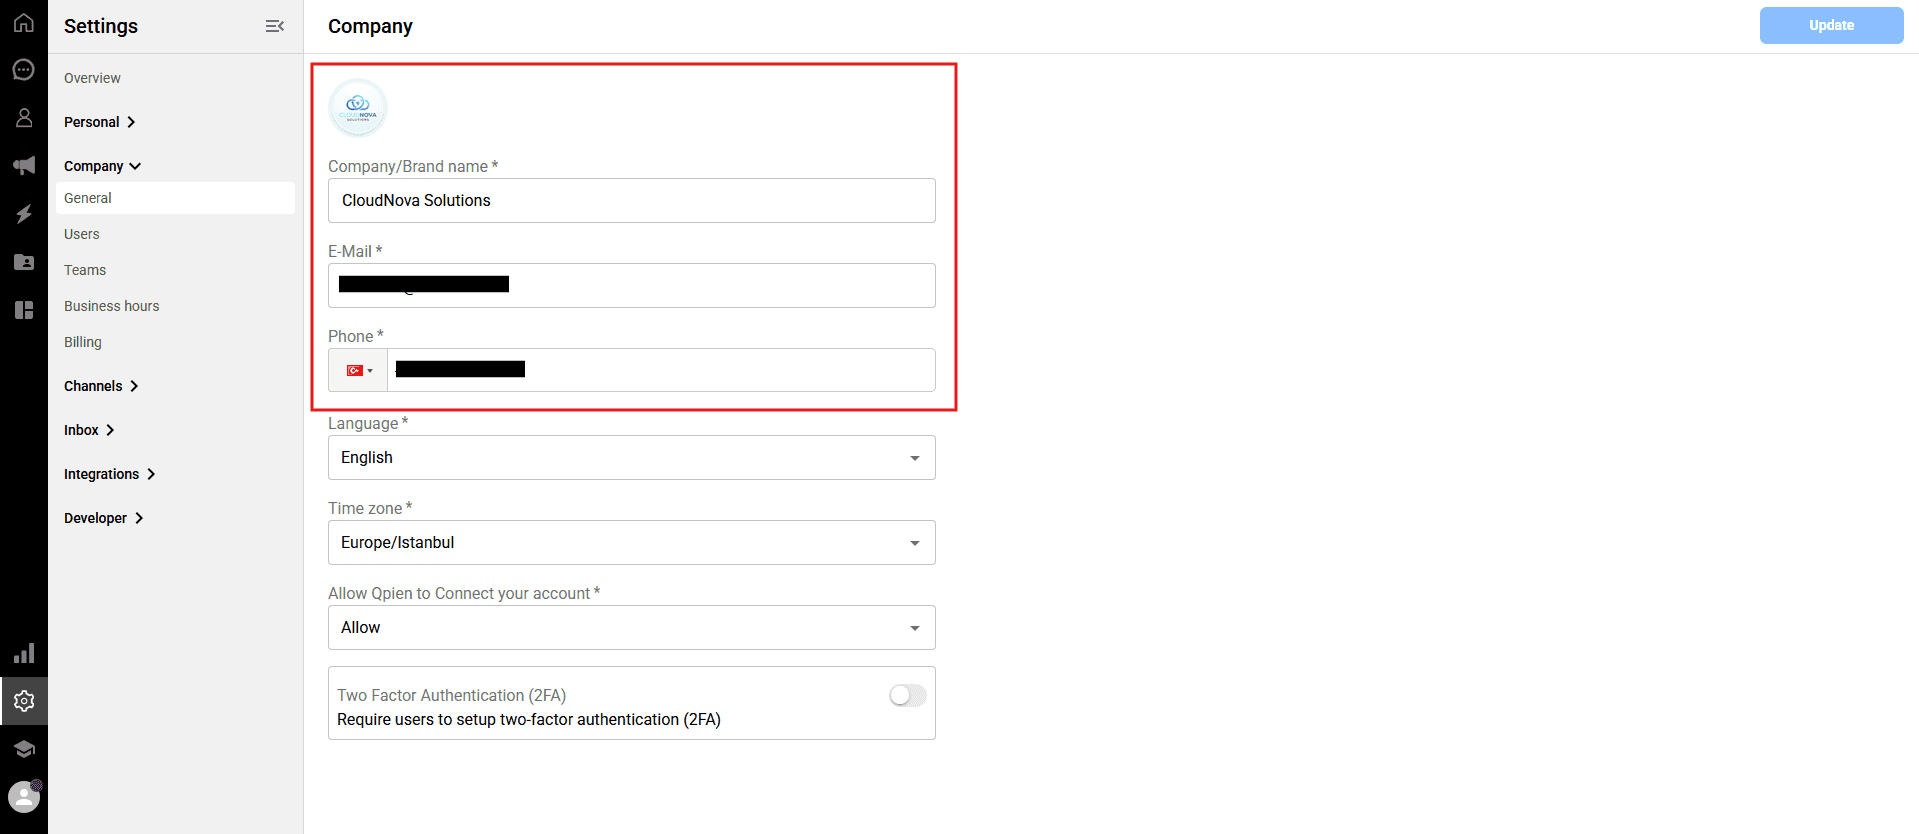
Regional settings: Select your company's primary Language (e.g., Turkish, English, Arabic) and your Time zone.
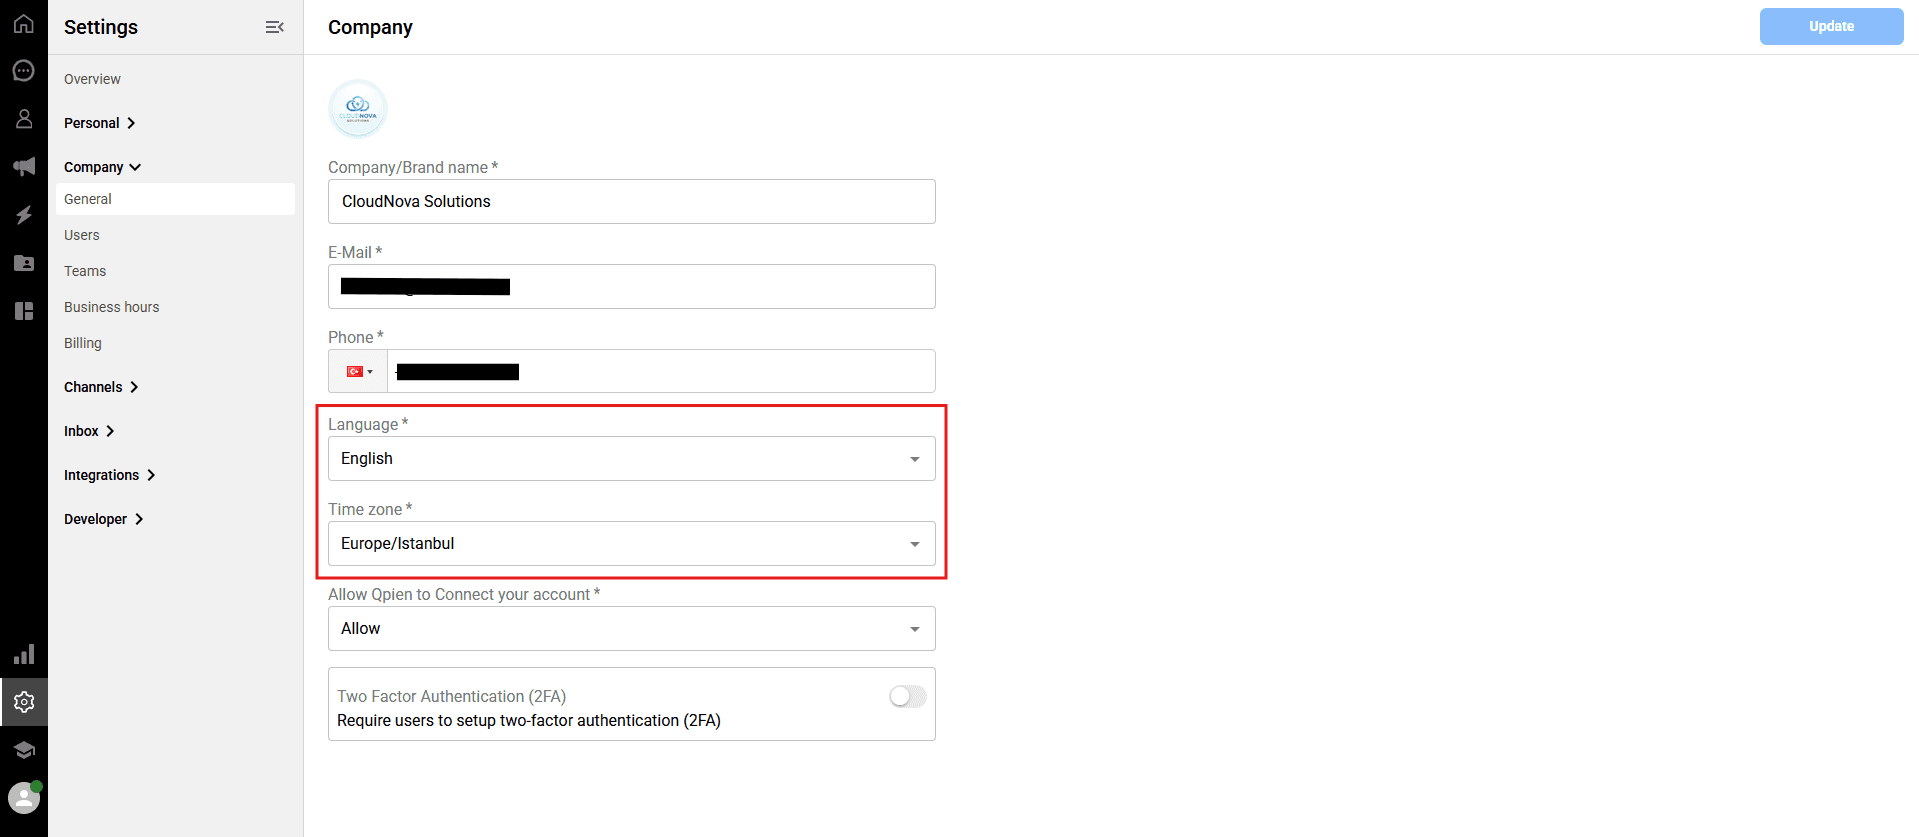
Note: Setting the correct time zone is crucial as it ensures all system-generated logs, timestamps, and business hours align accurately with your headquarters.
Managing Qpien support access
As an administrator, you can control whether the Qpien support team has access to your workspace to facilitate technical troubleshooting.
-> Scroll down to the "Allow Qpien to Connect your account" field.
Click the dropdown menu and select the appropriate option:
Allow: Authorized Qpien support staff will be able to securely access your profile to assist with technical issues.
Don't Allow: Your profile will remain completely inaccessible to the Qpien team.

Enforcing Two-Factor Authentication (2FA) company-wide
You can mandate Two-Factor Authentication for all users in your organization to maximize account security.
-> Scroll to the bottom of the General settings page.
Enable the toggle next to Require users to setup two-factor authentication (2FA).
When enabled, all users will be required to set up 2FA on their personal profiles before they can access the dashboard. For a detailed user guide, please refer to our "Profile settings and two factor authentication" article.
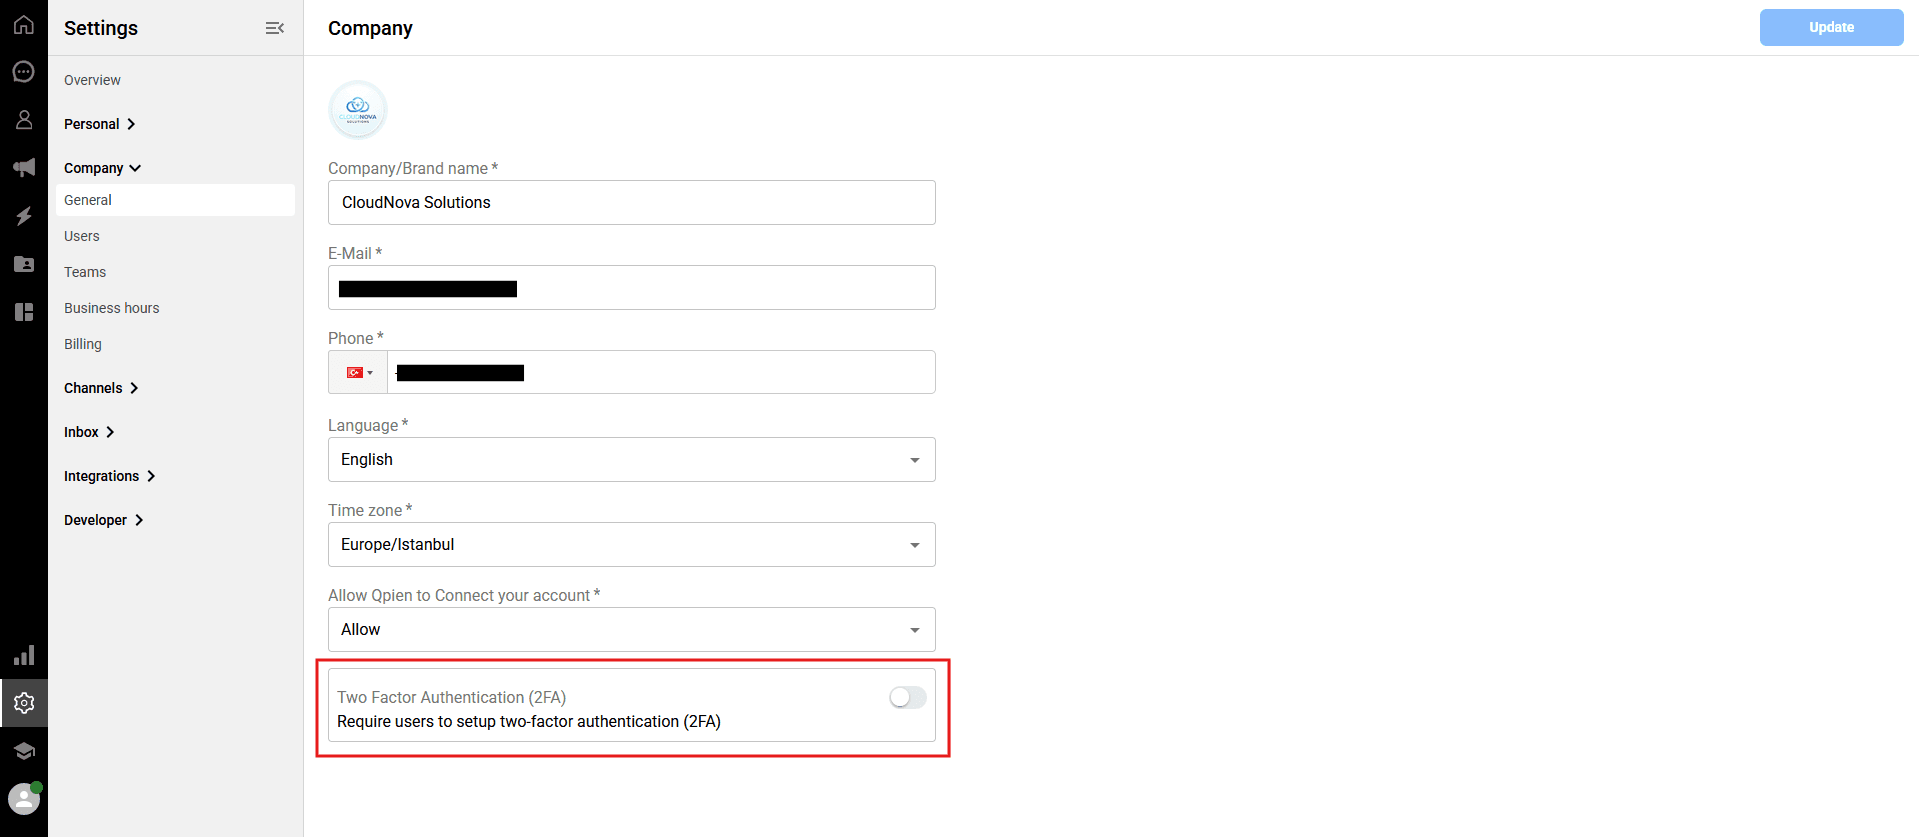
Important: Always remember to click the blue "Update" button in the upper right corner to save any changes made on the General page.
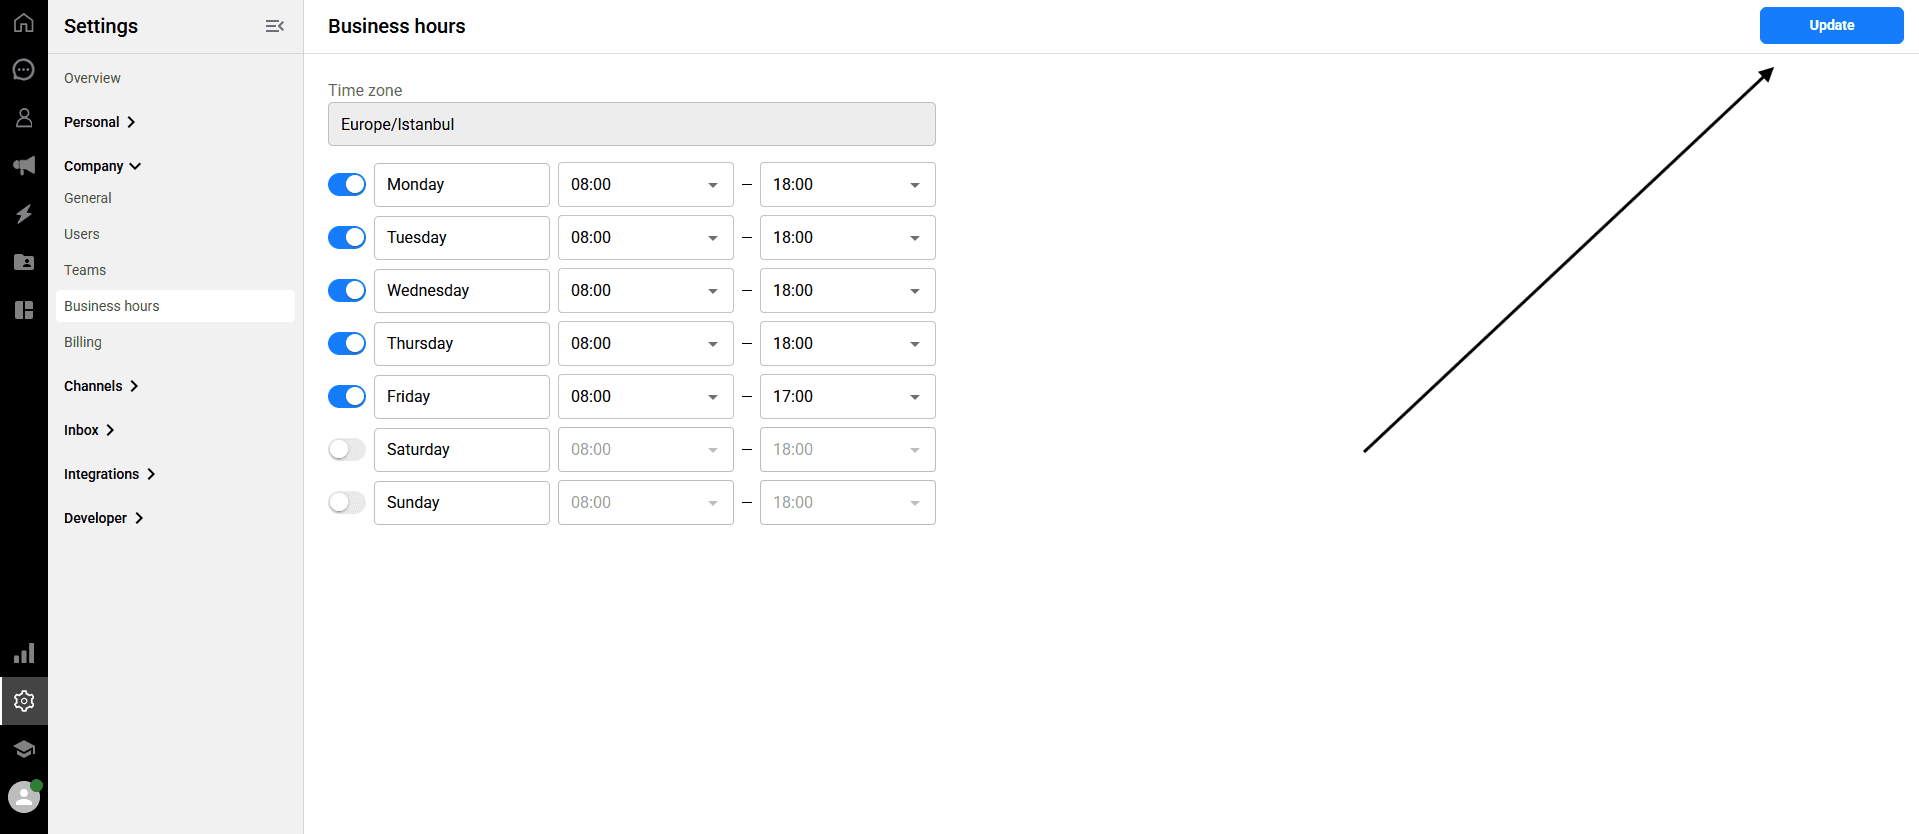
Setting up business hours
Defining your business hours helps manage customer expectations by aligning your team's availability with your automated responses.
-> Navigate to Settings > Company > Business hours from the left sidebar.
The Time zone displayed here is automatically synced from your General settings page.
Use the toggle switches next to each day to mark your business as open (blue) or closed (gray).
For the days you are open, use the dropdown menus to specify the exact start and end times for your shifts.
Click the "Update" button in the upper right corner to save your schedule.
Your company profile is the core of your organization’s identity on Qpien. As an administrator, this section allows you to manage branding, set regional preferences, enforce security protocols for all team members, and define operational schedules like your business hours to ensure smooth communication.
In this article:
Accessing general company settings
Configuring company identity
Managing Qpien support access
Enforcing Two-Factor Authentication (2FA) company-wide
Setting up business hours
Accessing general company settings
To manage your organization's core details, navigate to Settings > Company > General from the left sidebar.
Configuring company identity
On the General settings page, you can update your basic company information:
Company logo: Click on the avatar icon at the top to upload or update your company logo.
Company details: Click on the Company/Brand name, E-Mail, and Phone fields to enter or update your contact information.
Regional settings: Select your company's primary Language (e.g., Turkish, English, Arabic) and your Time zone.
Note: Setting the correct time zone is crucial as it ensures all system-generated logs, timestamps, and business hours align accurately with your headquarters.
Managing Qpien support access
As an administrator, you can control whether the Qpien support team has access to your workspace to facilitate technical troubleshooting.
-> Scroll down to the "Allow Qpien to Connect your account" field.
Click the dropdown menu and select the appropriate option:
Allow: Authorized Qpien support staff will be able to securely access your profile to assist with technical issues.
Don't Allow: Your profile will remain completely inaccessible to the Qpien team.
Enforcing Two-Factor Authentication (2FA) company-wide
You can mandate Two-Factor Authentication for all users in your organization to maximize account security.
-> Scroll to the bottom of the General settings page.
Enable the toggle next to Require users to setup two-factor authentication (2FA).
When enabled, all users will be required to set up 2FA on their personal profiles before they can access the dashboard. For a detailed user guide, please refer to our "Profile settings and two factor authentication" article.
Important: Always remember to click the blue "Update" button in the upper right corner to save any changes made on the General page.
Setting up business hours
Defining your business hours helps manage customer expectations by aligning your team's availability with your automated responses.
-> Navigate to Settings > Company > Business hours from the left sidebar.
The Time zone displayed here is automatically synced from your General settings page.
Use the toggle switches next to each day to mark your business as open (blue) or closed (gray).
For the days you are open, use the dropdown menus to specify the exact start and end times for your shifts.
Click the "Update" button in the upper right corner to save your schedule.
Previous
Personalizing your account
Next
Next
What is Qpien?
Try Qpien free for 14 days! 🎉
Ready to take control of all your support channels?
Empower your customer interactions with Qpien! Boost sales and elevate satisfaction with every conversation.
Try Qpien free for 14 days! 🎉
Ready to take control of all your support channels?
Empower your customer interactions with Qpien! Boost sales and elevate satisfaction with every conversation.
Try Qpien free for 14 days! 🎉
Ready to take control of all your support channels?
Empower your customer interactions with Qpien! Boost sales and elevate satisfaction with every conversation.