
Smart Inbox
Person and Chat Merging
To manage different chats from the same person or messages from different channels (WhatsApp, email, Instagram, etc.) on Qpien, you can merge chats and contacts.
Conversations Merge
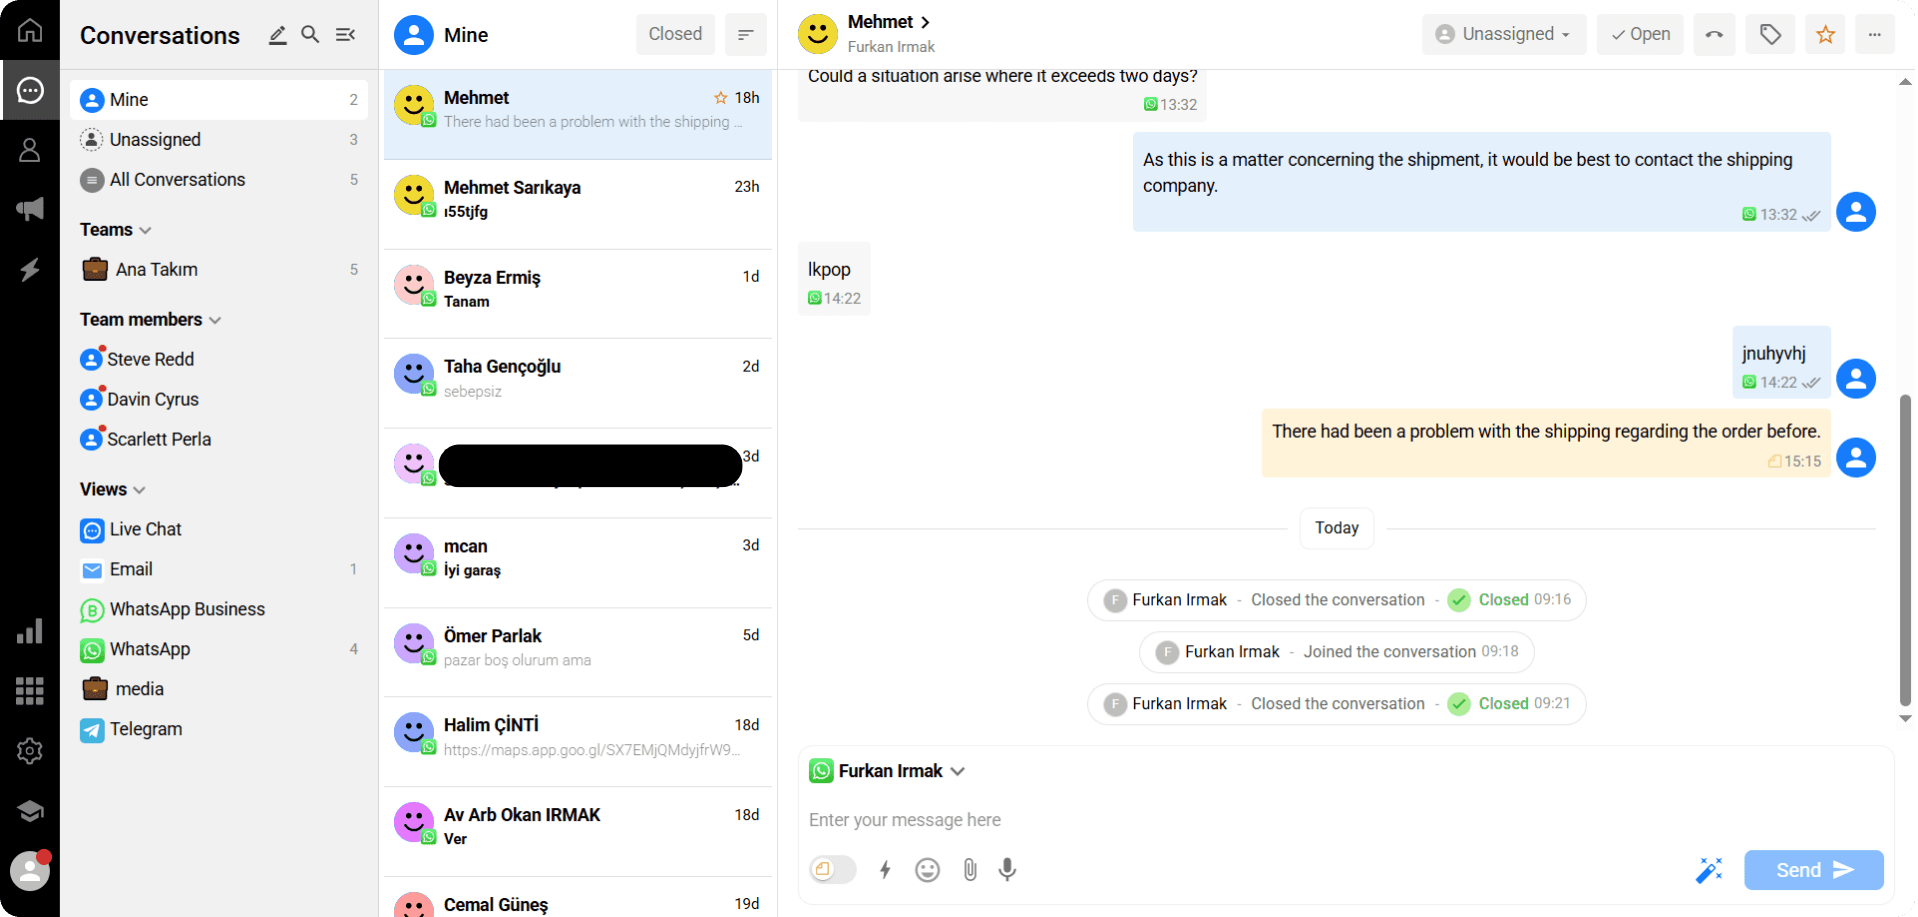
Let’s say you have two different WhatsApp lines on Qpien.
If a customer sends messages to both lines at different times, these messages will appear as separate conversations in the conversation screen.
Even though the messages come from different lines, the same name will appear in both conversations because the customer’s phone number is the same.
If you are sure that these two conversations belong to the same person, you can use the “Merge Conversations” button to combine them into a single screen.
After merging, no matter which WhatsApp line the customer messages, all messages will be displayed in a single conversation screen.
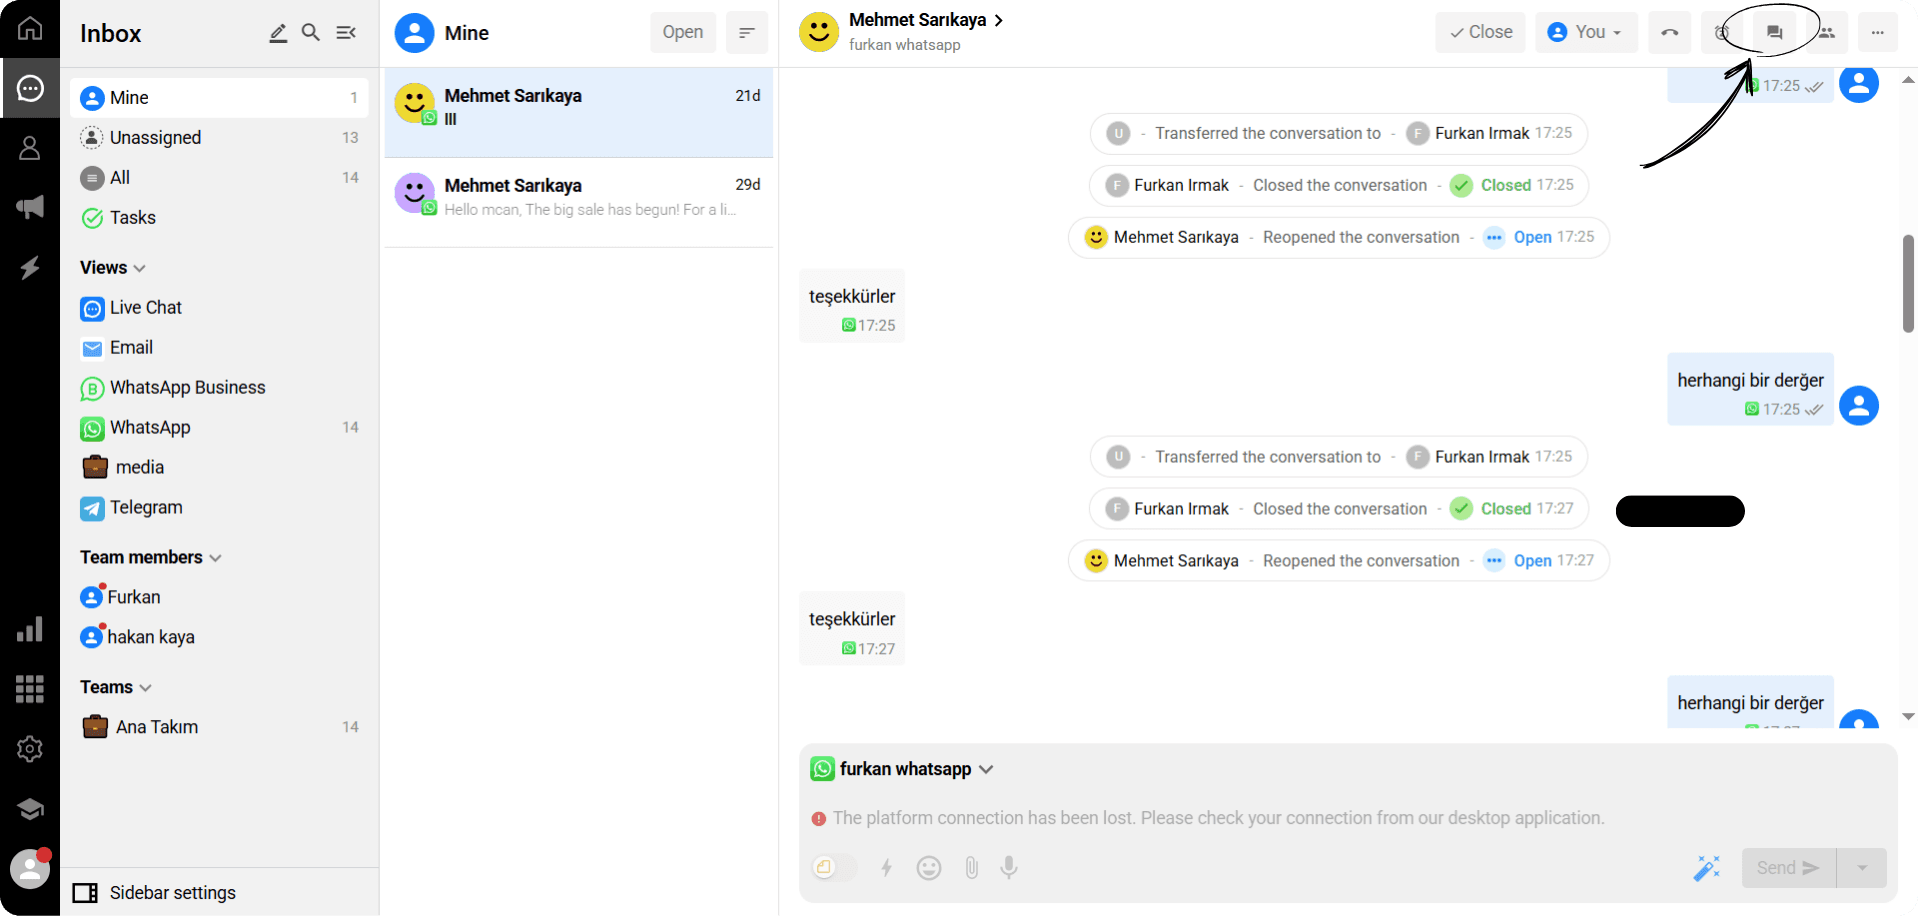
Click the "Merge Chat" button displayed on this screen.
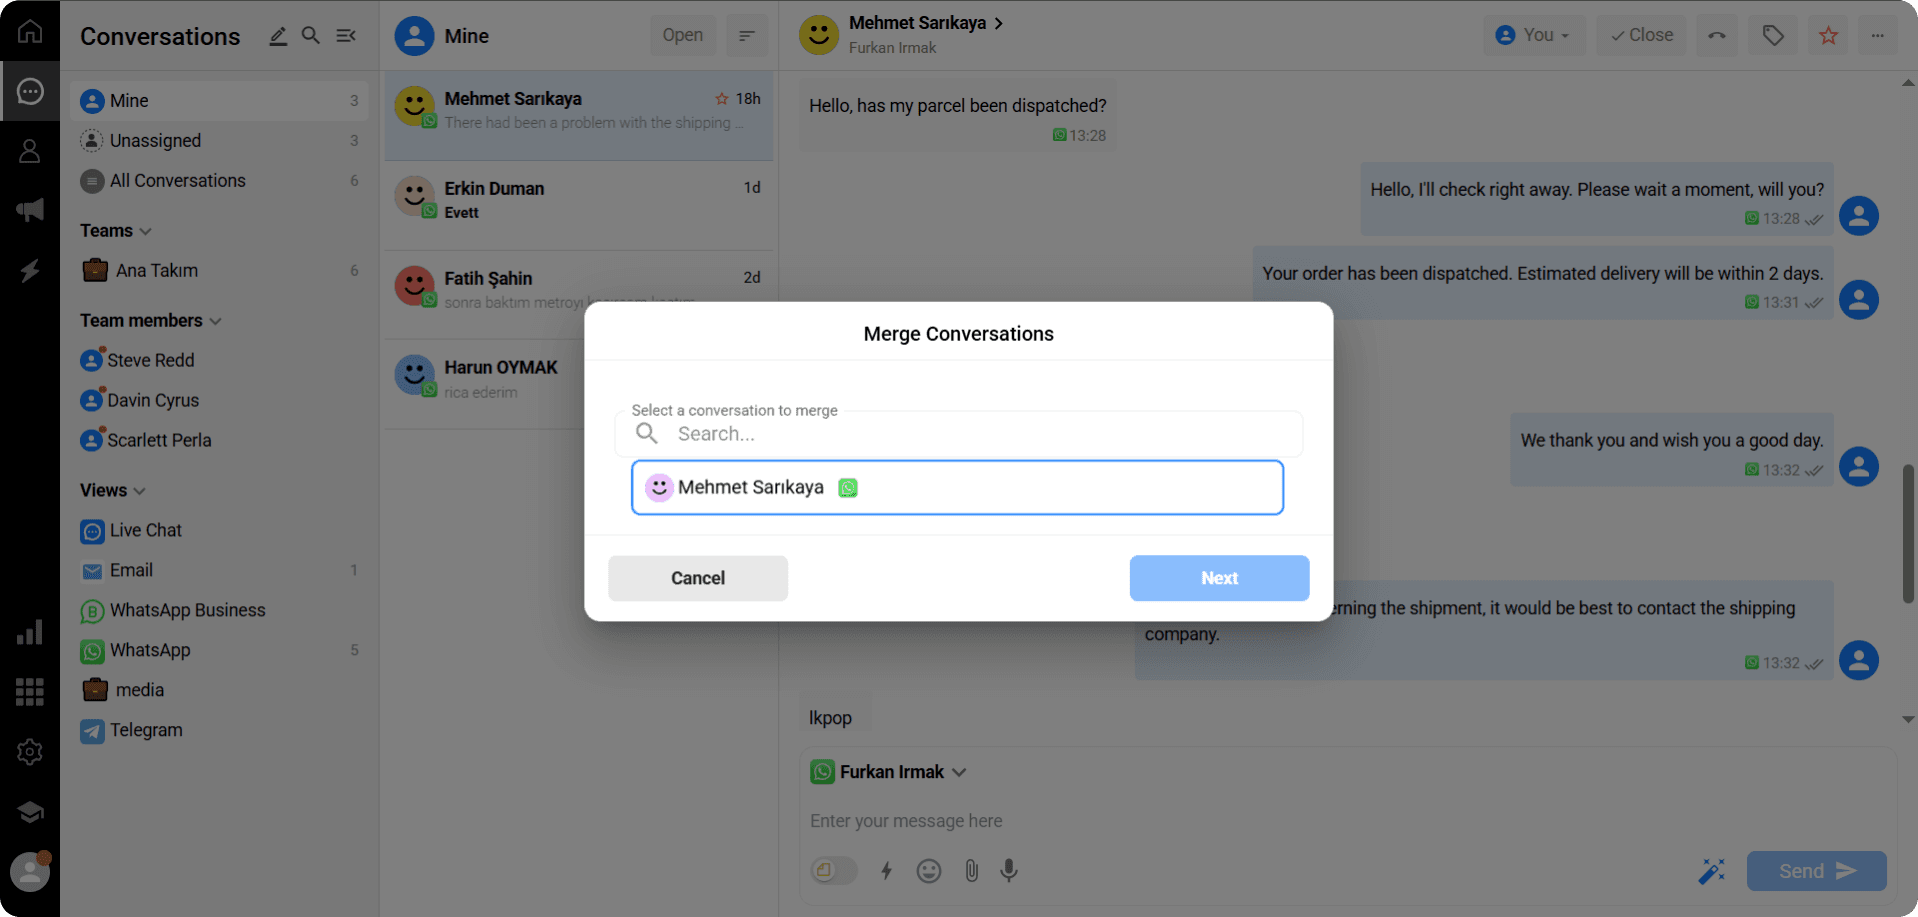
When you click the “Merge Conversations” button, the panel that opens will automatically display the other conversation that has the same phone number as the person you are currently viewing.
From this screen, you can select the relevant conversation and click the “Next” button to proceed.
In the newly opened panel, the conversations to be merged will be displayed.
It is also indicated on the screen that this action cannot be undone.
After checking the confirmation box, click the “Merge” button to proceed.
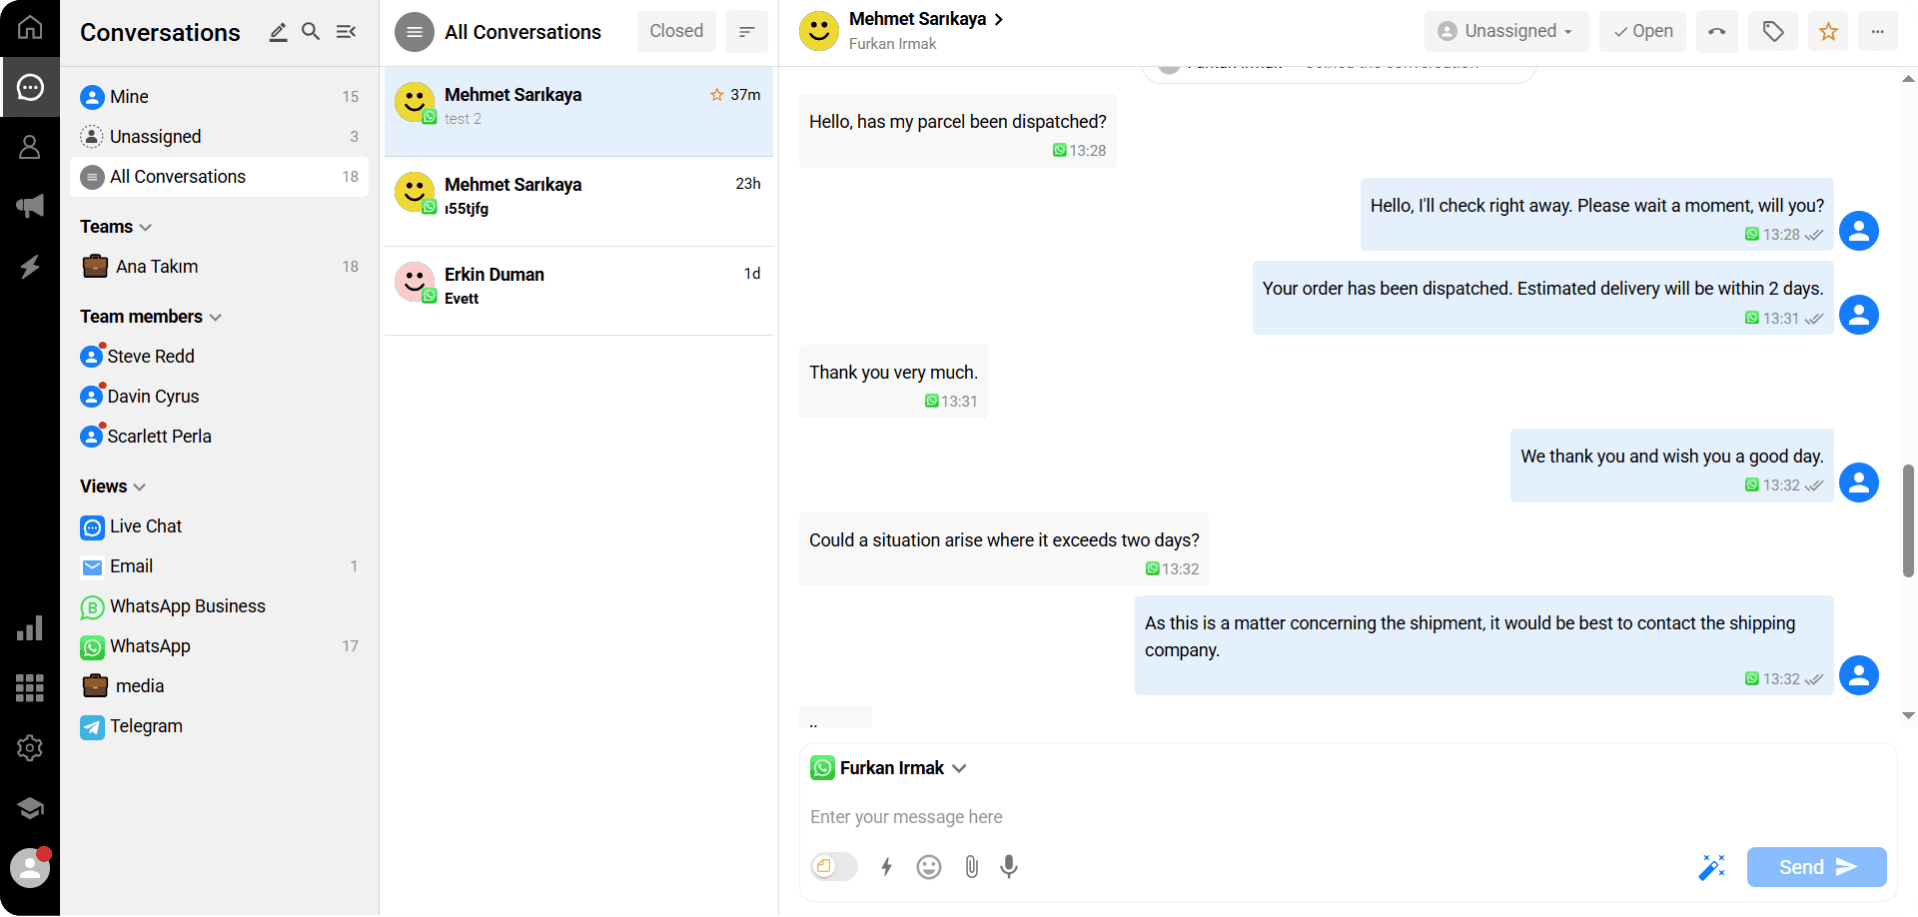
Once you complete these steps, the conversation merge will be successfully completed.
Contact Merge
If the same contact has reached out to us through different channels (e.g., WhatsApp, e-mail, Instagram, etc.), the contact merge process should be performed first.
With contact merge, conversations coming from different channels for the same contact are grouped under a single contact profile.
Once this process is completed, conversation merge can be performed on the relevant conversations.
For example, contacts named “Mehmet” and “Mehmet Sarıkaya” may have reached out to us through different channels. If these two contacts are actually the same person, you can use the contact merge process to consolidate all their information into a single profile.
This way, messages sent by the contact from different channels, their contact information, and interaction history are combined in one place. This ensures a more organized and comprehensive contact management.
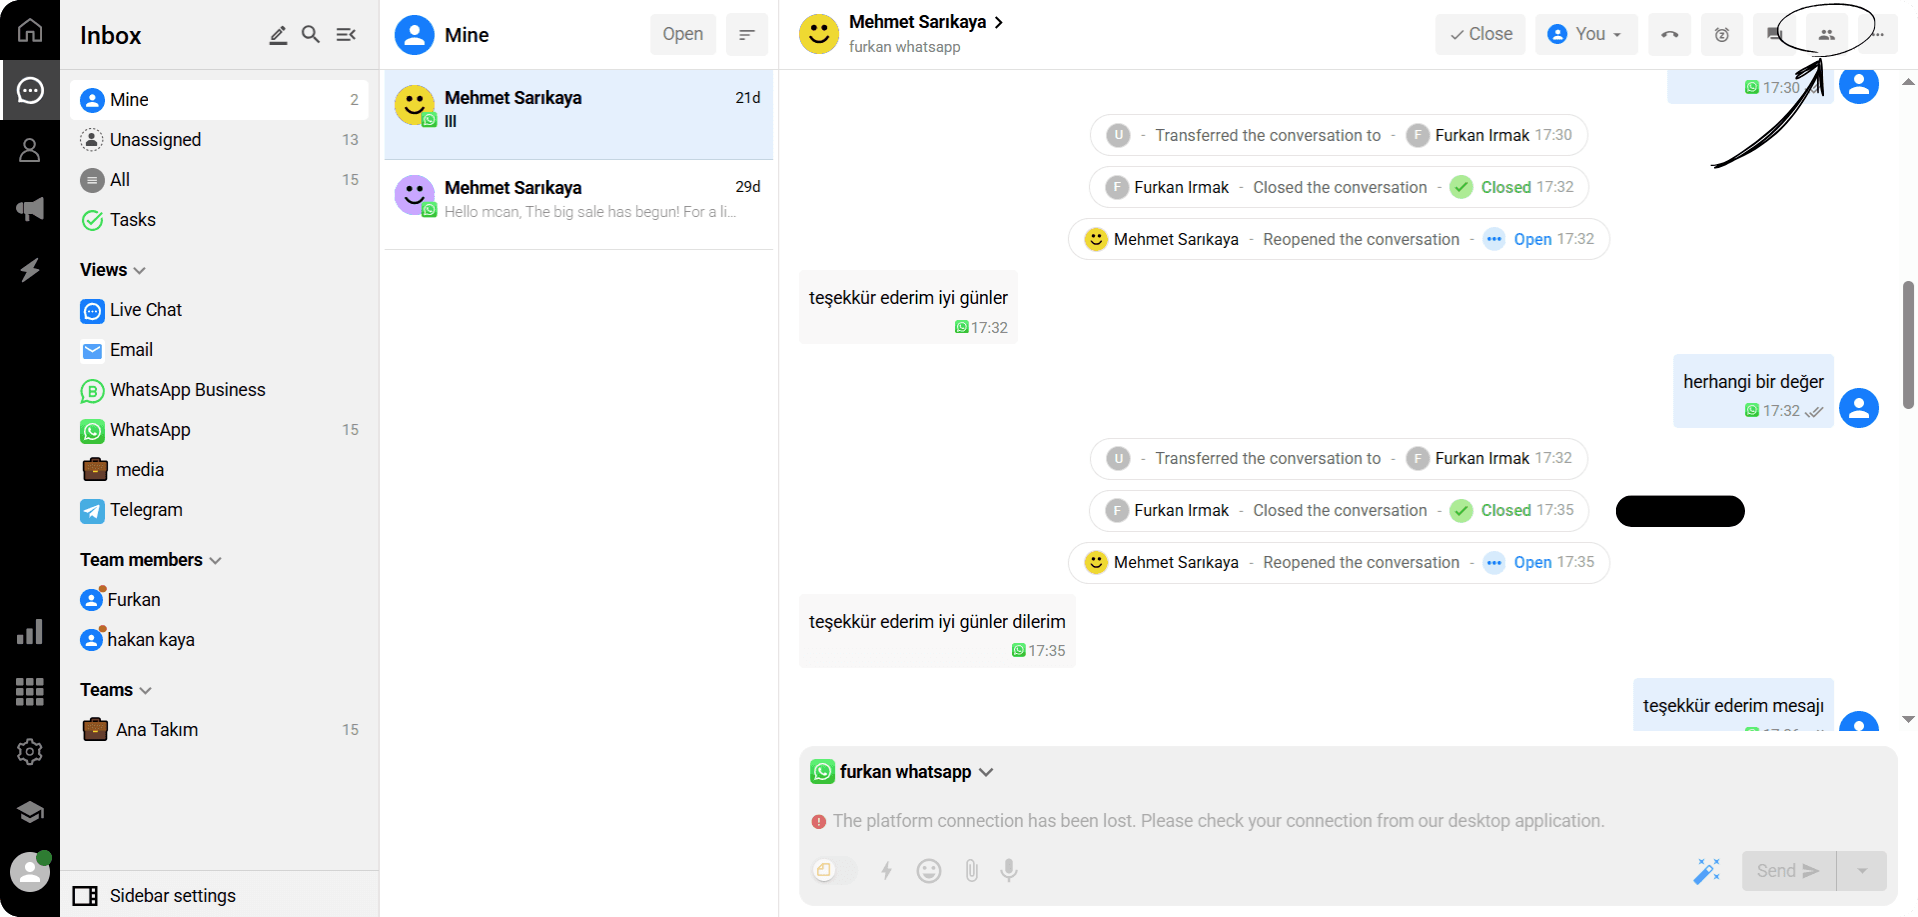
Open the conversation of one of the contacts you want to merge and click the “Merge Contact” button.

In the panel that appears, select the other contact you want to merge from the list.
Click the “Next” button to continue.
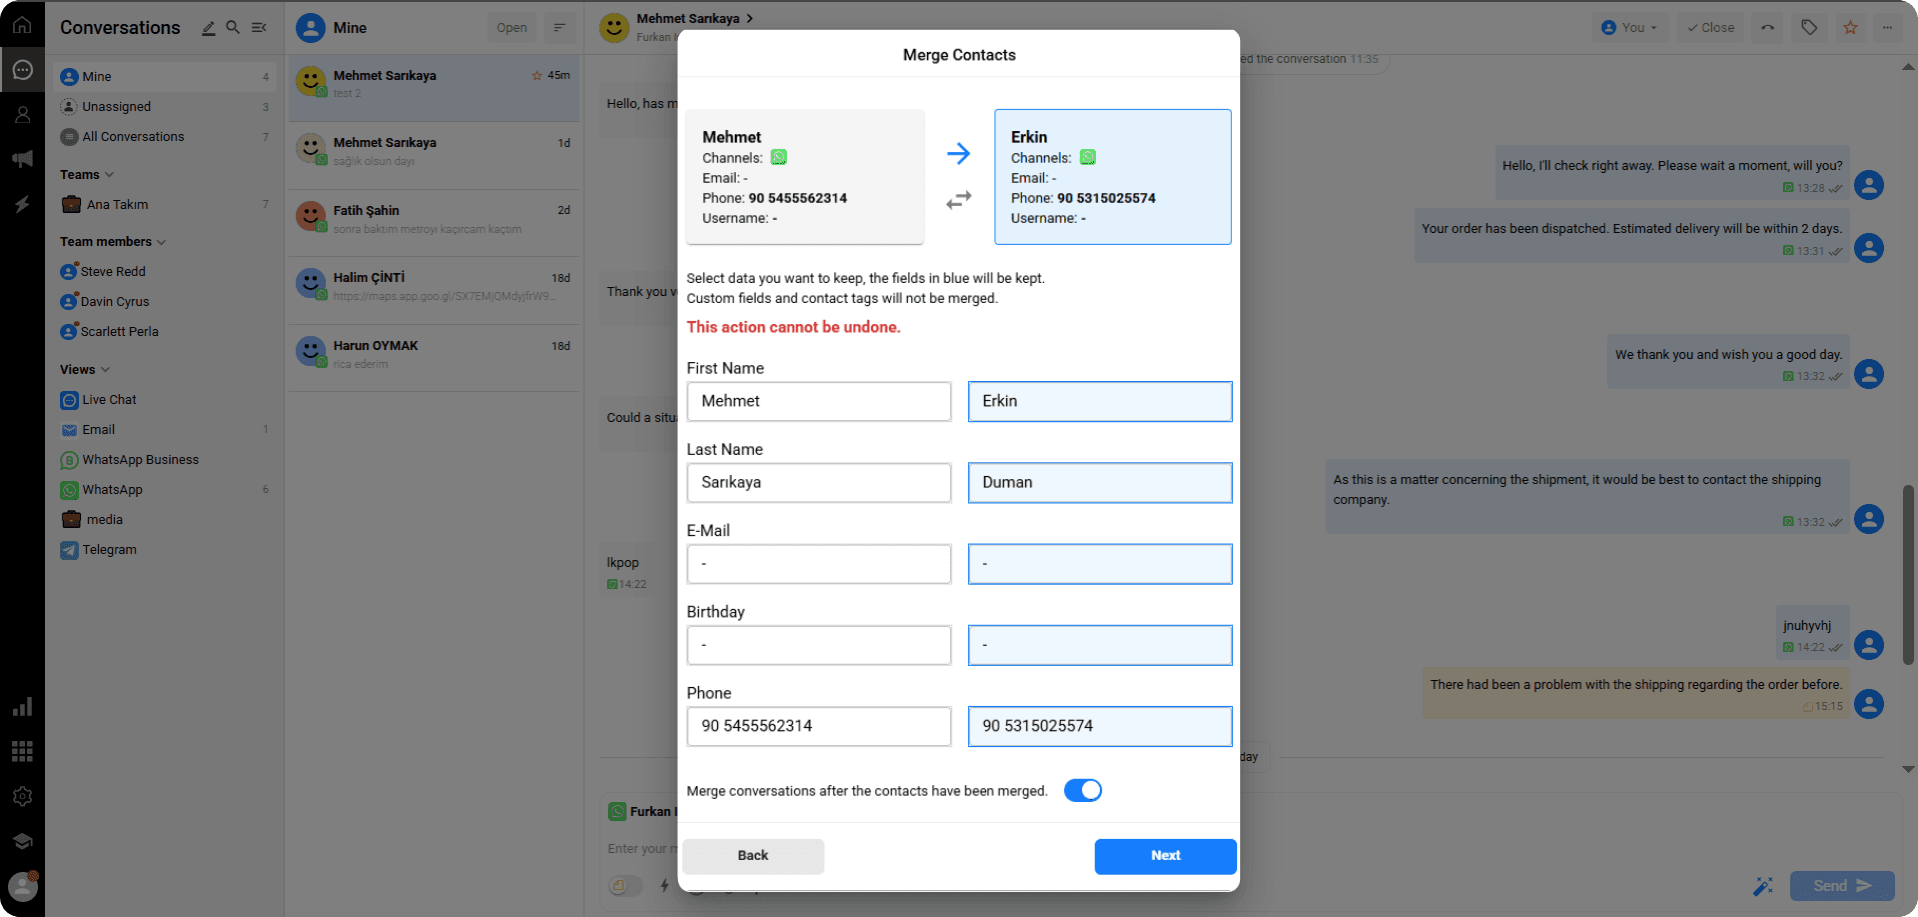
During the merge process, you can select which data you want to keep.
If you want the conversations to also be combined on a single screen along with the contacts, enable the option at the bottom: “Merge conversations after contacts are merged.”
This way, both the contact information and conversation history are consolidated in one place. After the merge is complete, all messages from this contact—regardless of the channel they use—will appear in the same conversation screen. This allows you to manage your communication from a single location and avoid confusion.
💡Once the merge is complete, all messages from this contact will appear in the same conversation screen, no matter which channel they use. This enables you to track your communication from one place and prevent mix-ups.
After making the necessary selections, click the “Next” button to proceed to the next step.
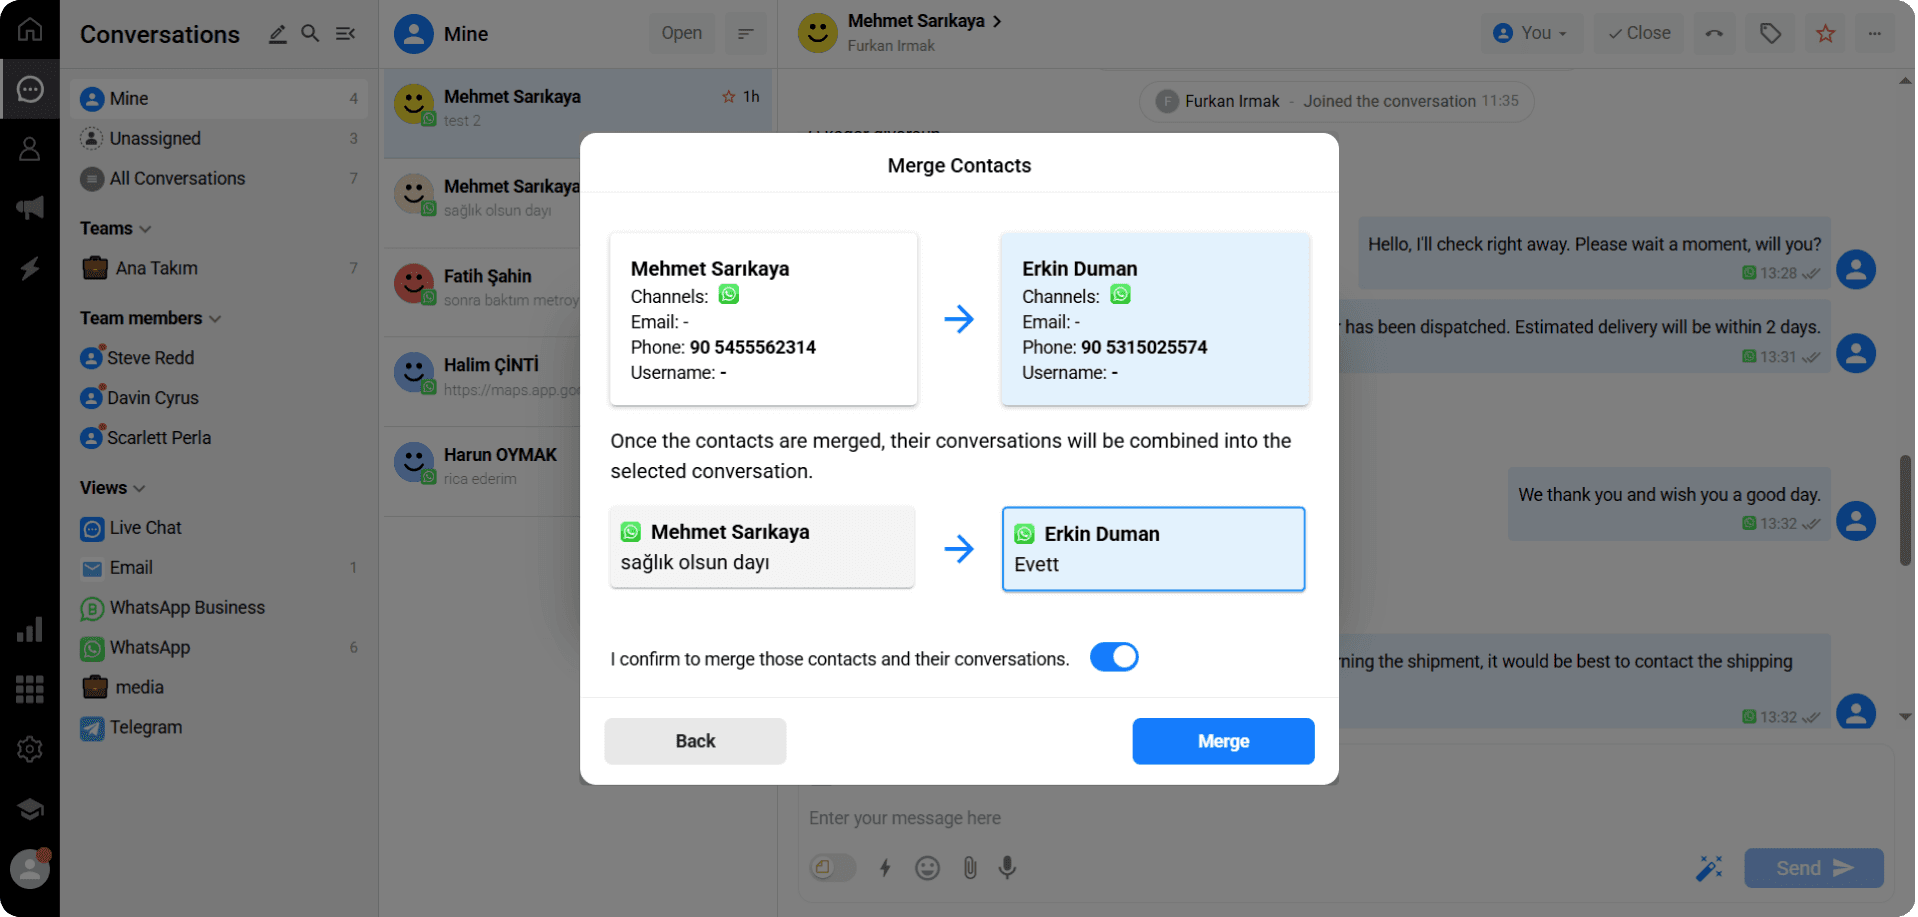
In the opened panel, confirm the contact and conversation merge.
Then, click the “Merge” button.
Once the process is complete, the contact and their conversations will be successfully merged.
Conversations Merge
Let’s say you have two different WhatsApp lines on Qpien.
If a customer sends messages to both lines at different times, these messages will appear as separate conversations in the conversation screen.
Even though the messages come from different lines, the same name will appear in both conversations because the customer’s phone number is the same.
If you are sure that these two conversations belong to the same person, you can use the “Merge Conversations” button to combine them into a single screen.
After merging, no matter which WhatsApp line the customer messages, all messages will be displayed in a single conversation screen.
Click the "Merge Chat" button displayed on this screen.
When you click the “Merge Conversations” button, the panel that opens will automatically display the other conversation that has the same phone number as the person you are currently viewing.
From this screen, you can select the relevant conversation and click the “Next” button to proceed.
In the newly opened panel, the conversations to be merged will be displayed.
It is also indicated on the screen that this action cannot be undone.
After checking the confirmation box, click the “Merge” button to proceed.
Once you complete these steps, the conversation merge will be successfully completed.
Contact Merge
If the same contact has reached out to us through different channels (e.g., WhatsApp, e-mail, Instagram, etc.), the contact merge process should be performed first.
With contact merge, conversations coming from different channels for the same contact are grouped under a single contact profile.
Once this process is completed, conversation merge can be performed on the relevant conversations.
For example, contacts named “Mehmet” and “Mehmet Sarıkaya” may have reached out to us through different channels. If these two contacts are actually the same person, you can use the contact merge process to consolidate all their information into a single profile.
This way, messages sent by the contact from different channels, their contact information, and interaction history are combined in one place. This ensures a more organized and comprehensive contact management.
Open the conversation of one of the contacts you want to merge and click the “Merge Contact” button.
In the panel that appears, select the other contact you want to merge from the list.
Click the “Next” button to continue.
During the merge process, you can select which data you want to keep.
If you want the conversations to also be combined on a single screen along with the contacts, enable the option at the bottom: “Merge conversations after contacts are merged.”
This way, both the contact information and conversation history are consolidated in one place. After the merge is complete, all messages from this contact—regardless of the channel they use—will appear in the same conversation screen. This allows you to manage your communication from a single location and avoid confusion.
💡Once the merge is complete, all messages from this contact will appear in the same conversation screen, no matter which channel they use. This enables you to track your communication from one place and prevent mix-ups.
After making the necessary selections, click the “Next” button to proceed to the next step.
In the opened panel, confirm the contact and conversation merge.
Then, click the “Merge” button.
Once the process is complete, the contact and their conversations will be successfully merged.
Previous
AI Representative
Next
Next
Creating, Editing, and Deleting Quick Responses
Try Qpien free for 14 days! 🎉
Ready to take control of all your support channels?
Empower your customer interactions with Qpien! Boost sales and elevate satisfaction with every conversation.
Try Qpien free for 14 days! 🎉
Ready to take control of all your support channels?
Empower your customer interactions with Qpien! Boost sales and elevate satisfaction with every conversation.
Try Qpien free for 14 days! 🎉
Ready to take control of all your support channels?
Empower your customer interactions with Qpien! Boost sales and elevate satisfaction with every conversation.