
Account setup
Company Profile Setup
Keep your business profile up to date to present your customers with a clear and consistent view of your brand.
Your company profile is the core of your organization’s identity on Qpien. From this section, administrators can manage branding, regional settings, security protocols for all team members, and operational schedules like working hours.
Configuring Company Identity
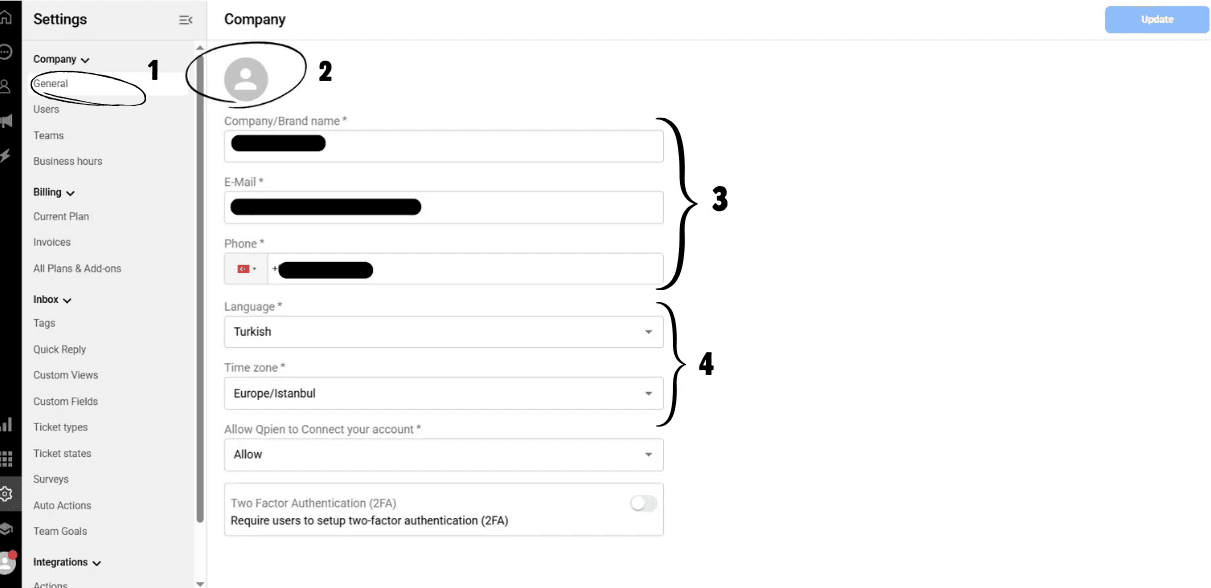
To manage your organization's general settings, open the Settings page and go to the General section.
Click on the avatar to upload or update your company logo.
Update your Brand Name, Email, and Phone Number by clicking on the respective fields.
Set your company's primary Language and Time Zone to ensure all system-generated logs and timestamps align with your headquarters.
Support Access
As an administrator, you have additional controls to ensure account safety and facilitate technical support.
In the “Allow Qpien to connect to your account” option:
-> If you select the “Allow” option, authorized persons on Qpien will be able to access your profile.
-> If you select the “Do not allow” option, your profile will not be accessible.
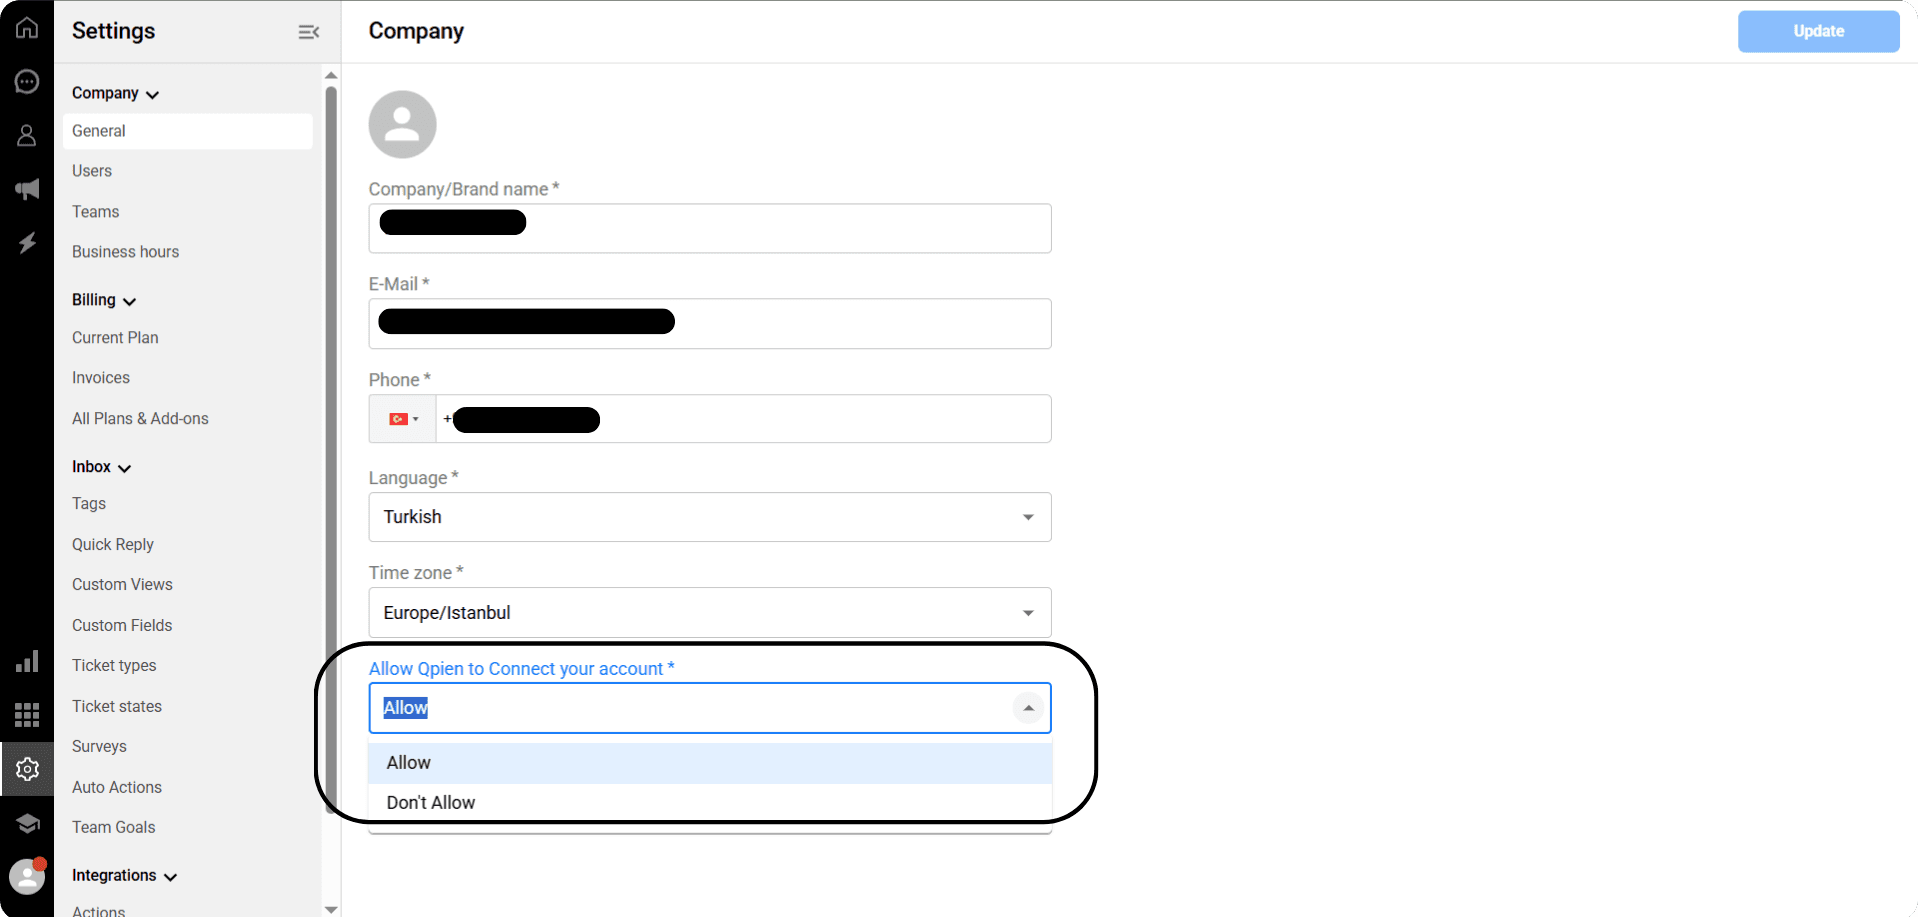
💾 You can save your changes by clicking the “Update” button in the upper right corner.
Two-Factor Authentication (2FA)
You can mandate Two-Factor Authentication for all users in your organization. When enabled, users will be required to set up 2FA on their personal profiles before they can access the dashboard.
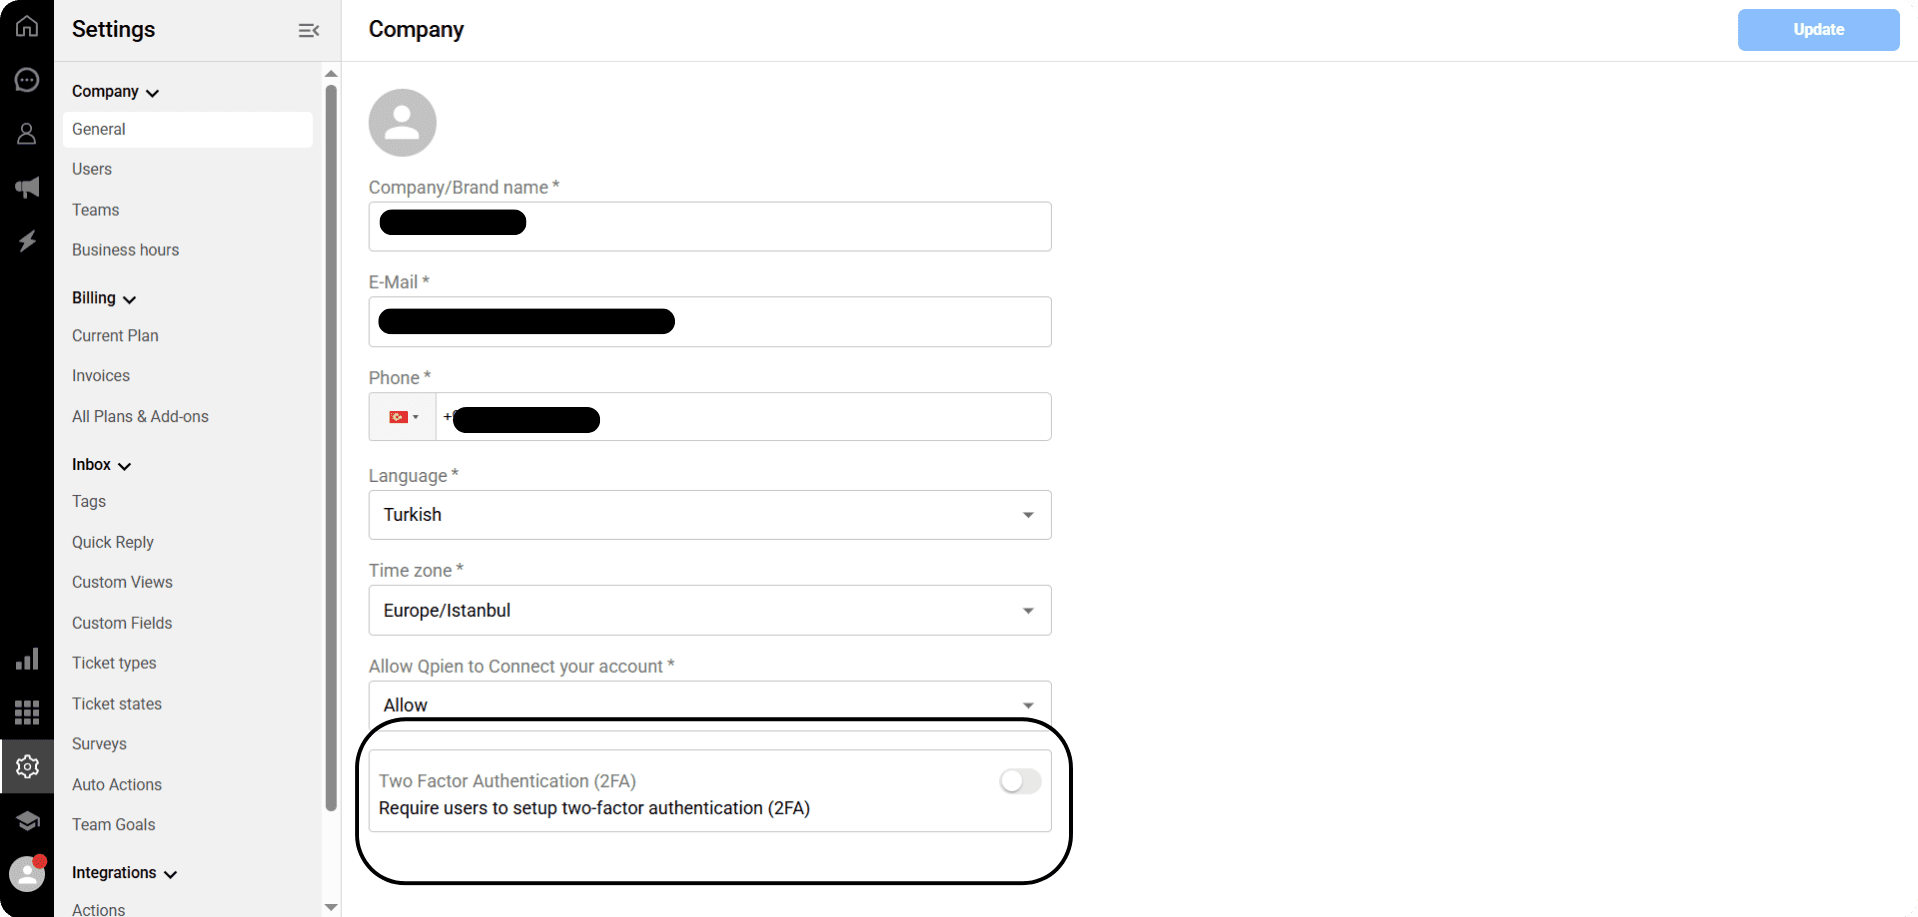
💡 Note: For a detailed guide on how individual users set up their 2FA, please refer to our Personalizing Your Account: Profile Settings and Security (2FA) guide.
Working Hours Option
Click on the “Business Hours” field to access the working hours page.
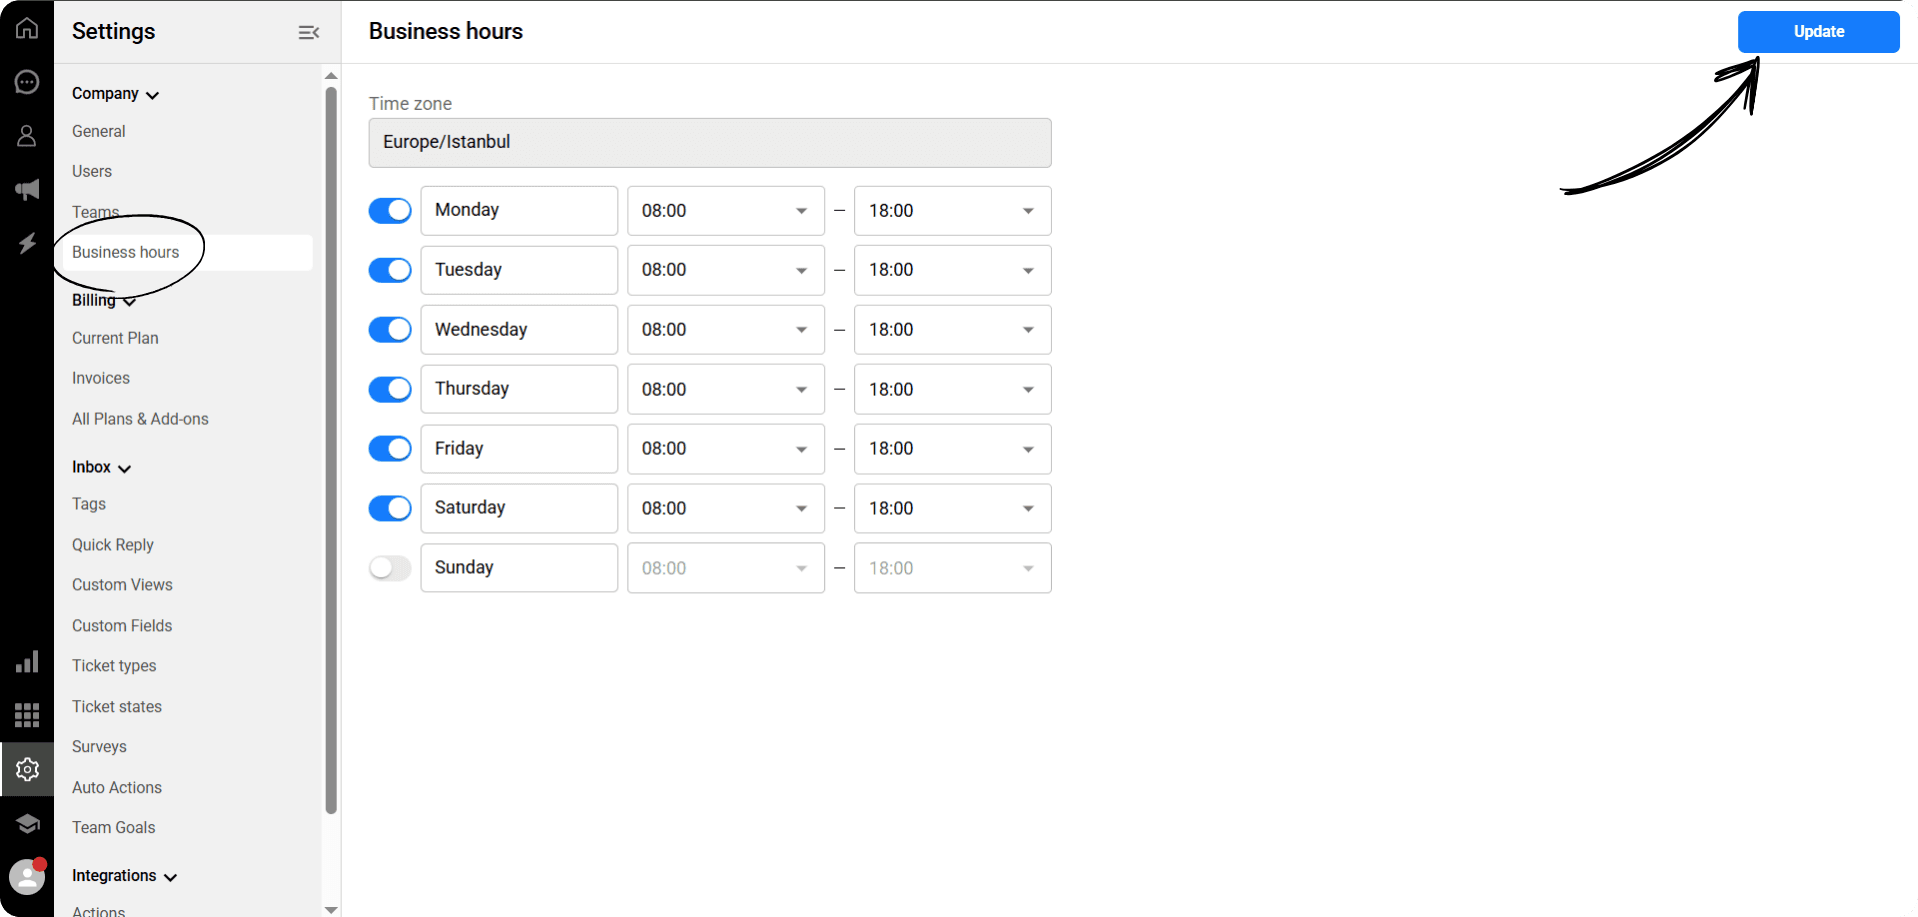
You can view the time period selected for the company and the list of days according to that time period.
From here, you can select working days and specify start and end times for shifts.
💾 You can save your changes by clicking the “Update” button in the upper right corner.
Your company profile is the core of your organization’s identity on Qpien. From this section, administrators can manage branding, regional settings, security protocols for all team members, and operational schedules like working hours.
Configuring Company Identity
To manage your organization's general settings, open the Settings page and go to the General section.
Click on the avatar to upload or update your company logo.
Update your Brand Name, Email, and Phone Number by clicking on the respective fields.
Set your company's primary Language and Time Zone to ensure all system-generated logs and timestamps align with your headquarters.
Support Access
As an administrator, you have additional controls to ensure account safety and facilitate technical support.
In the “Allow Qpien to connect to your account” option:
-> If you select the “Allow” option, authorized persons on Qpien will be able to access your profile.
-> If you select the “Do not allow” option, your profile will not be accessible.
💾 You can save your changes by clicking the “Update” button in the upper right corner.
Two-Factor Authentication (2FA)
You can mandate Two-Factor Authentication for all users in your organization. When enabled, users will be required to set up 2FA on their personal profiles before they can access the dashboard.
💡 Note: For a detailed guide on how individual users set up their 2FA, please refer to our Personalizing Your Account: Profile Settings and Security (2FA) guide.
Working Hours Option
Click on the “Business Hours” field to access the working hours page.
You can view the time period selected for the company and the list of days according to that time period.
From here, you can select working days and specify start and end times for shifts.
💾 You can save your changes by clicking the “Update” button in the upper right corner.
Try Qpien free for 14 days! 🎉
Ready to take control of all your support channels?
Empower your customer interactions with Qpien! Boost sales and elevate satisfaction with every conversation.
Try Qpien free for 14 days! 🎉
Ready to take control of all your support channels?
Empower your customer interactions with Qpien! Boost sales and elevate satisfaction with every conversation.
Try Qpien free for 14 days! 🎉
Ready to take control of all your support channels?
Empower your customer interactions with Qpien! Boost sales and elevate satisfaction with every conversation.