
Plans & Pricing
Managing your billing details
Update your corporate billing details, tax information, and download past invoices directly from your workspace settings to ensure accurate financial reporting.
Keeping your billing details up to date ensures uninterrupted service and accurate financial reporting. Through the Qpien dashboard, you can easily manage your billing information, track your usage, and access your past invoices in one centralized location.
📝 Adding or Updating Billing Details
-> To add billing information, open the "Settings" page.
-> When you click the “Current Plan” option on the panel, a page opens displaying your billing, usage, and current plan information.
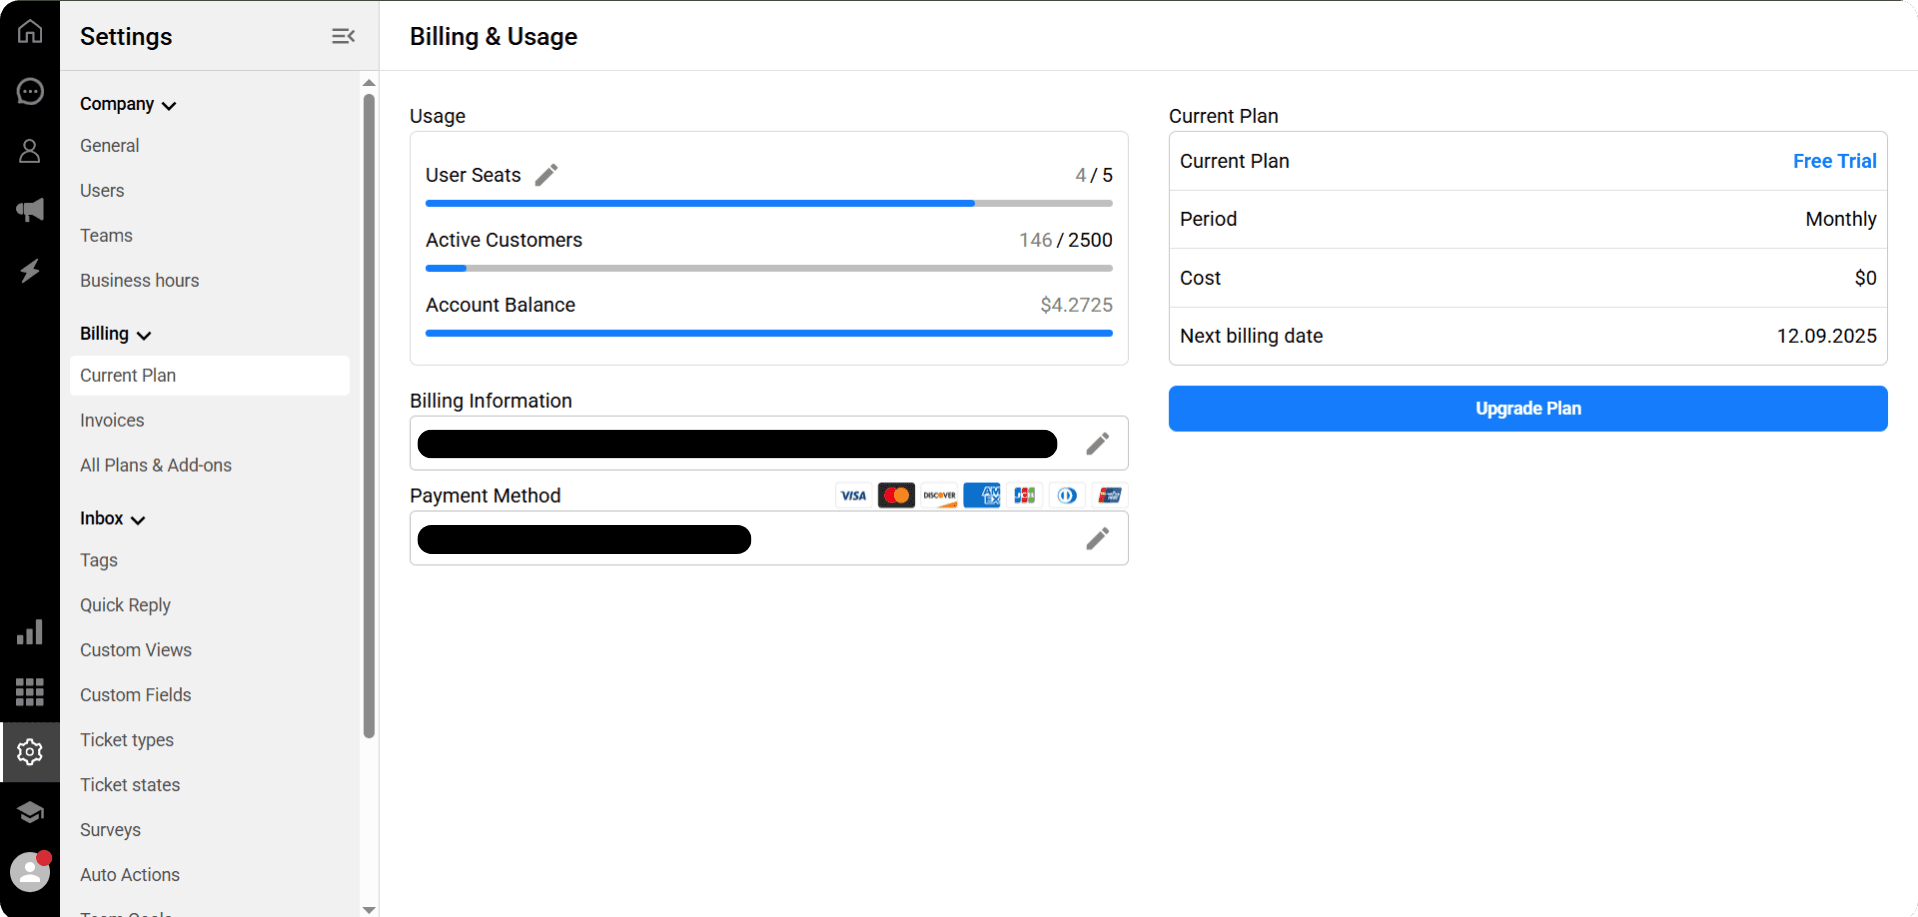
On this page:
You can review your billing and usage details,
You can view your current plan,
And you can update it at any time.
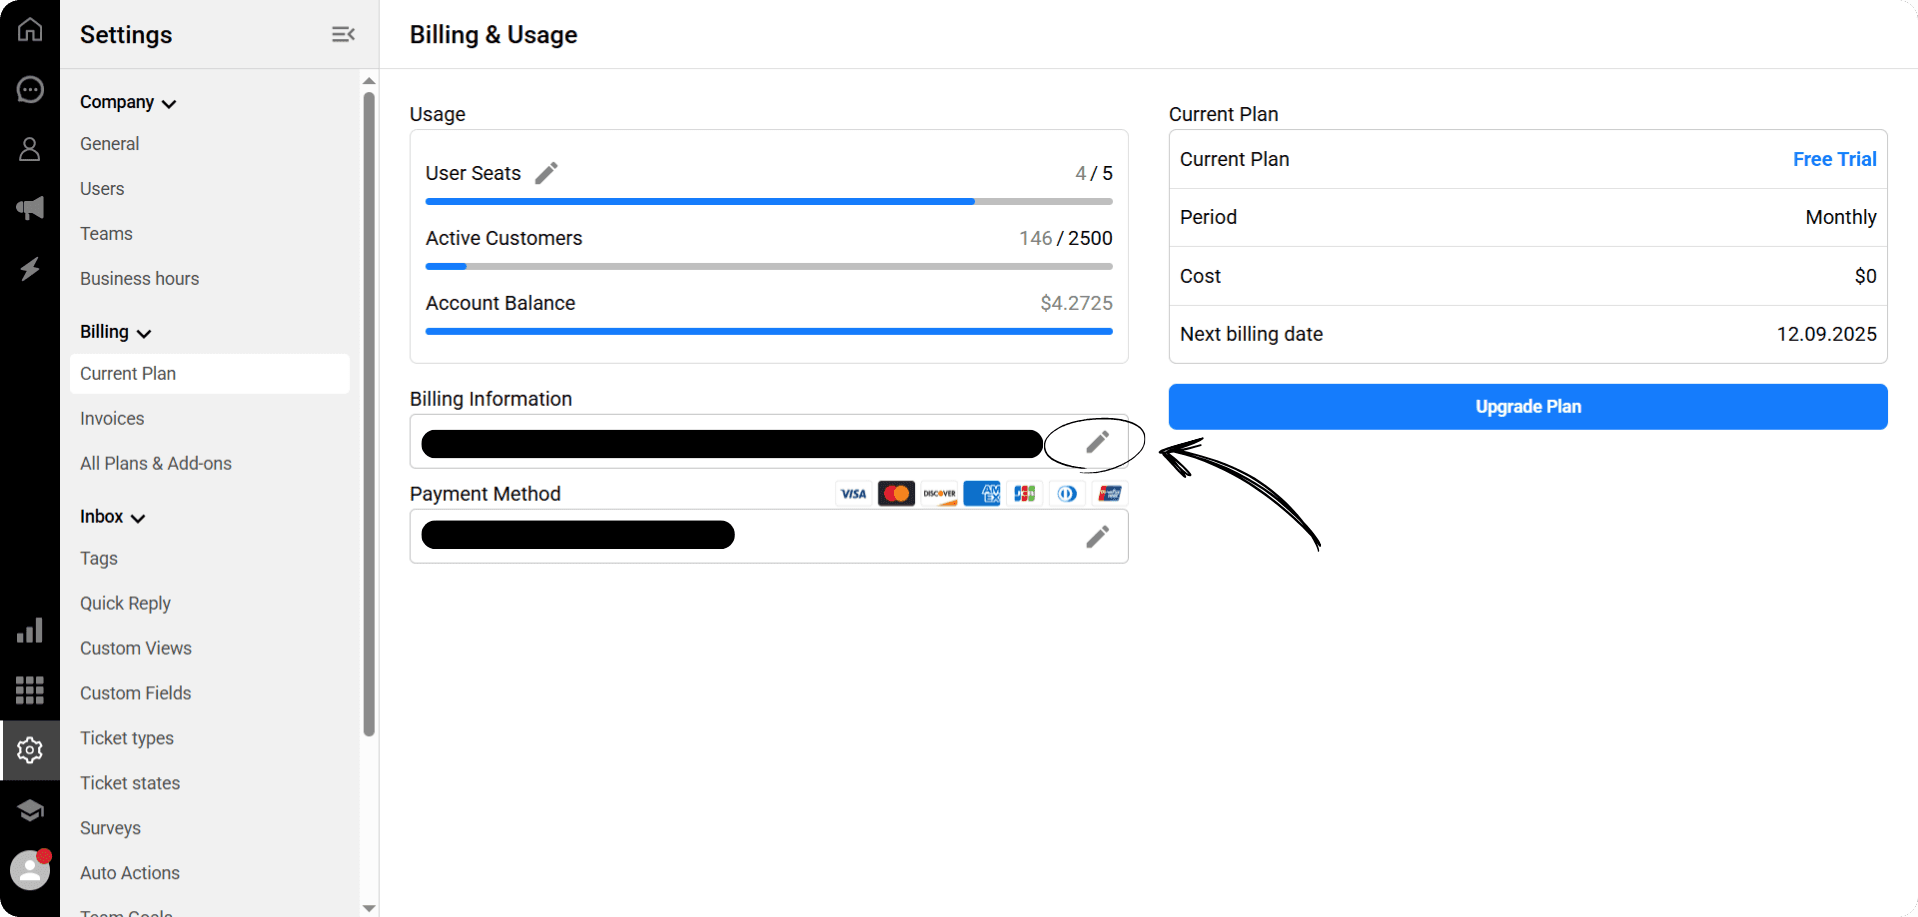
-> Click on the pencil (✏️) icon located on the far right of the Invoice Information line.
If you have not previously added invoice information, the panel that opens will appear blank.
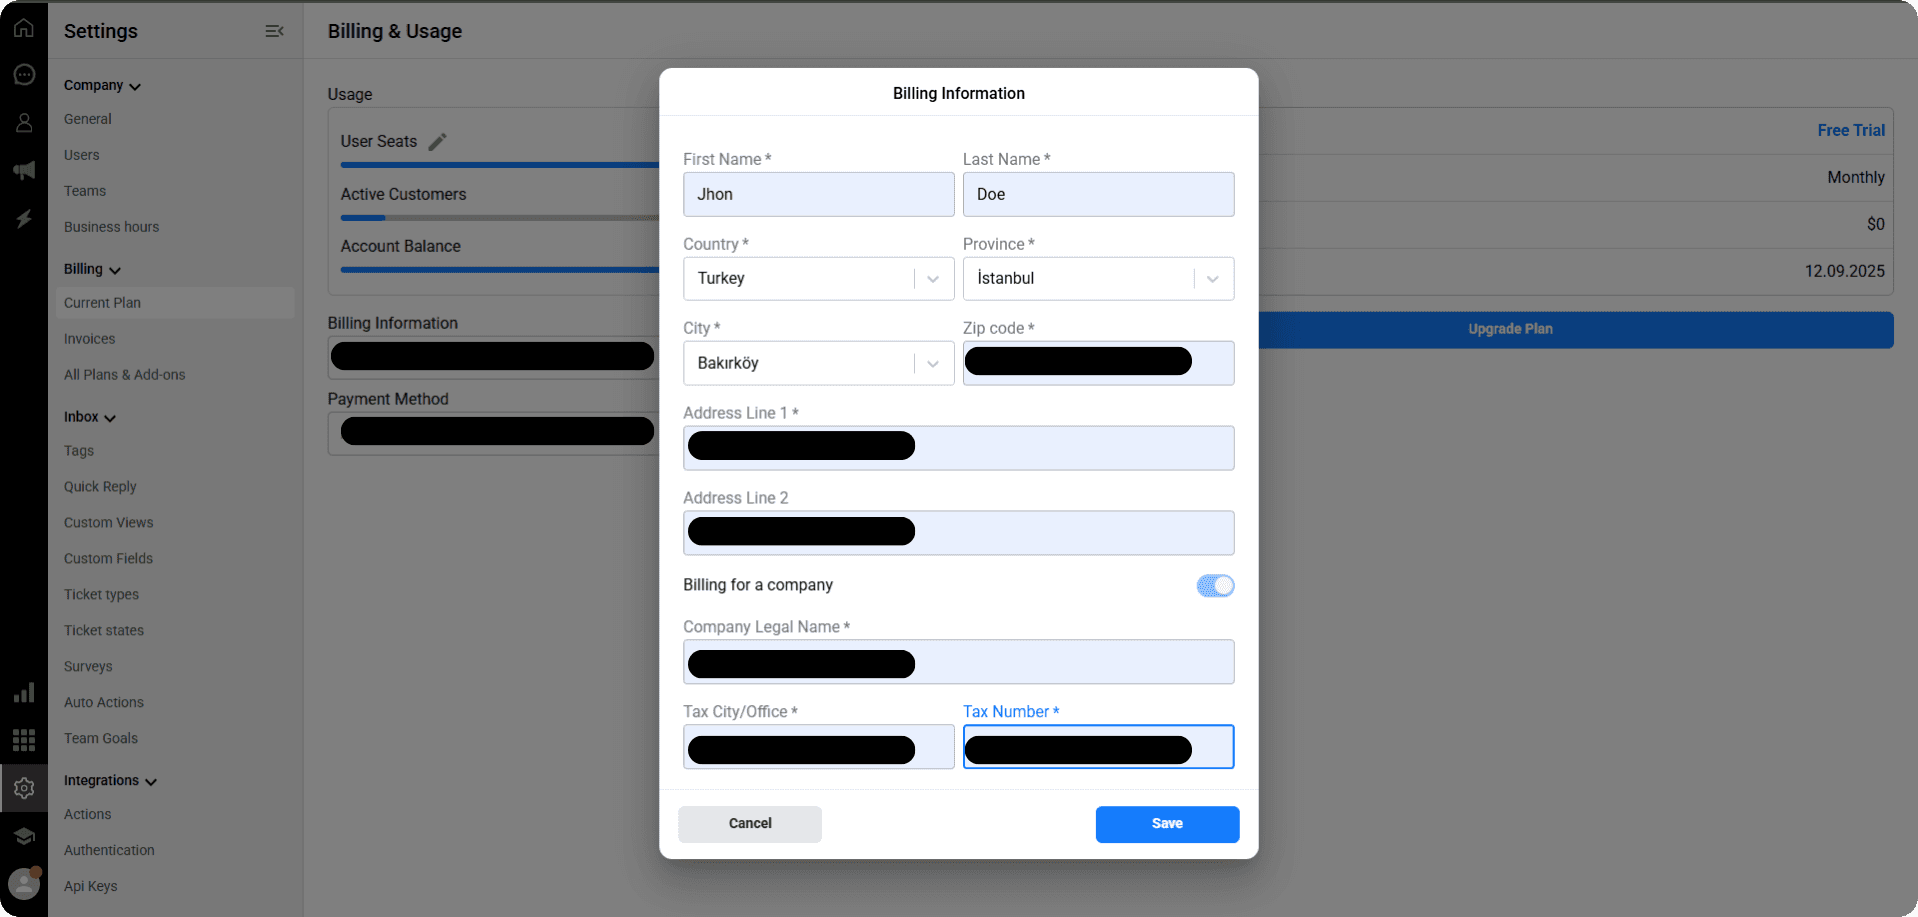
Fill in the required information in the panel completely:
First name – Last name
Country
City
District
Address
Company name
Tax office
Tax number
-> After filling in all the fields, click the Save button at the bottom.
Once your information has been successfully saved, the system will automatically generate your invoices based on this information.
💡If you have previously entered your invoice details, the panel will open with this information already filled in.
Make the necessary changes in the required fields.
After completing the updates, click the Save button.
Your new invoice details will then be successfully saved.
📑 Viewing and Tracking Invoices
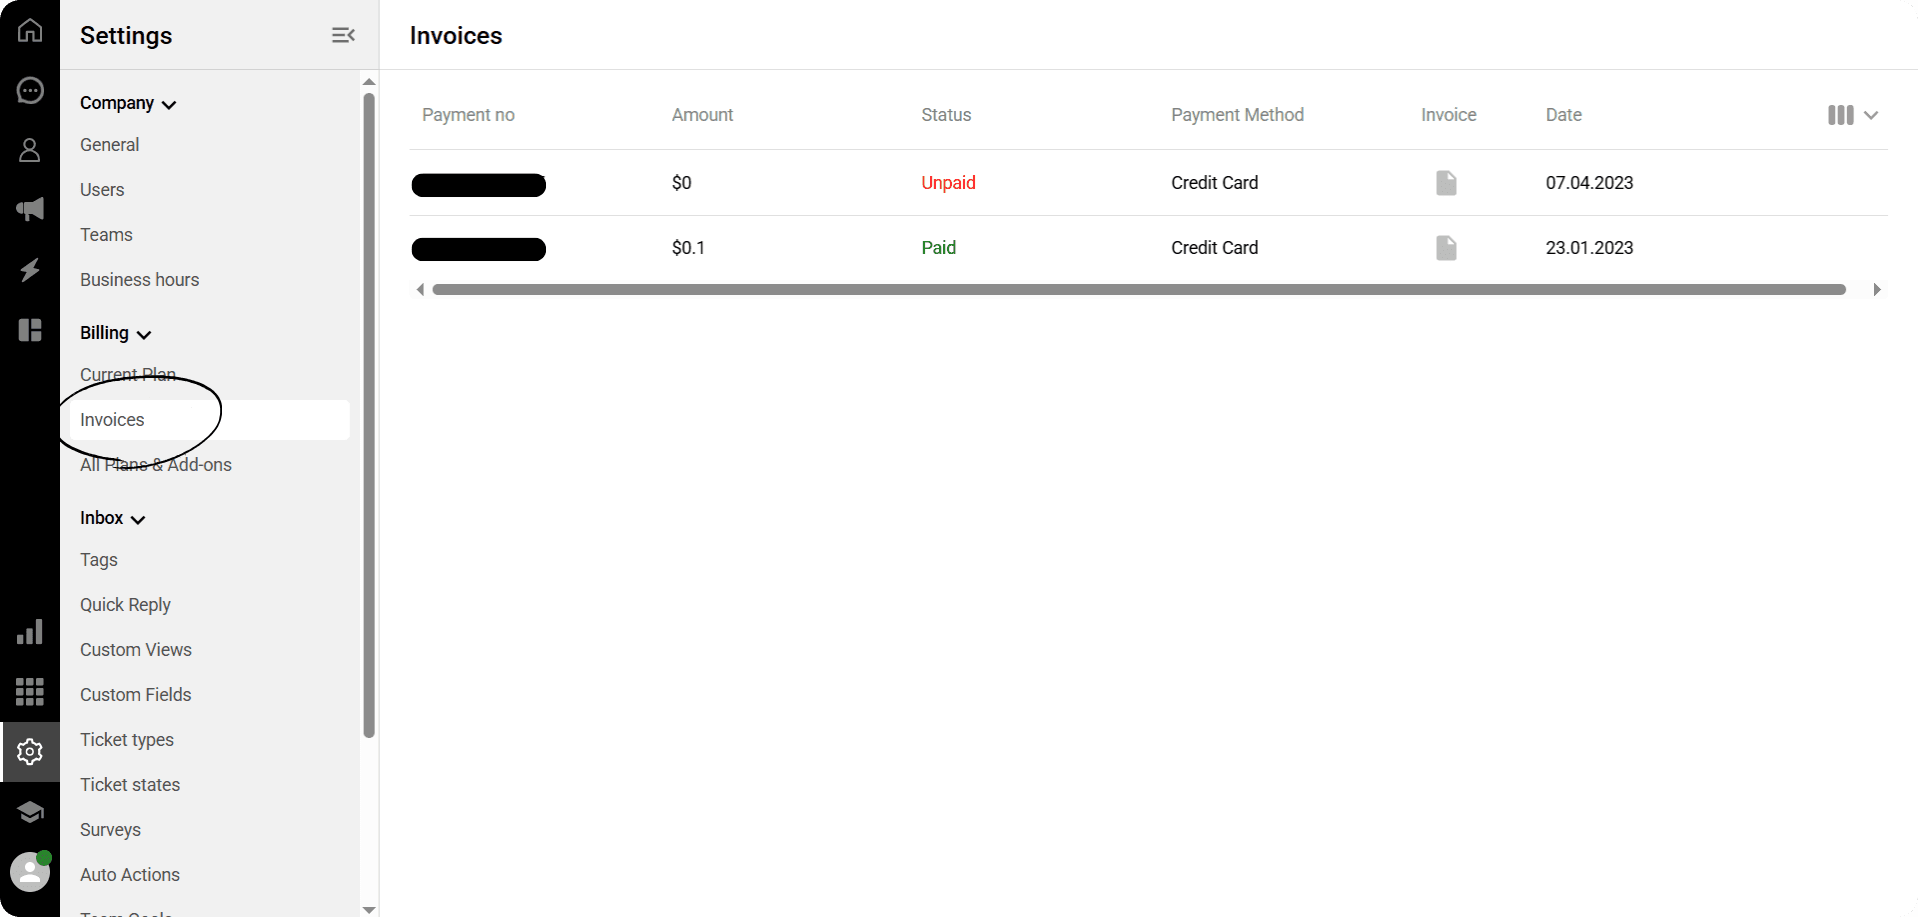
-> When you click on the “Invoices” section in the left panel, this screen opens.
Here, you can see a list of all your invoices issued to date.
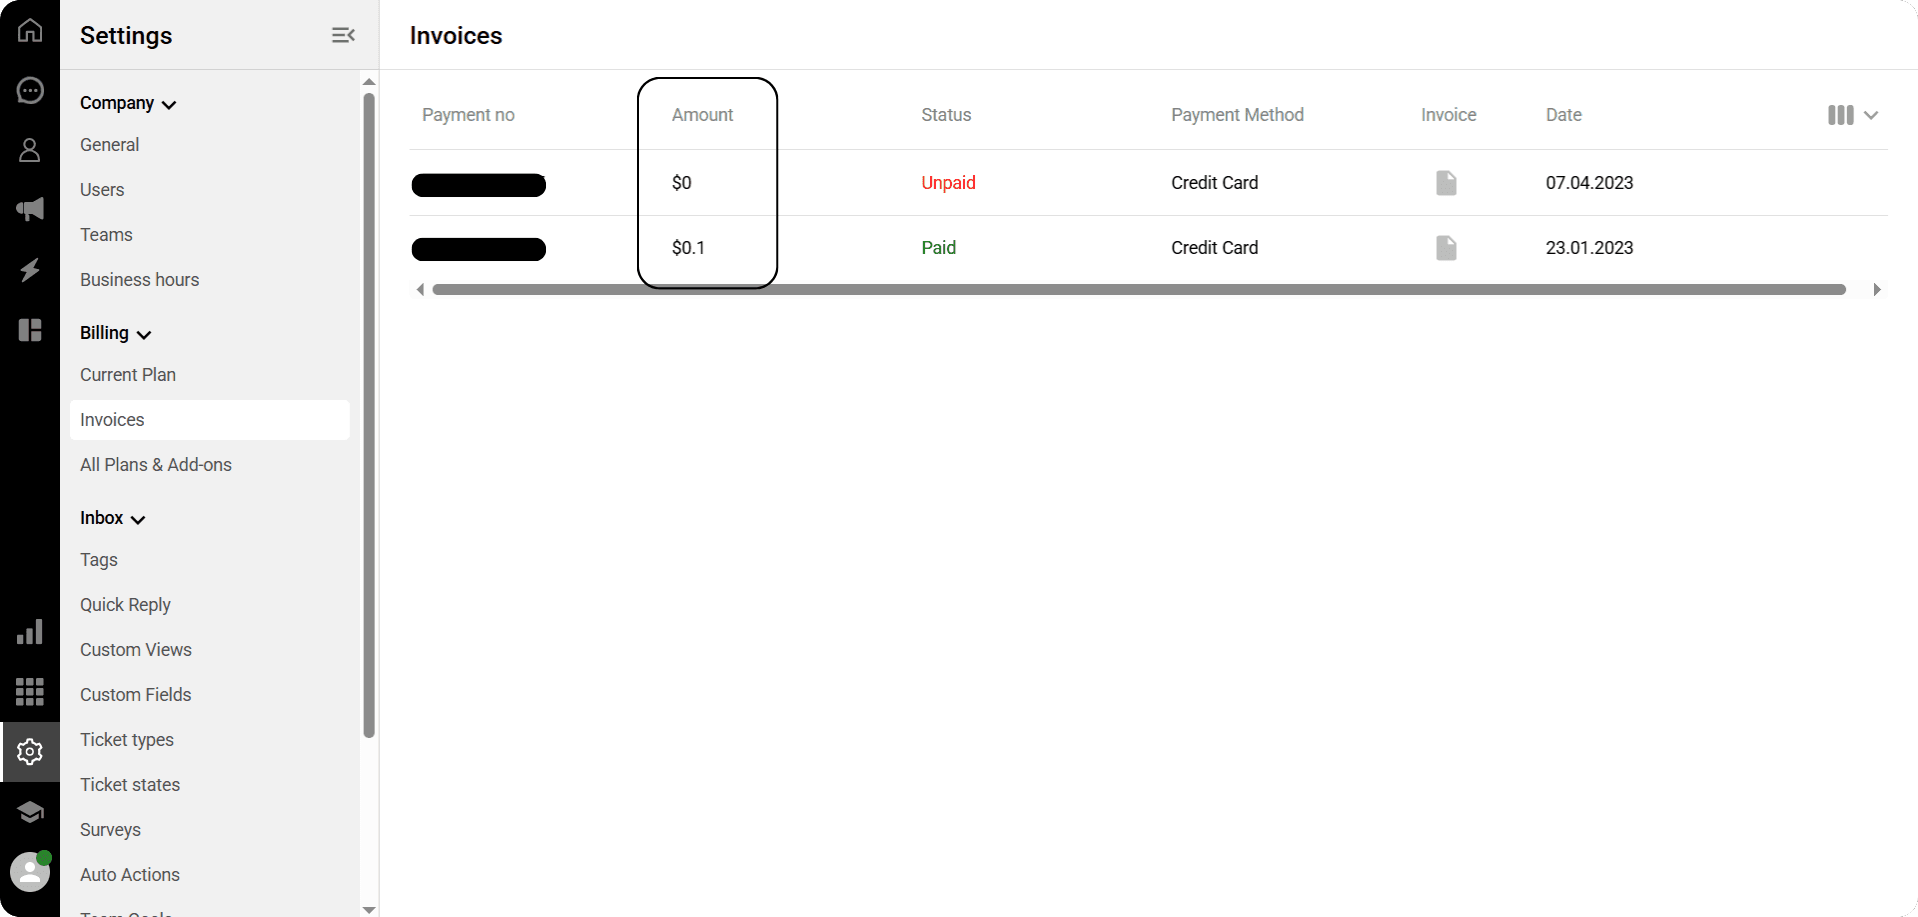
-> In the "Amount" column, you can see the amount of each invoice.

-> Under the "Status" column, you can see whether the listed invoices have been paid or not.
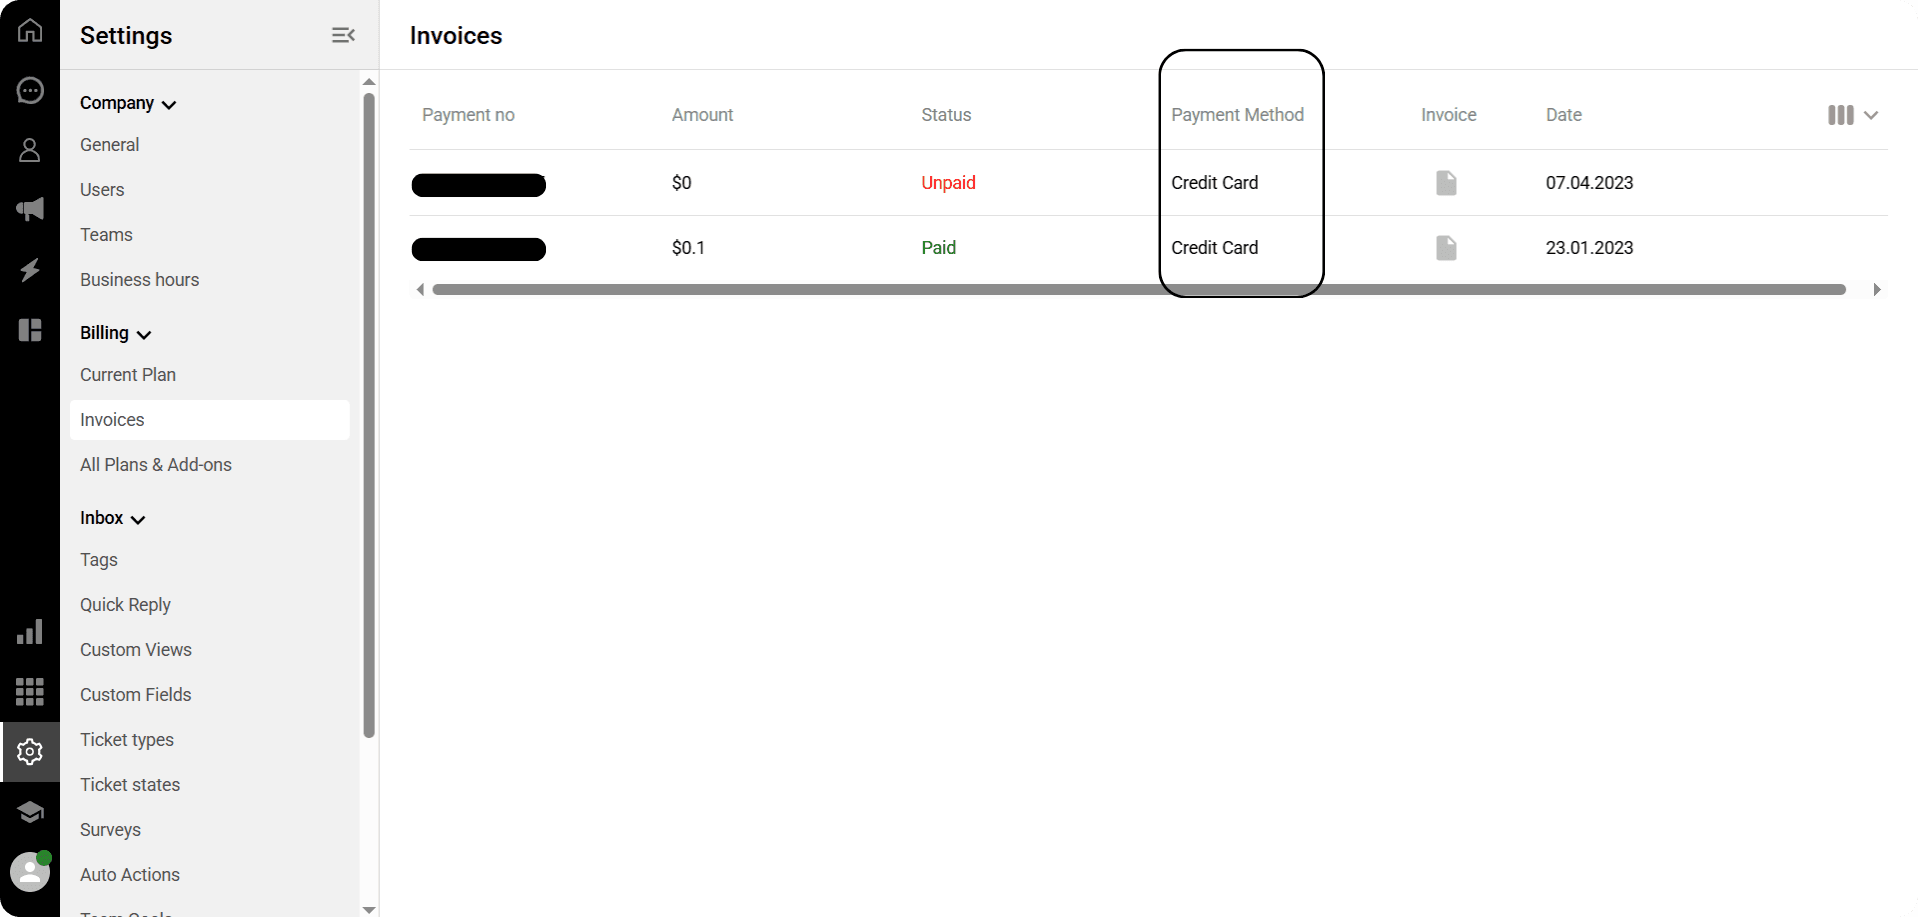
-> In the "Payment Method" column:
If the invoice has been paid, you can see which method was used.
If the invoice has not been paid yet, you can see how the payment will be collected using your registered payment details.
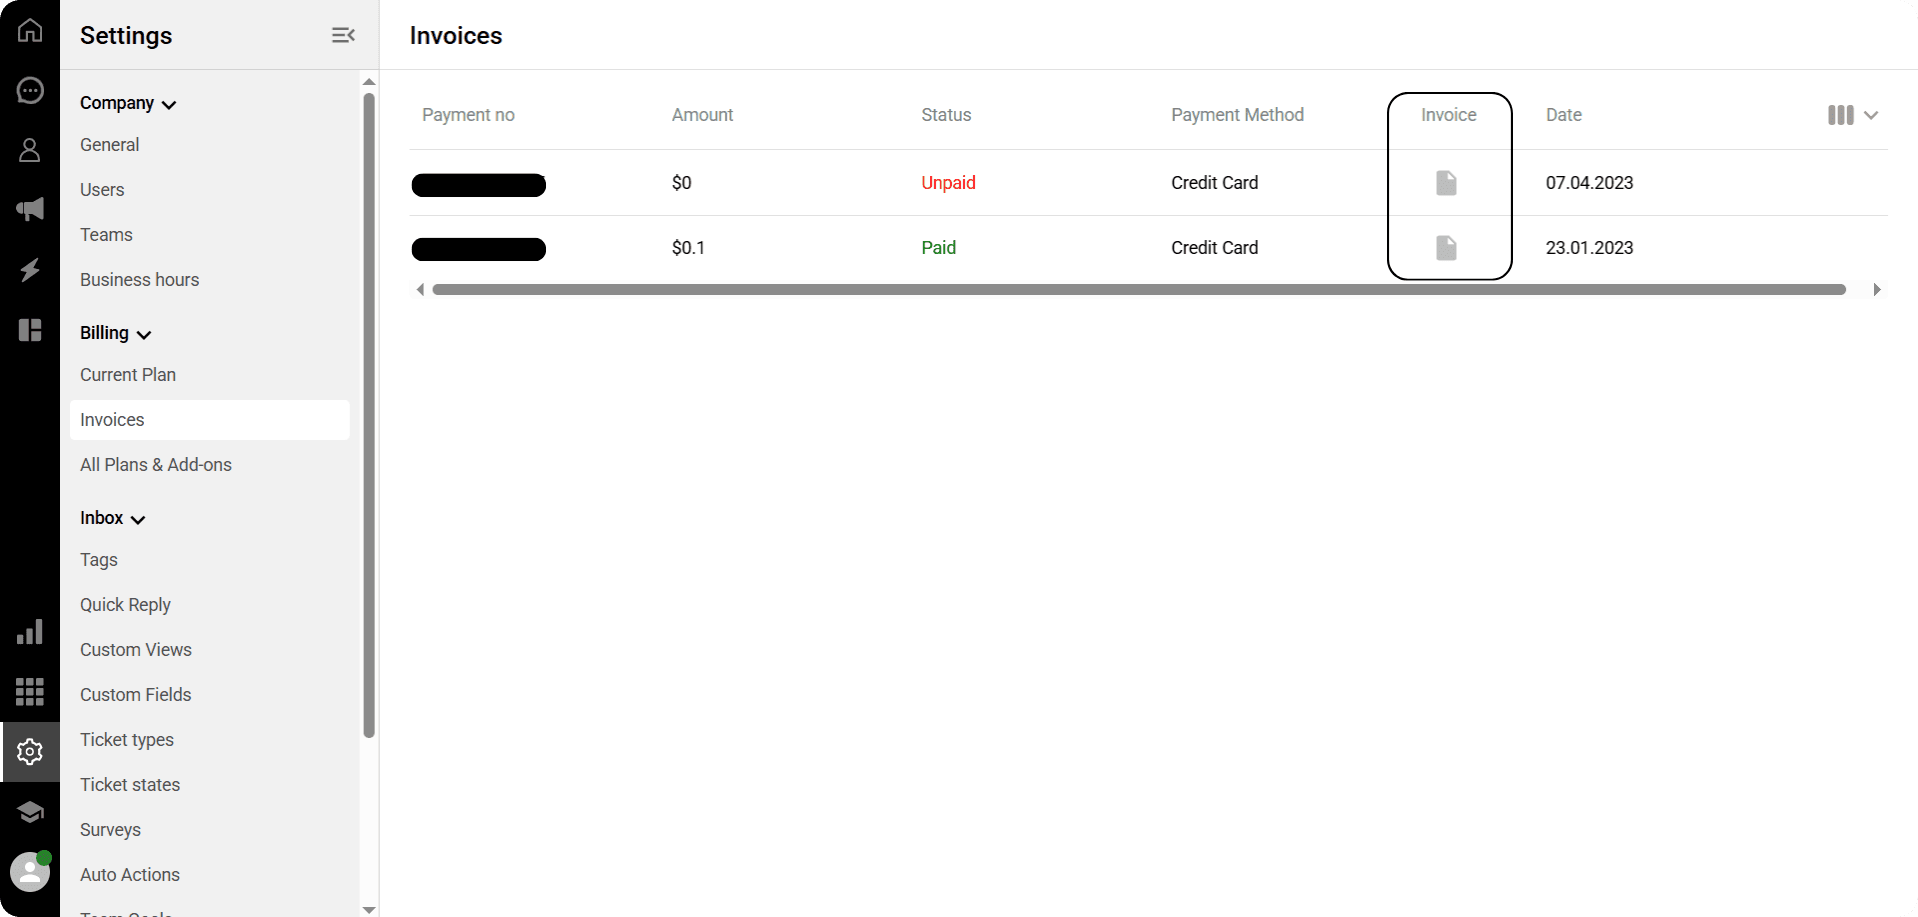
-> Below the invoice column, when you click on the icon for the relevant invoice, you can see all the details for that invoice.
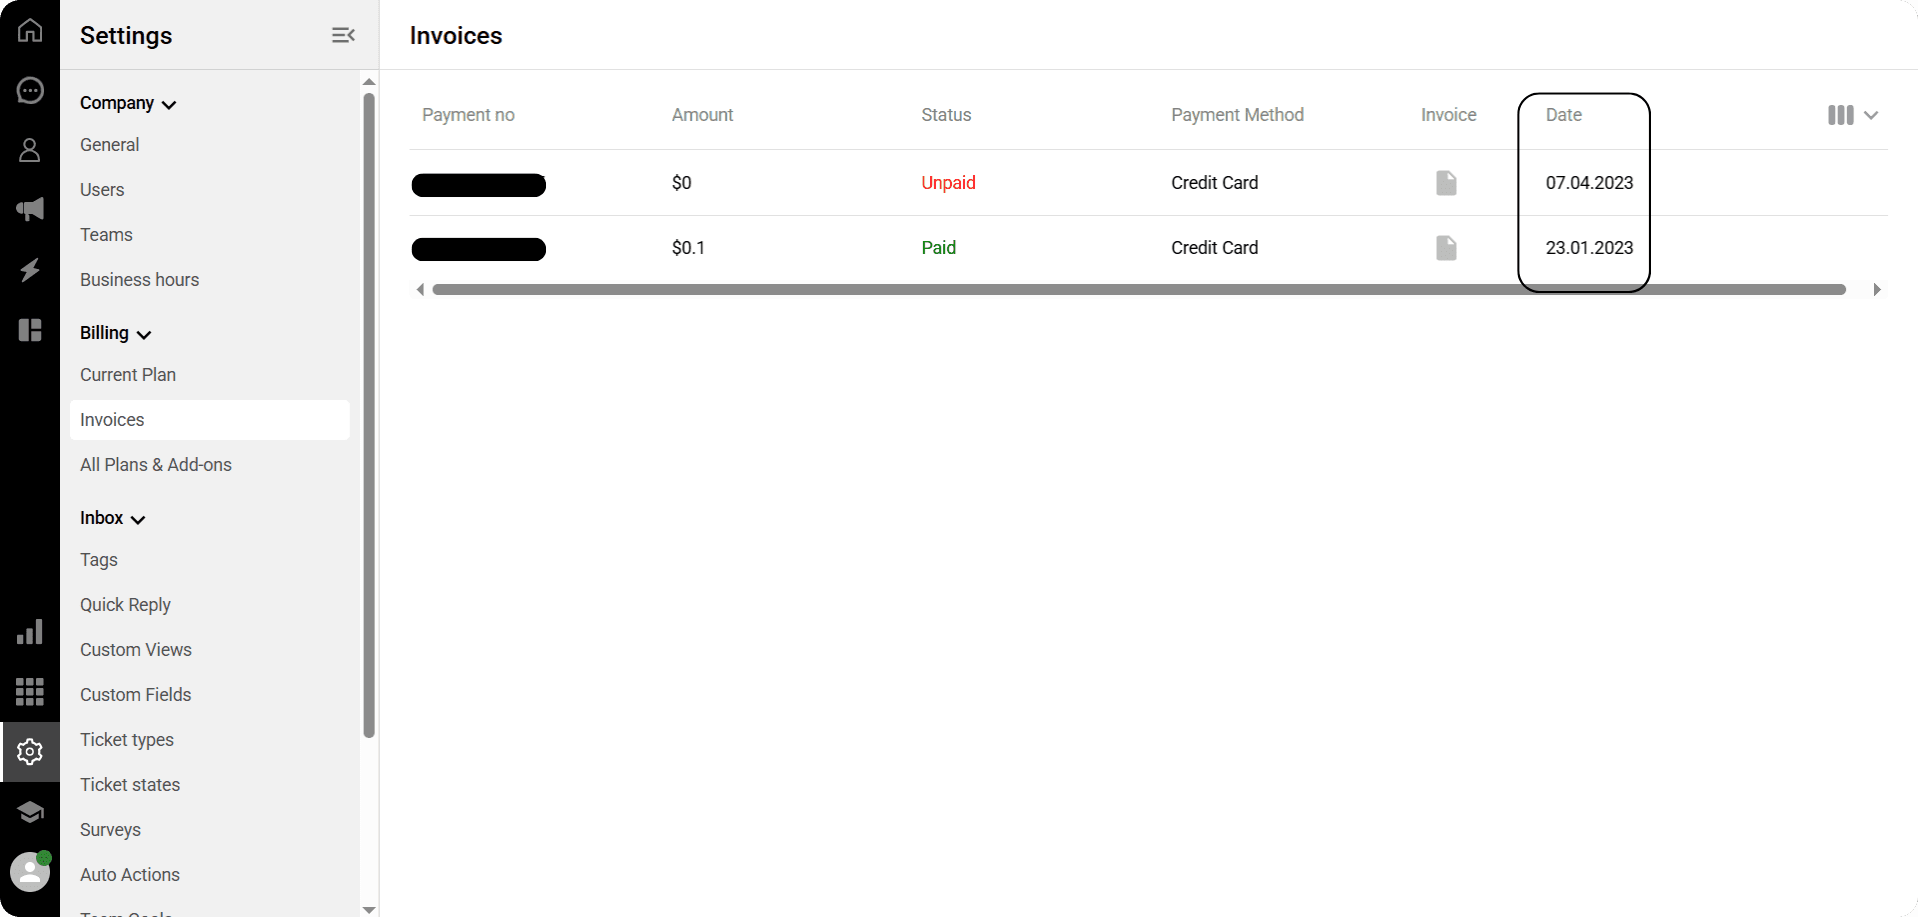
-> In the "Date" column, you can see the date each invoice was issued.

-> In this section, you can customize the columns when listing invoices.
You can enable or disable the display of the features you want.
Keeping your billing details up to date ensures uninterrupted service and accurate financial reporting. Through the Qpien dashboard, you can easily manage your billing information, track your usage, and access your past invoices in one centralized location.
📝 Adding or Updating Billing Details
-> To add billing information, open the "Settings" page.
-> When you click the “Current Plan” option on the panel, a page opens displaying your billing, usage, and current plan information.
On this page:
You can review your billing and usage details,
You can view your current plan,
And you can update it at any time.
-> Click on the pencil (✏️) icon located on the far right of the Invoice Information line.
If you have not previously added invoice information, the panel that opens will appear blank.
Fill in the required information in the panel completely:
First name – Last name
Country
City
District
Address
Company name
Tax office
Tax number
-> After filling in all the fields, click the Save button at the bottom.
Once your information has been successfully saved, the system will automatically generate your invoices based on this information.
💡If you have previously entered your invoice details, the panel will open with this information already filled in.
Make the necessary changes in the required fields.
After completing the updates, click the Save button.
Your new invoice details will then be successfully saved.
📑 Viewing and Tracking Invoices
-> When you click on the “Invoices” section in the left panel, this screen opens.
Here, you can see a list of all your invoices issued to date.
-> In the "Amount" column, you can see the amount of each invoice.
-> Under the "Status" column, you can see whether the listed invoices have been paid or not.
-> In the "Payment Method" column:
If the invoice has been paid, you can see which method was used.
If the invoice has not been paid yet, you can see how the payment will be collected using your registered payment details.
-> Below the invoice column, when you click on the icon for the relevant invoice, you can see all the details for that invoice.
-> In the "Date" column, you can see the date each invoice was issued.
-> In this section, you can customize the columns when listing invoices.
You can enable or disable the display of the features you want.
Try Qpien free for 14 days! 🎉
Ready to take control of all your support channels?
Empower your customer interactions with Qpien! Boost sales and elevate satisfaction with every conversation.
Try Qpien free for 14 days! 🎉
Ready to take control of all your support channels?
Empower your customer interactions with Qpien! Boost sales and elevate satisfaction with every conversation.
Try Qpien free for 14 days! 🎉
Ready to take control of all your support channels?
Empower your customer interactions with Qpien! Boost sales and elevate satisfaction with every conversation.