
Plans & Pricing
Managing Your Subscription: Upgrading Plans, Adding Seats, and Account Balance
At the end of your 14-day free trial, when you want to purchase a plan, you can easily see how to proceed step by step.
As your business grows, Qpien scales with you. Whether you need higher message limits, advanced automation, or a larger team, you can manage your subscription directly from your dashboard. This guide walks you through upgrading your plan, purchasing additional user seats, and maintaining your account balance.
Accessing Your Billing Dashboard
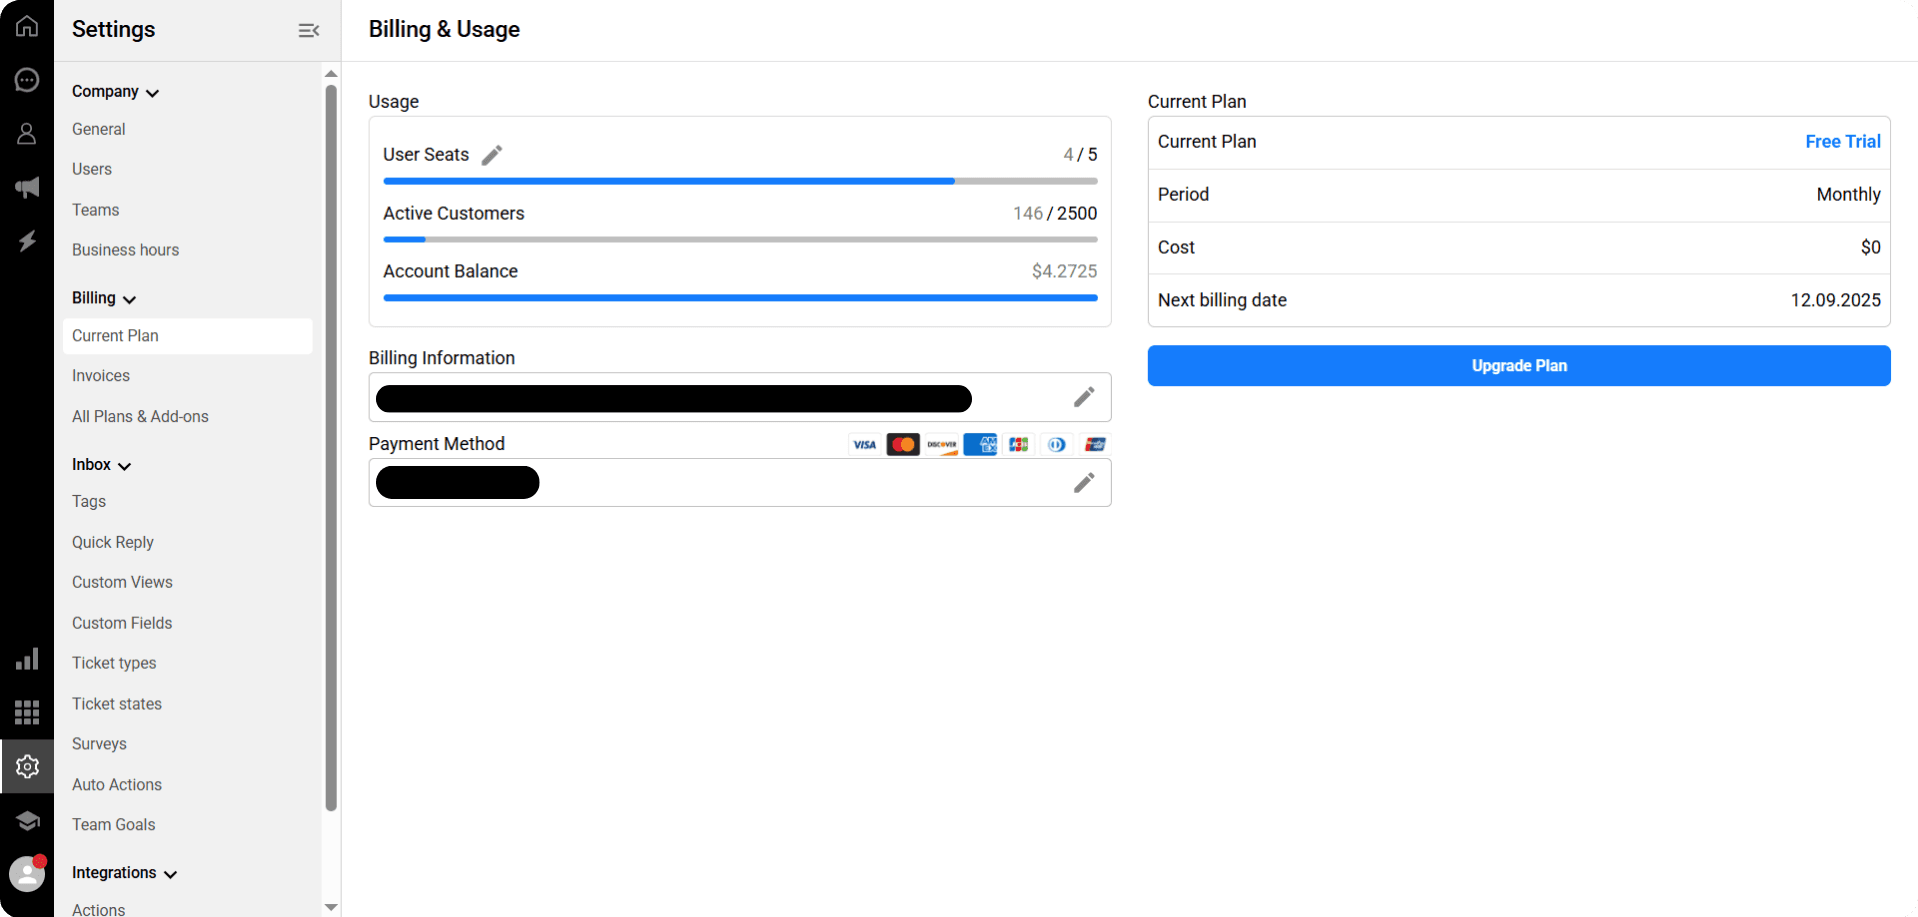
To manage your subscription, click the "Settings" icon in the lower-left corner and select the Current Plan tab. This opens the Billing & Usage page, where you can monitor your current plan, usage limits, and account balance.
When you click the “Current Plan” option on the panel, a page opens displaying your billing, usage, and current plan information.
On this page:
You can review your billing and usage details,
You can view your current plan,
And you can update it at any time.
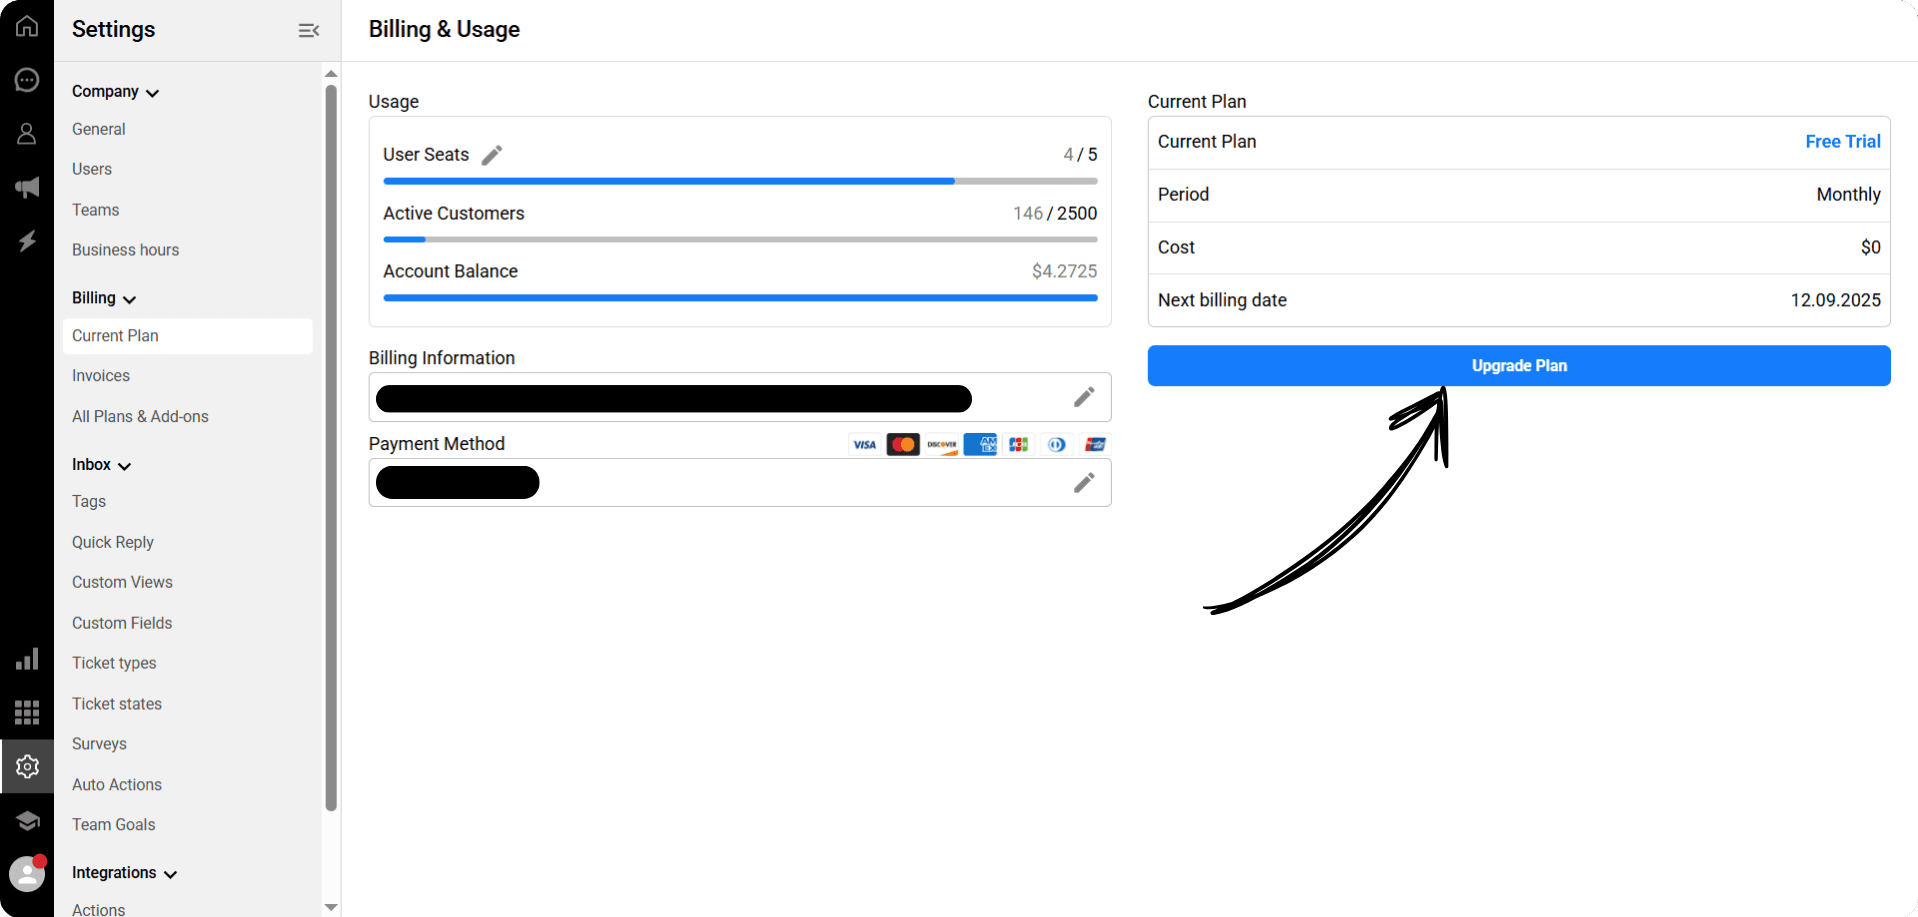
Upgrading Your Subscription Plan
-> On the Billing page, click Upgrade Plan.
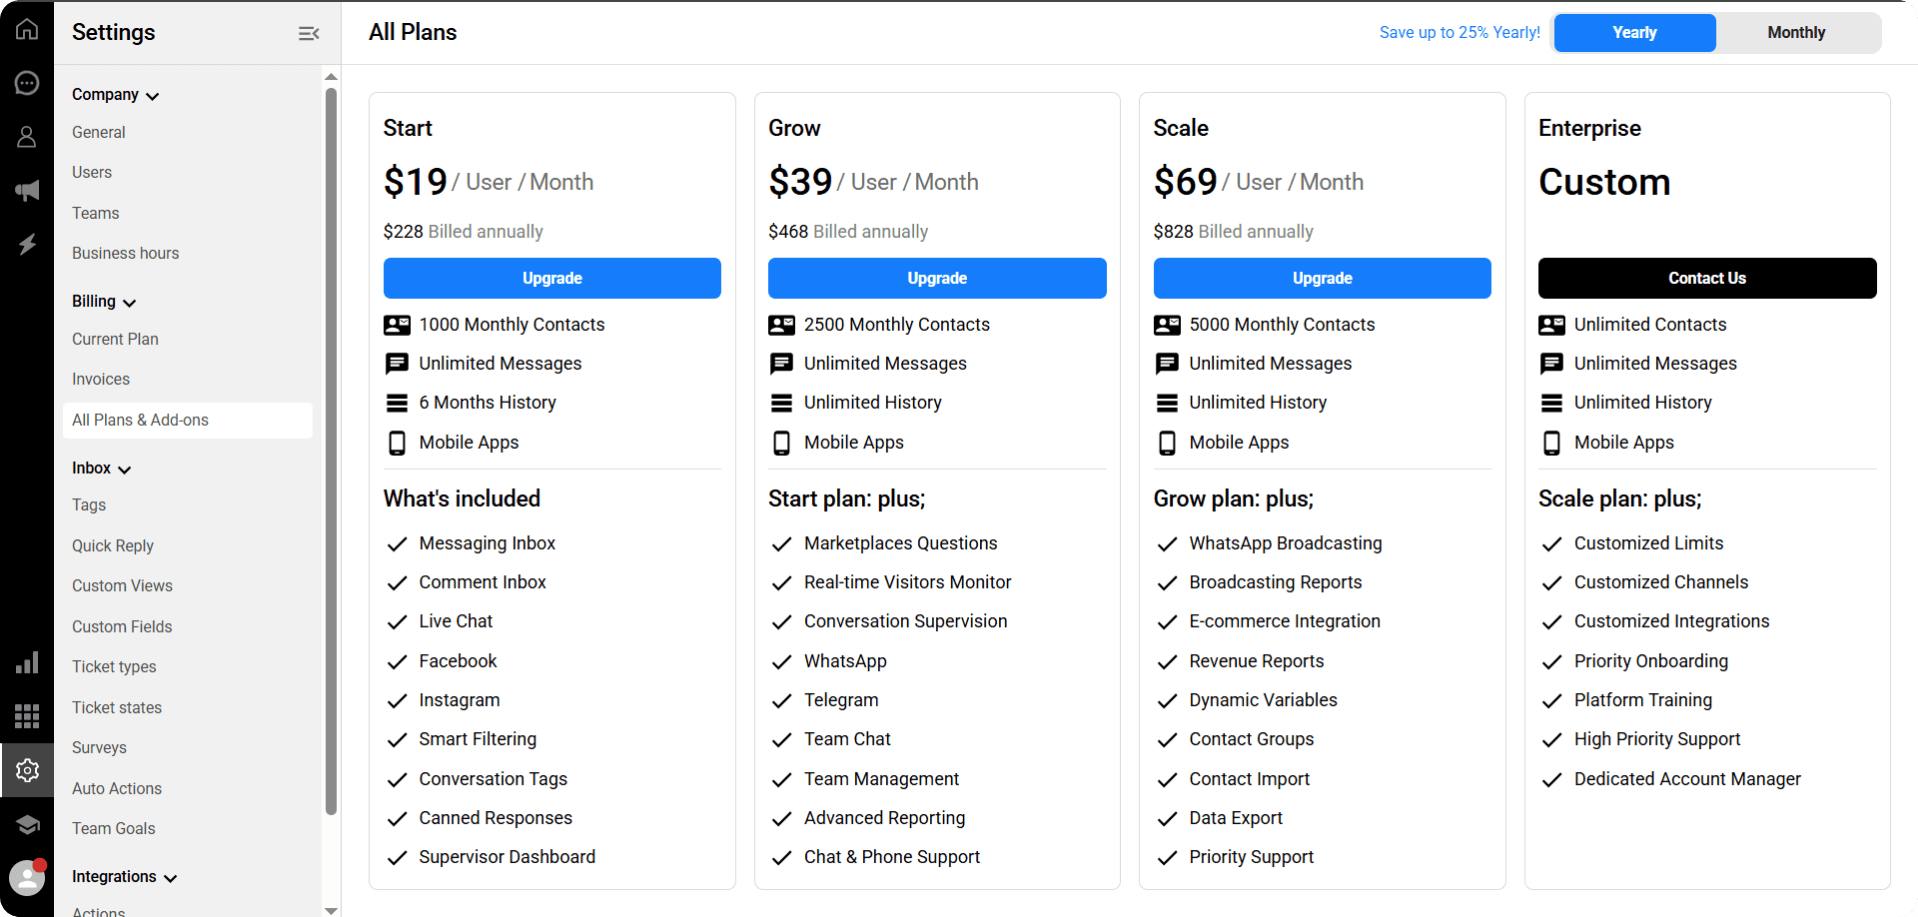
-> From the All Plans and Add-ons menu, select the package that fits your needs and click Upgrade.
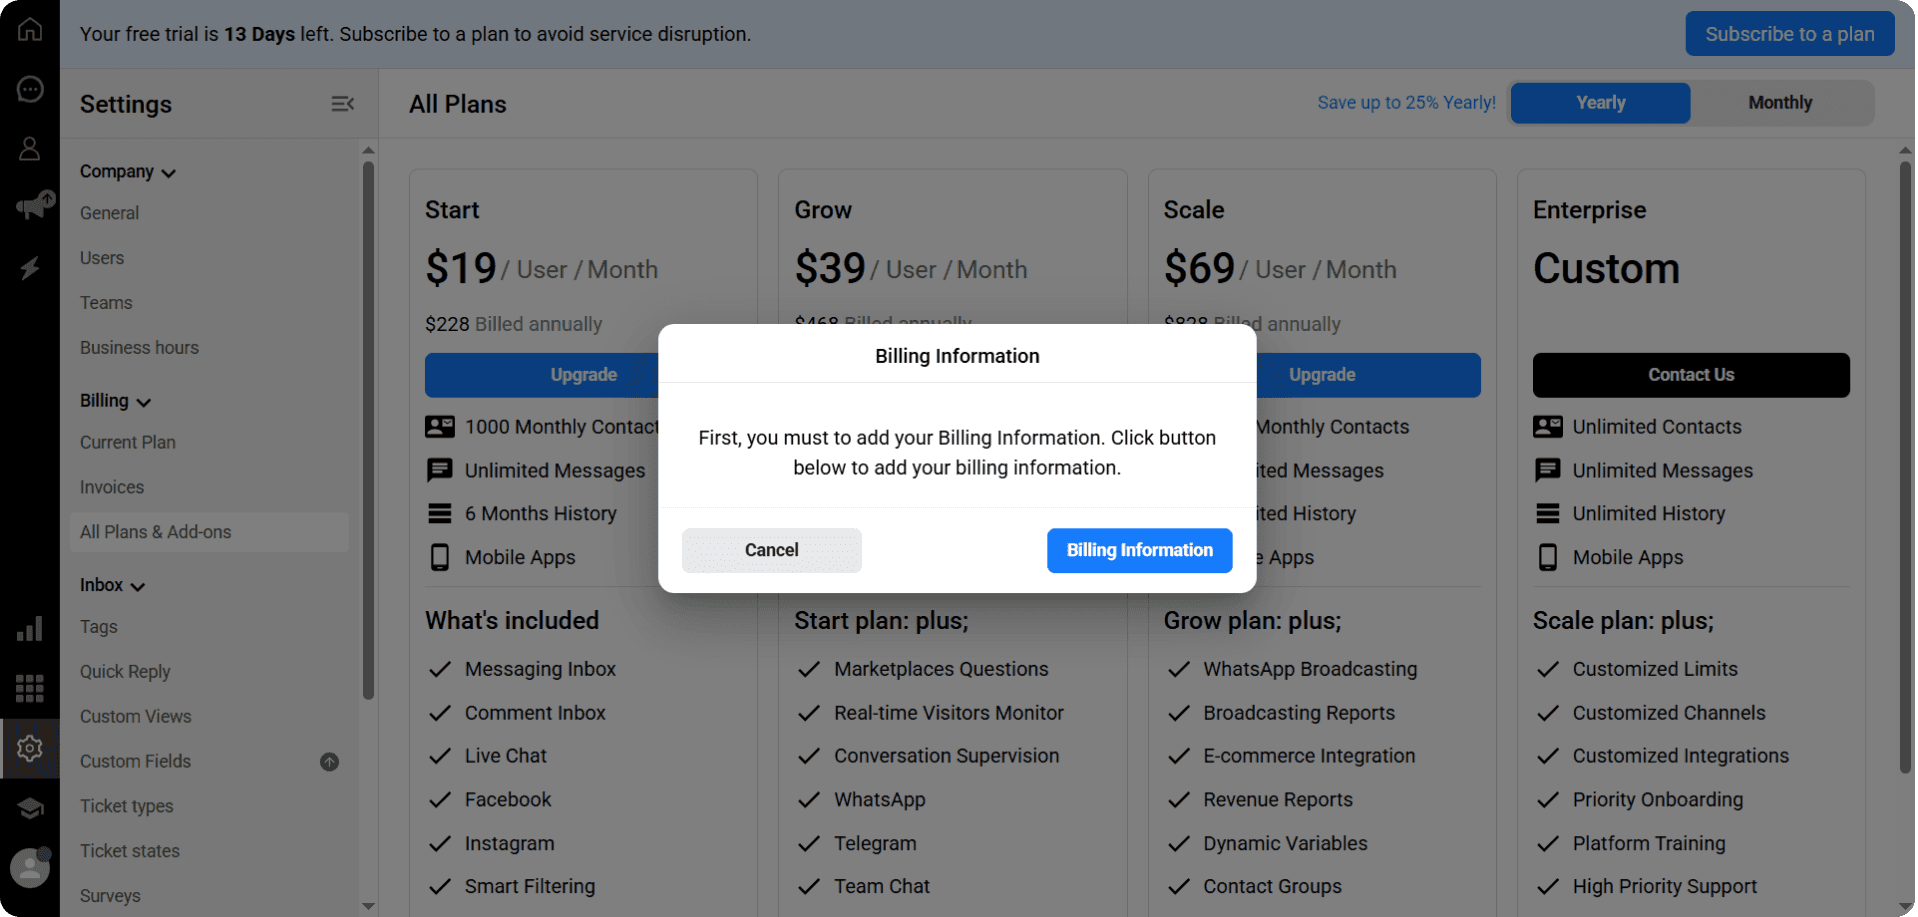
💡 Note on Payment & Billing Information
If you haven't configured your account details yet, the system will prompt a warning. To ensure a smooth transaction, please make sure your information is up to date:
If you need to add or edit your invoice details, please follow our "Managing Your Billing & Invoice Information" guide.
To add or update your credit card details, refer to our "Add/Change Payment Method" guide.
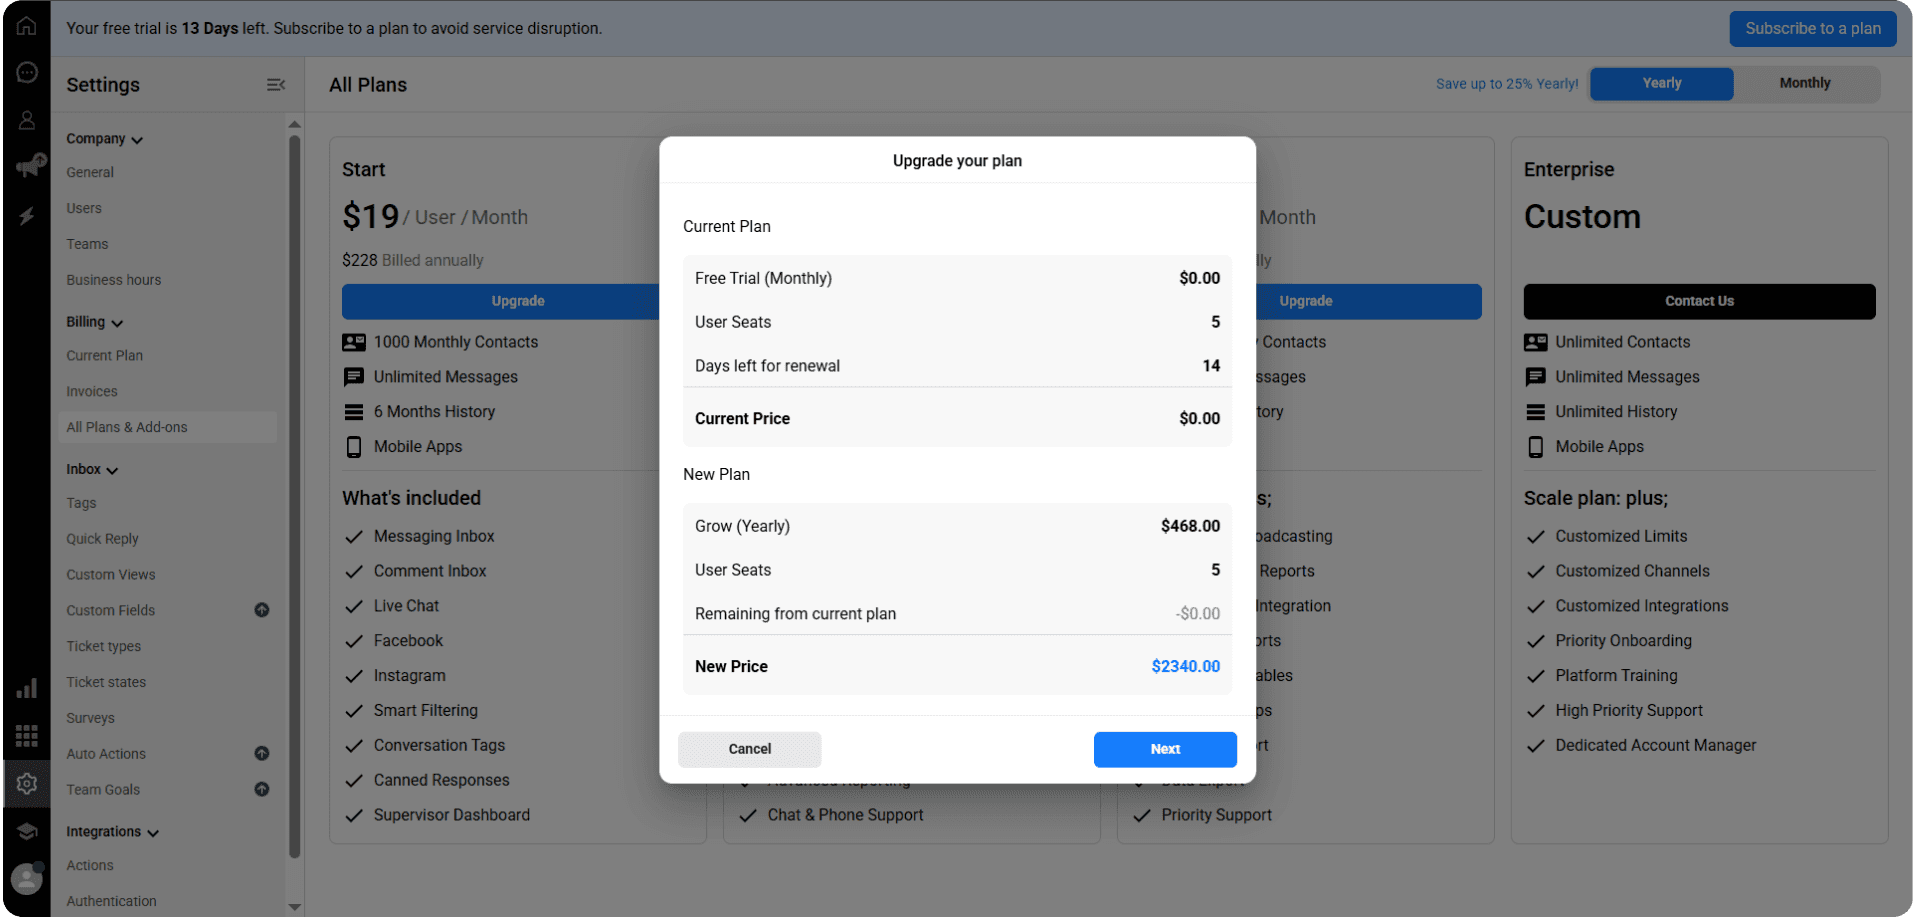
Review and Activation
In the panel that opens, you can see your current plan, the number of users, the number of days remaining until renewal, and the price.
Immediately below, you can view the new plan you want to switch to, the number of users, your remaining balance from the current plan, and the new price.
-> To continue, click the “Next” button.
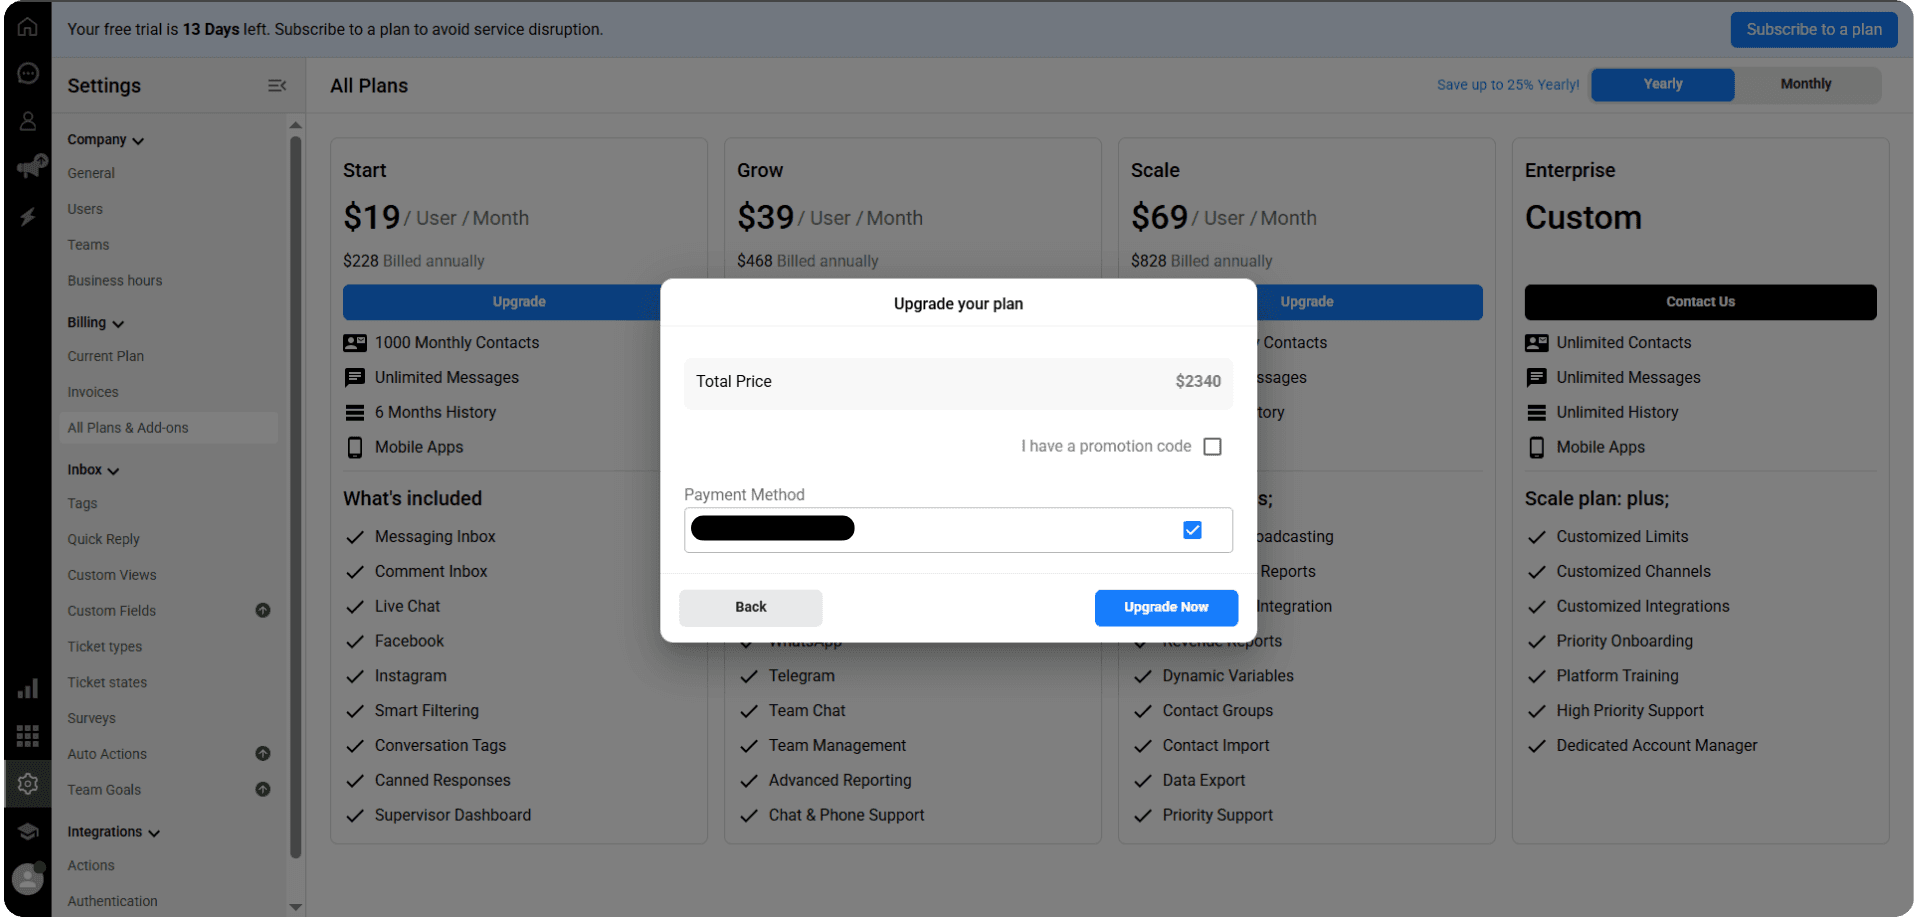
You can see the amount to be paid in the panel that opens.
-> If one or more payment methods are registered, select which one you want to use for payment.
-> If you have a promo code, check the “I have a promo code” option and enter your code in the field that appears.
-> To complete the transaction, click the “Upgrade Now” button.
Congratulations! Your plan has been successfully upgraded.
Purchasing Additional User Seats
If you need to expand your team without changing your base plan:
You’ll need to purchase additional user seats through your own account.
Once purchased, you can add these users and include them in your team.
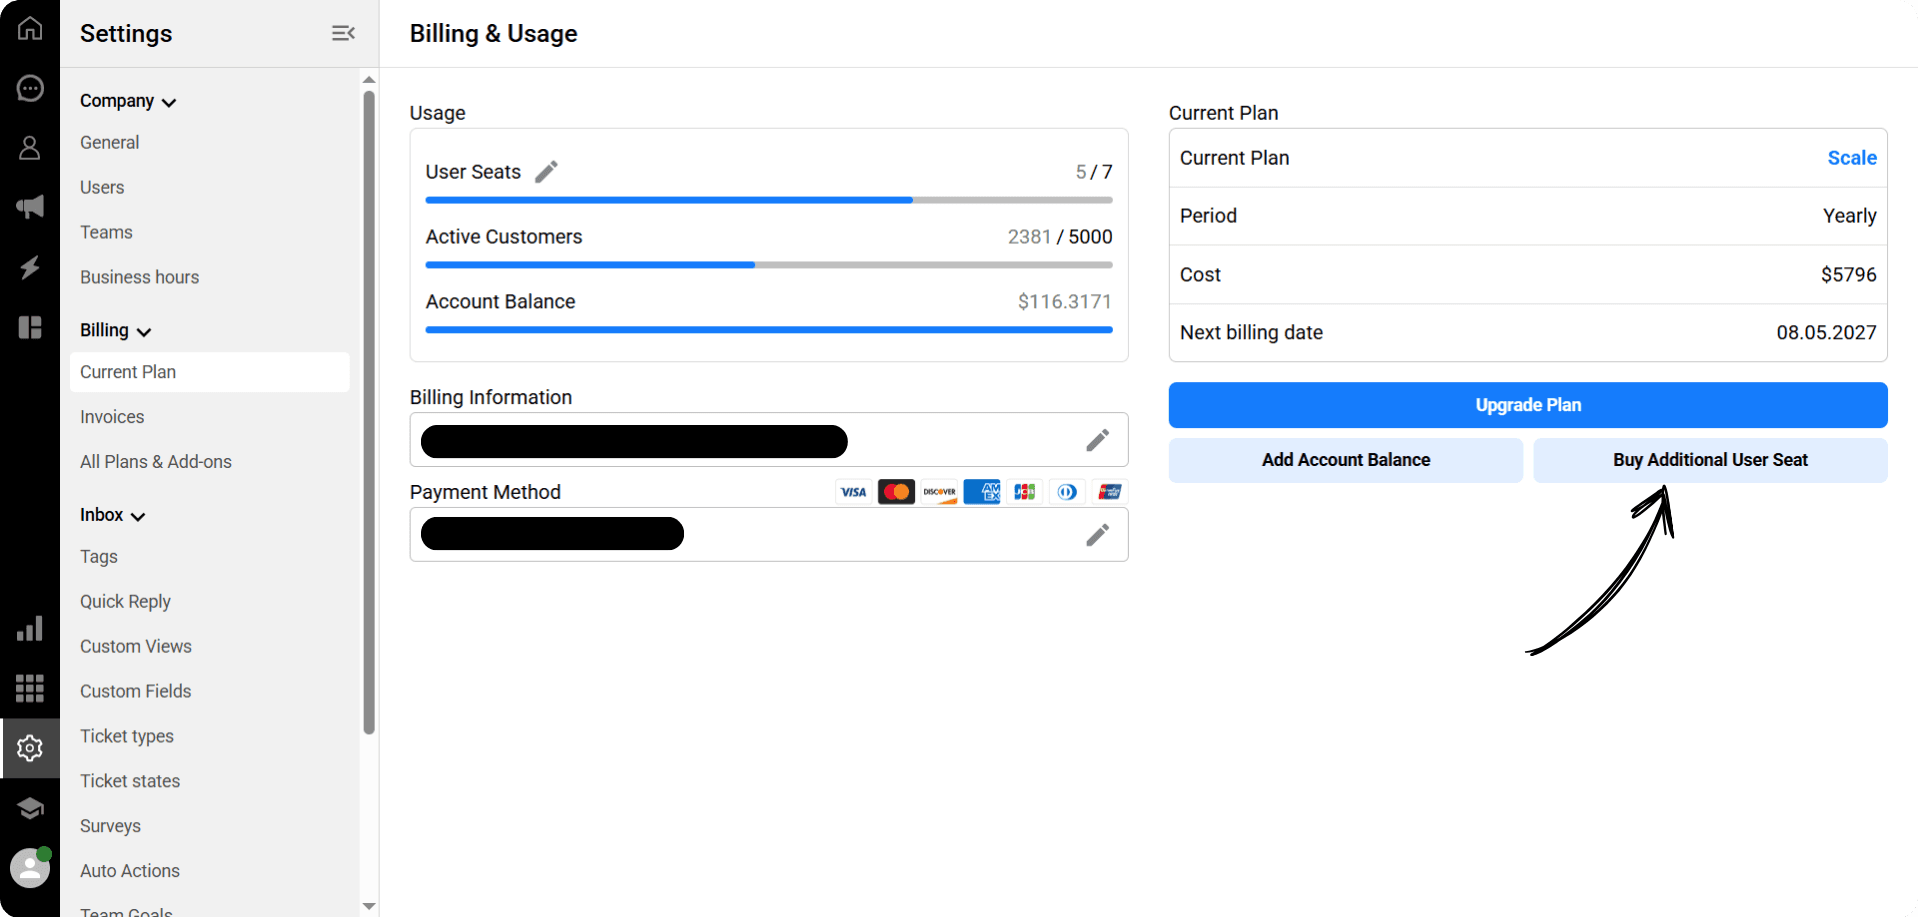
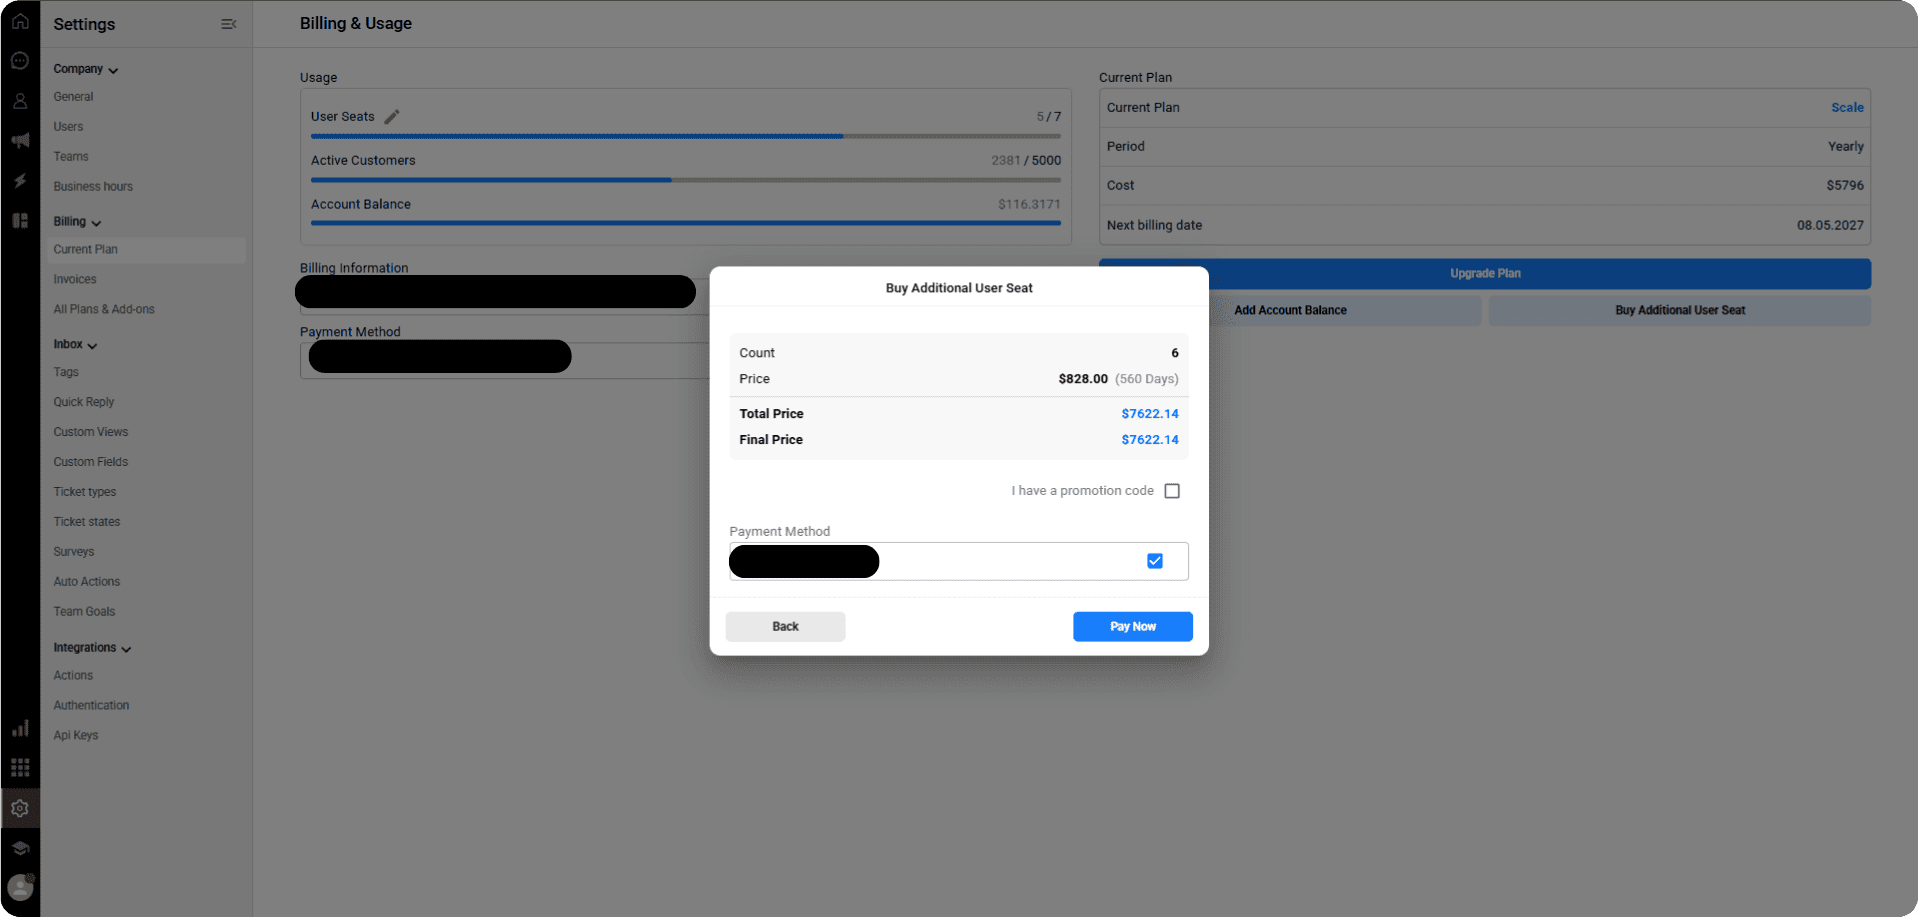
-> On the Billing & Usage page, click Buy Additional User Seat.
-> Select the required number of seats.
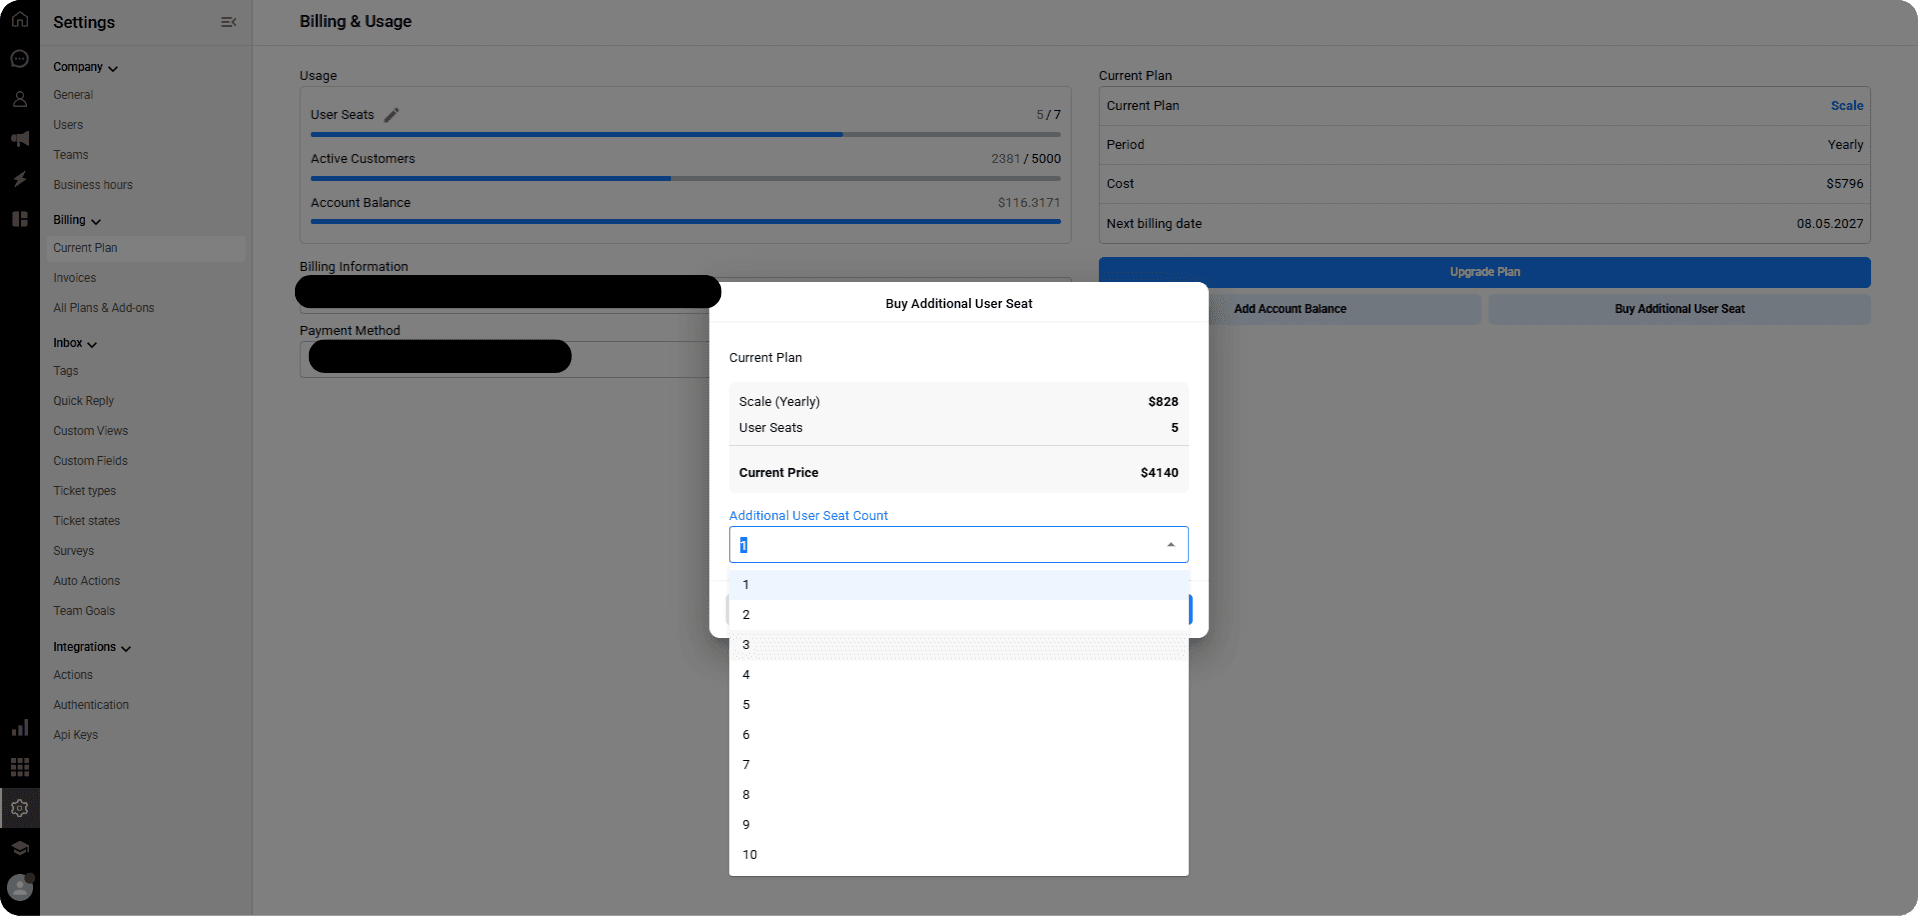
-> Review the total price, select your payment method, and click Pay Now.
Adding Account Balance
To ensure your subscription renews without issues or to cover future add-ons, you can top up your account balance:
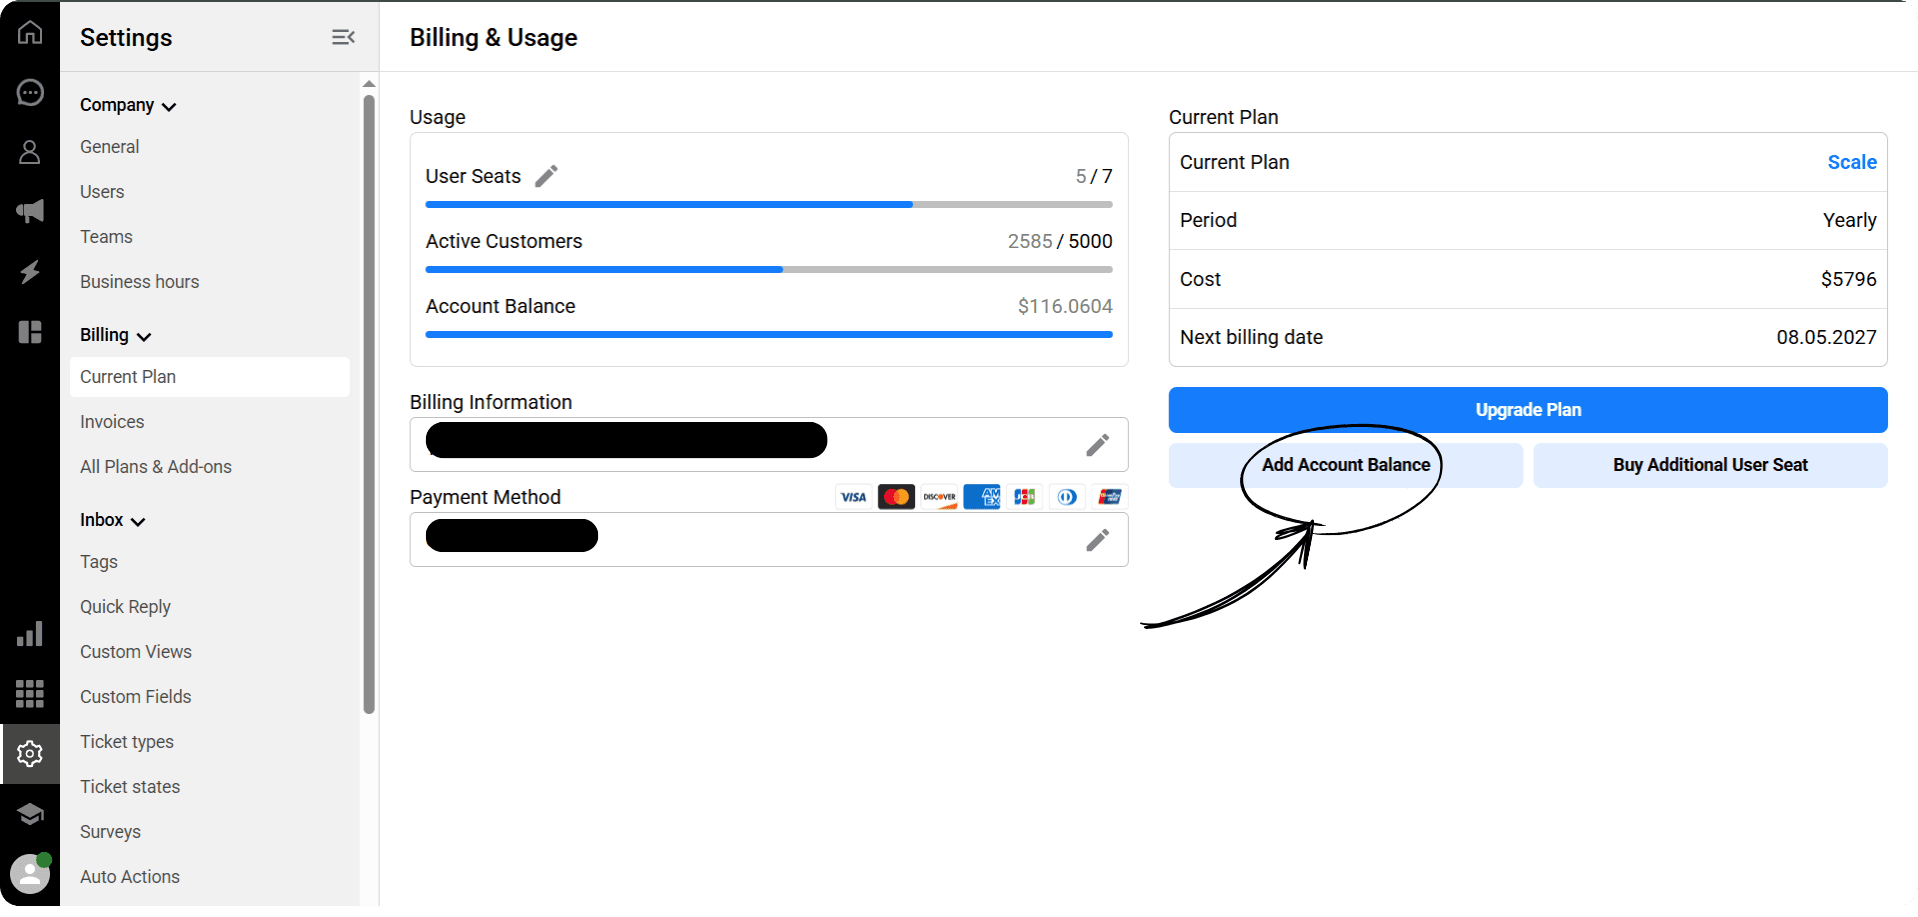
-> To top up your balance, click the “Add Account Balance” button located at the bottom right corner of the page.
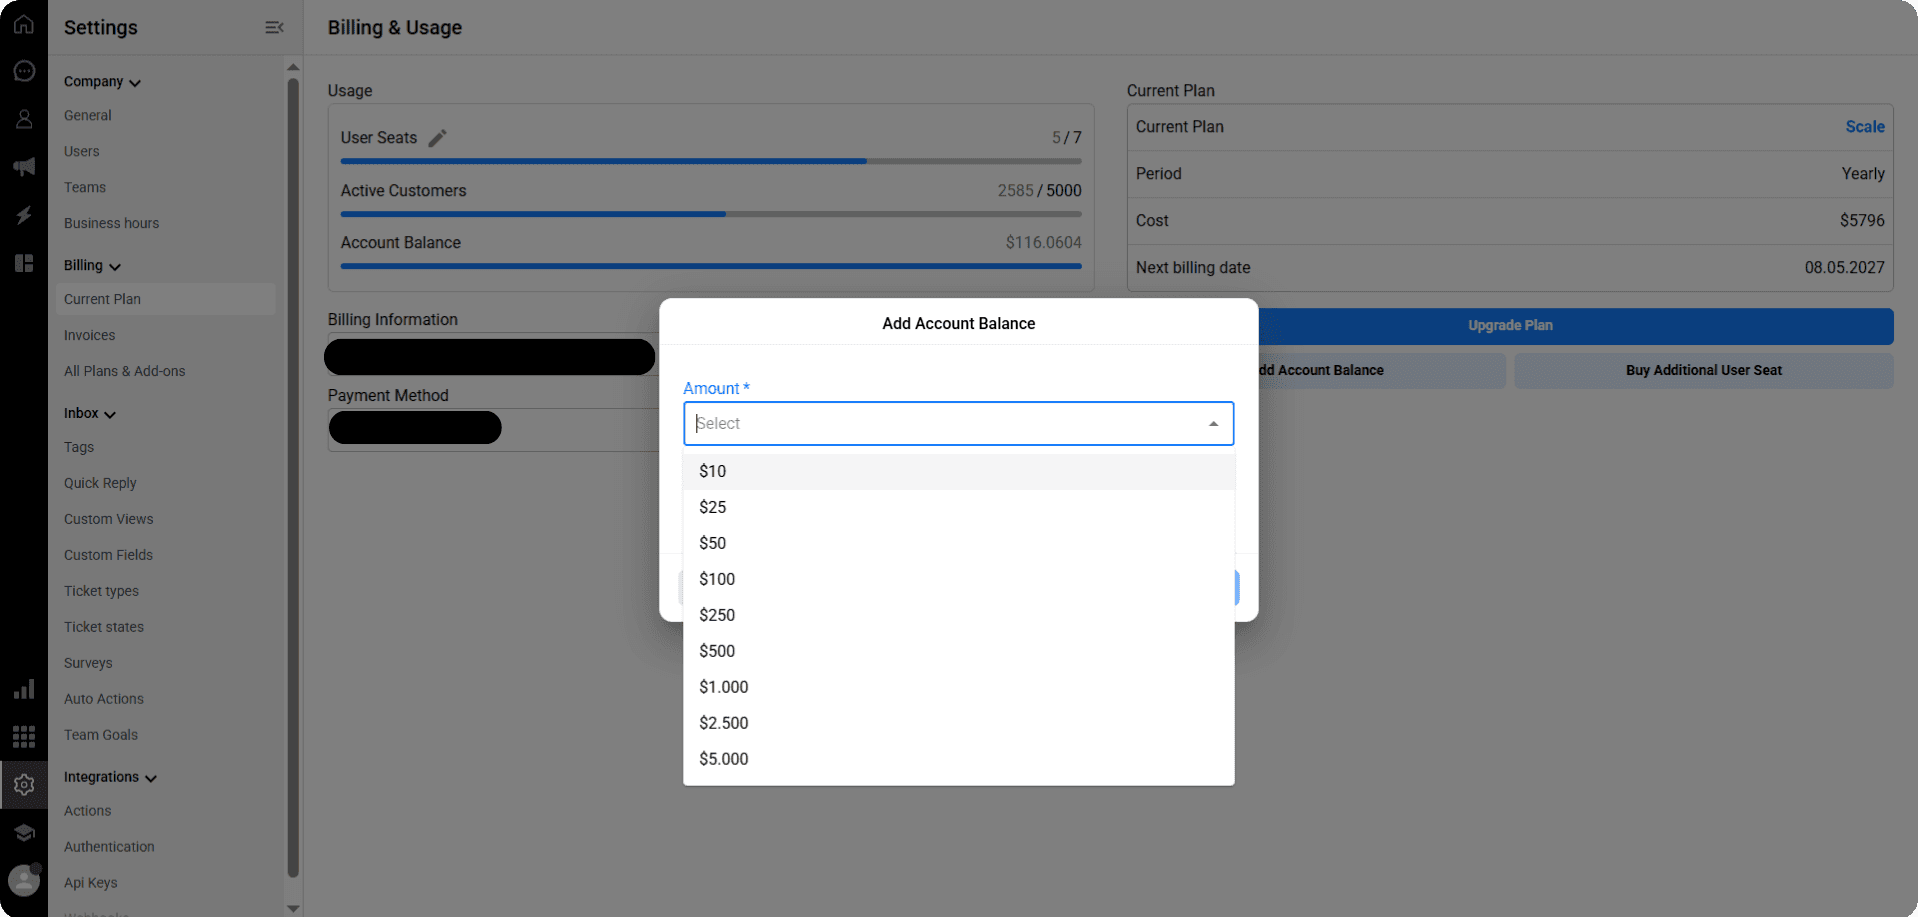
-> Choose the top-up Amount.
-> Next, in the Payment Method section, check the box on the right to confirm your payment method.
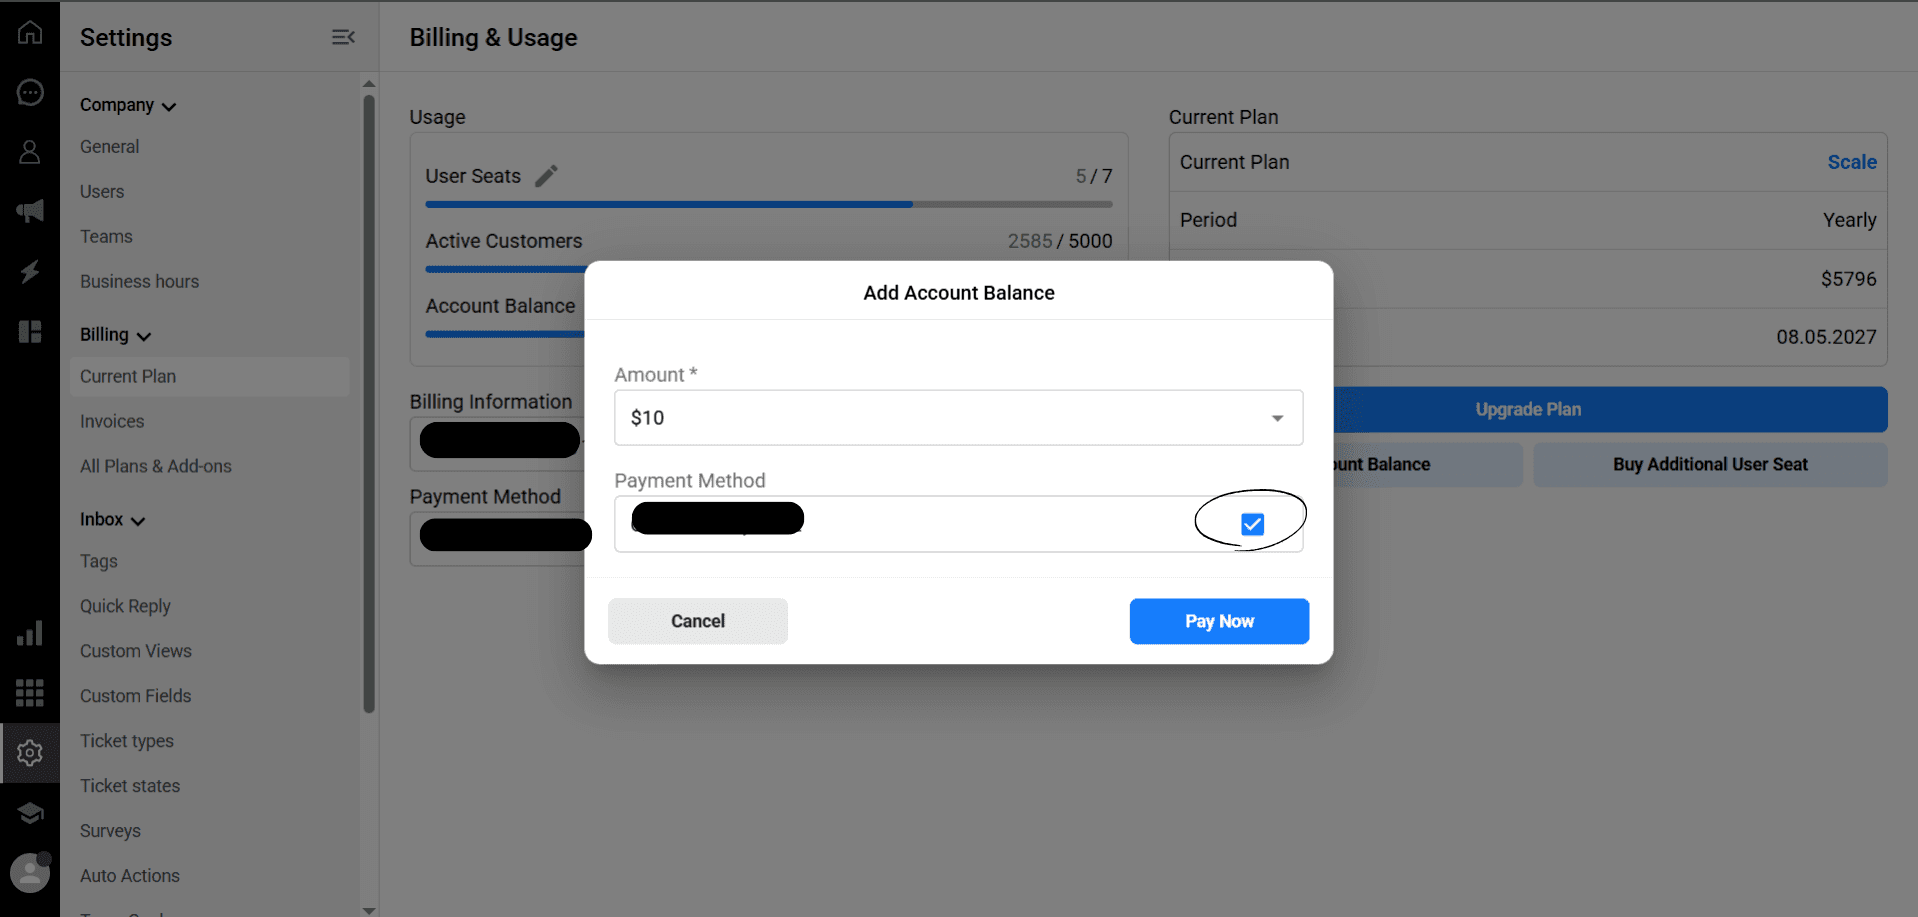
-> Finally, click the “Pay Now” button to complete your payment.
Once the process is successfully completed, the selected amount will be added to your account balance.
As your business grows, Qpien scales with you. Whether you need higher message limits, advanced automation, or a larger team, you can manage your subscription directly from your dashboard. This guide walks you through upgrading your plan, purchasing additional user seats, and maintaining your account balance.
Accessing Your Billing Dashboard
To manage your subscription, click the "Settings" icon in the lower-left corner and select the Current Plan tab. This opens the Billing & Usage page, where you can monitor your current plan, usage limits, and account balance.
When you click the “Current Plan” option on the panel, a page opens displaying your billing, usage, and current plan information.
On this page:
You can review your billing and usage details,
You can view your current plan,
And you can update it at any time.
Upgrading Your Subscription Plan
-> On the Billing page, click Upgrade Plan.
-> From the All Plans and Add-ons menu, select the package that fits your needs and click Upgrade.
💡 Note on Payment & Billing Information
If you haven't configured your account details yet, the system will prompt a warning. To ensure a smooth transaction, please make sure your information is up to date:
If you need to add or edit your invoice details, please follow our "Managing Your Billing & Invoice Information" guide.
To add or update your credit card details, refer to our "Add/Change Payment Method" guide.
Review and Activation
In the panel that opens, you can see your current plan, the number of users, the number of days remaining until renewal, and the price.
Immediately below, you can view the new plan you want to switch to, the number of users, your remaining balance from the current plan, and the new price.
-> To continue, click the “Next” button.
You can see the amount to be paid in the panel that opens.
-> If one or more payment methods are registered, select which one you want to use for payment.
-> If you have a promo code, check the “I have a promo code” option and enter your code in the field that appears.
-> To complete the transaction, click the “Upgrade Now” button.
Congratulations! Your plan has been successfully upgraded.
Purchasing Additional User Seats
If you need to expand your team without changing your base plan:
You’ll need to purchase additional user seats through your own account.
Once purchased, you can add these users and include them in your team.
-> On the Billing & Usage page, click Buy Additional User Seat.
-> Select the required number of seats.
-> Review the total price, select your payment method, and click Pay Now.
Adding Account Balance
To ensure your subscription renews without issues or to cover future add-ons, you can top up your account balance:
-> To top up your balance, click the “Add Account Balance” button located at the bottom right corner of the page.
-> Choose the top-up Amount.
-> Next, in the Payment Method section, check the box on the right to confirm your payment method.
-> Finally, click the “Pay Now” button to complete your payment.
Once the process is successfully completed, the selected amount will be added to your account balance.
Try Qpien free for 14 days! 🎉
Ready to take control of all your support channels?
Empower your customer interactions with Qpien! Boost sales and elevate satisfaction with every conversation.
Try Qpien free for 14 days! 🎉
Ready to take control of all your support channels?
Empower your customer interactions with Qpien! Boost sales and elevate satisfaction with every conversation.
Try Qpien free for 14 days! 🎉
Ready to take control of all your support channels?
Empower your customer interactions with Qpien! Boost sales and elevate satisfaction with every conversation.