
Account Settings
User Management
In Qpien, user management allows you to manage your team's access to the platform, add new users, update existing users' information, or remove them when necessary.
Efficient team management is the backbone of superior customer success. Qpien provides administrators with robust tools to invite team members, define granular access permissions, and monitor system activities. This guide covers everything from adding new users to creating custom roles and tracking audit logs.
Get To Know The "Roles"
Before inviting your team, it is essential to understand the access levels available:
Admin: Full access to all settings, billing, and management tools.
User: Can access the Dashboard and Chat Page. They can view all messages in their assigned teams and manage assignments.
Limited User: Restricted to viewing and responding only to chats specifically assigned to them. They cannot see the general message pool.
Manage The Users Dashboard
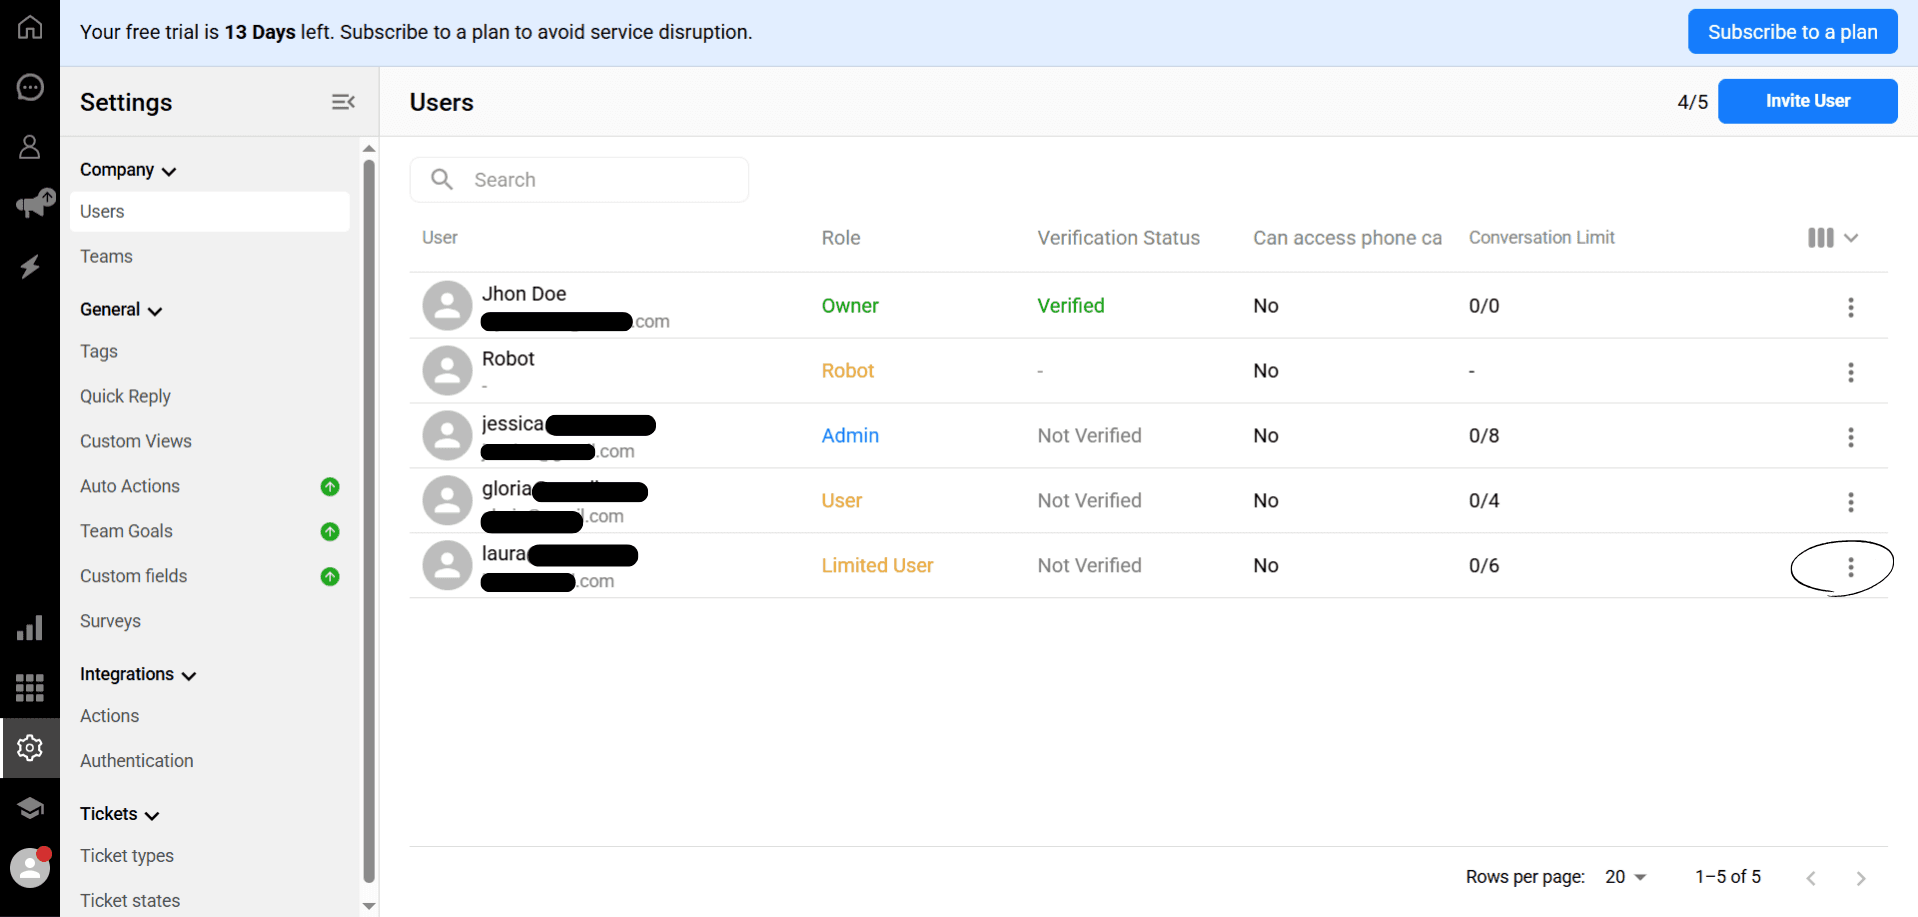
In this section, you can view the list of people who use the system with you. The user list provides a high-level overview of your team's status and capacity:
Verification Status
You can check whether users' email addresses have been verified or not.
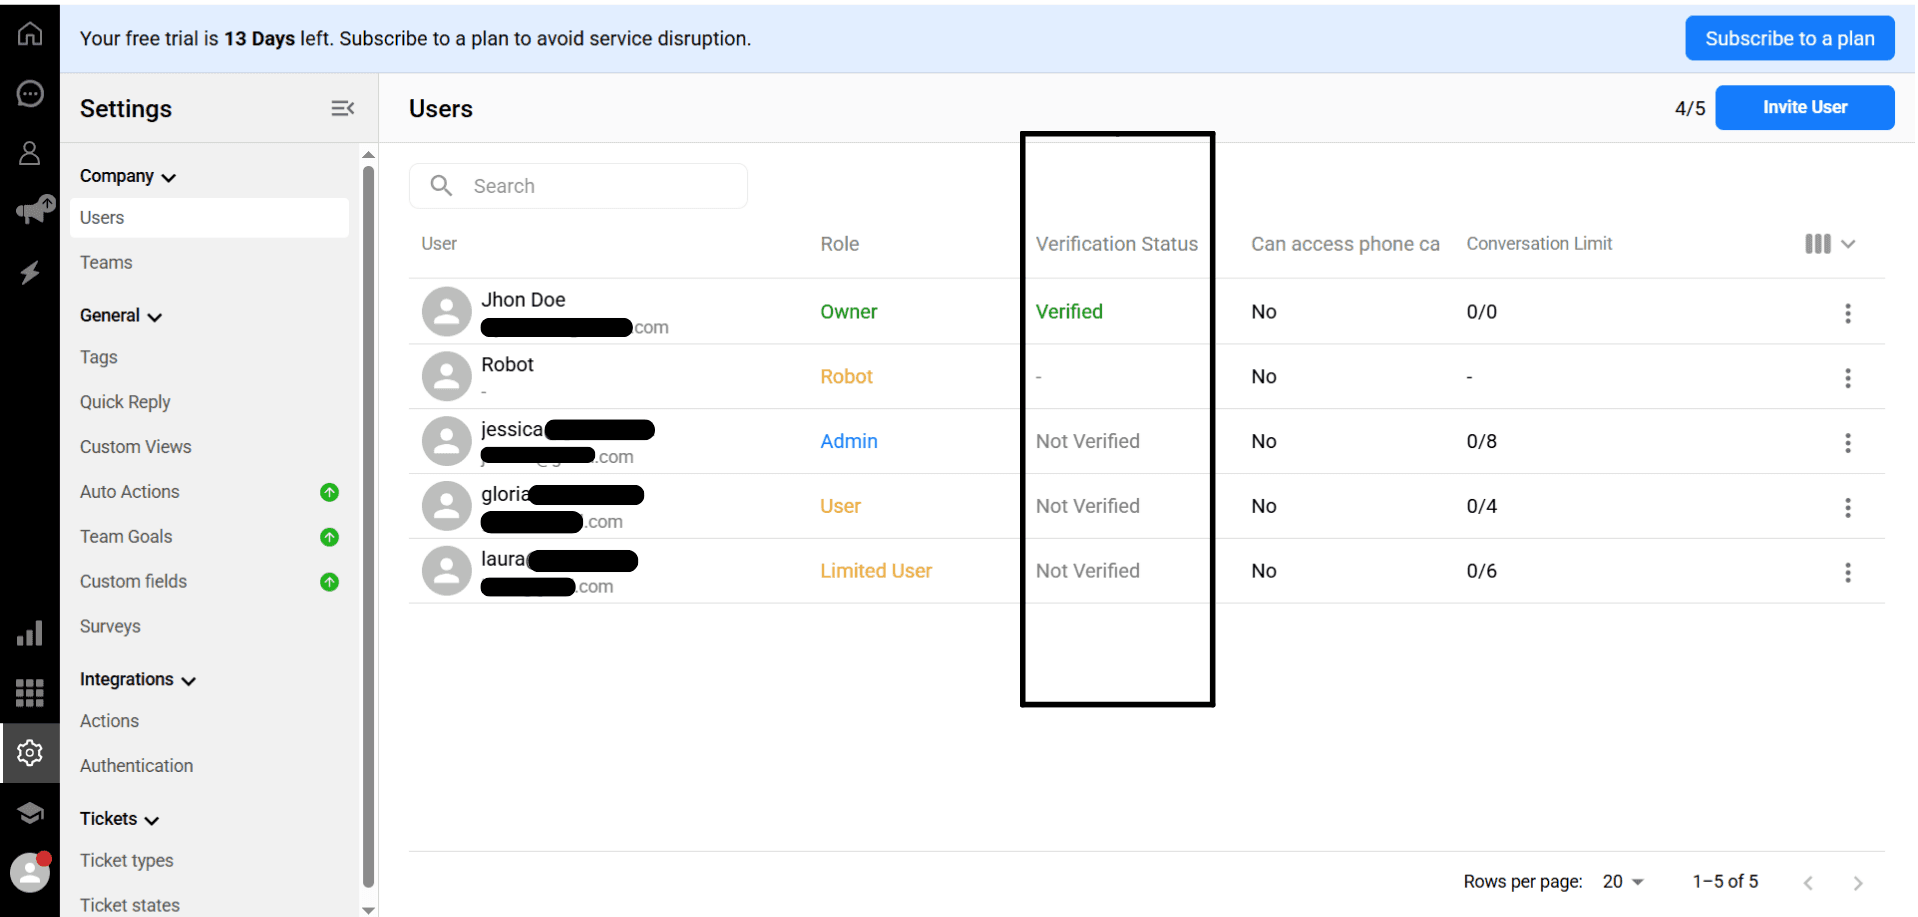
Unverified users cannot log in.
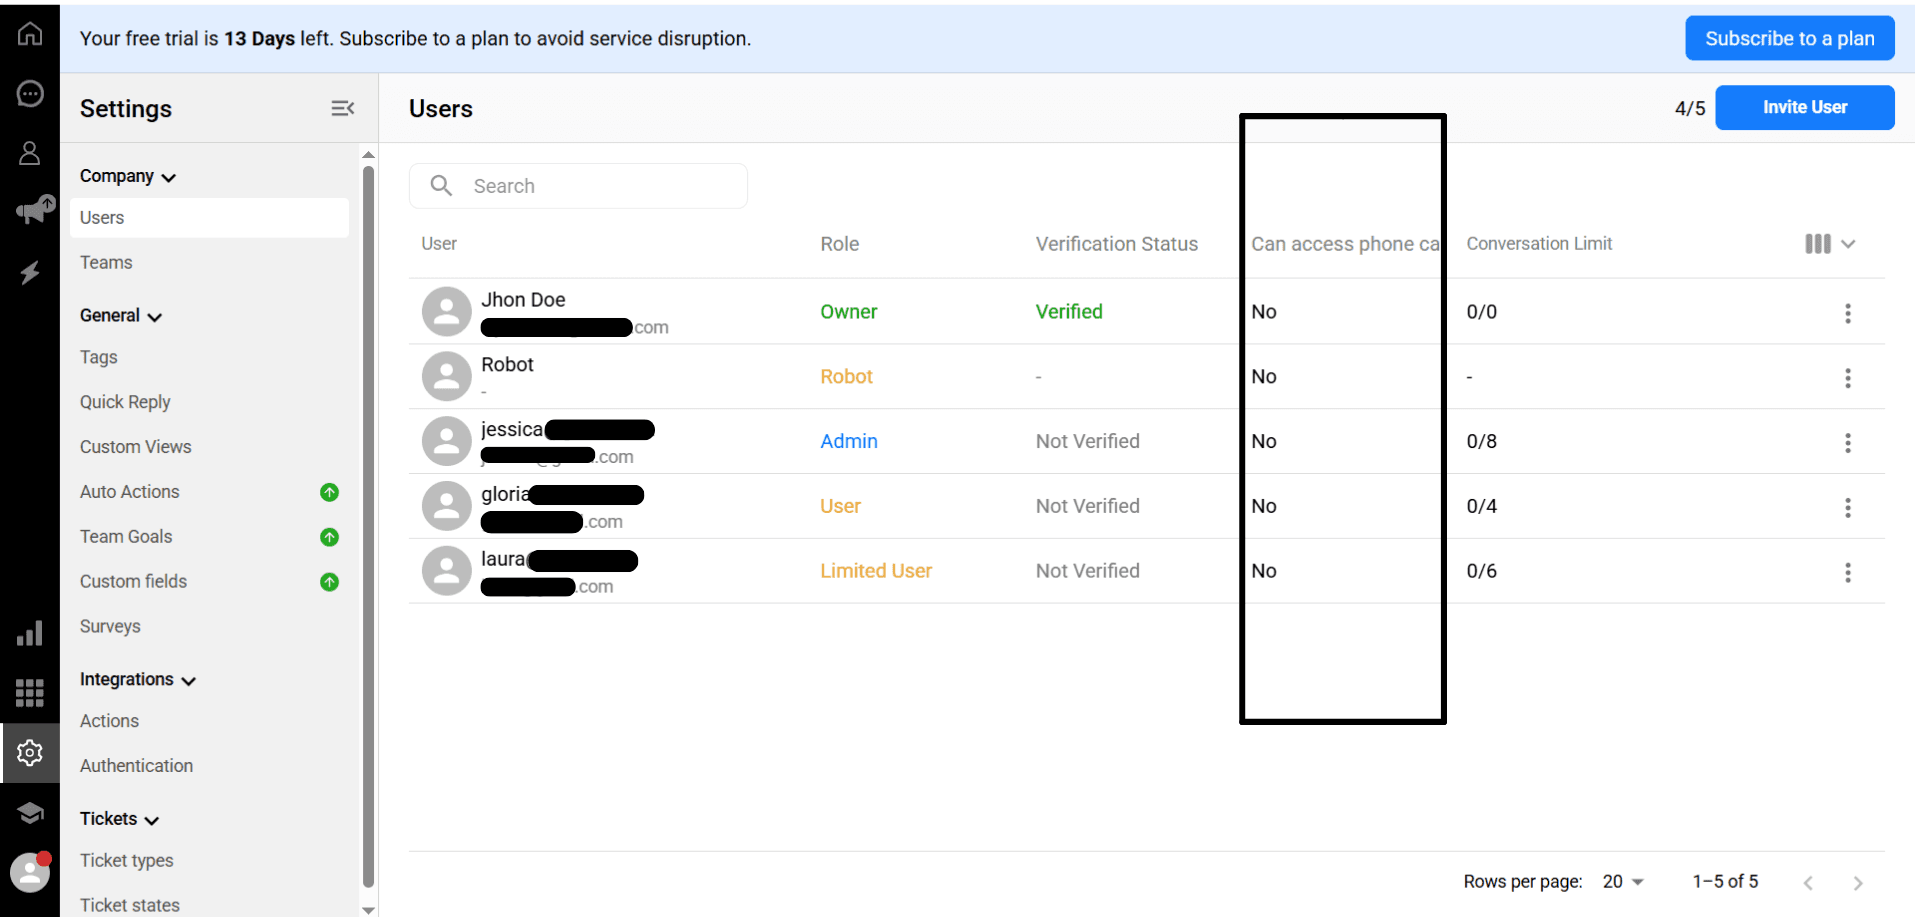
Phone Call Permission
You can see whether users have permission to answer incoming phone calls on the system.
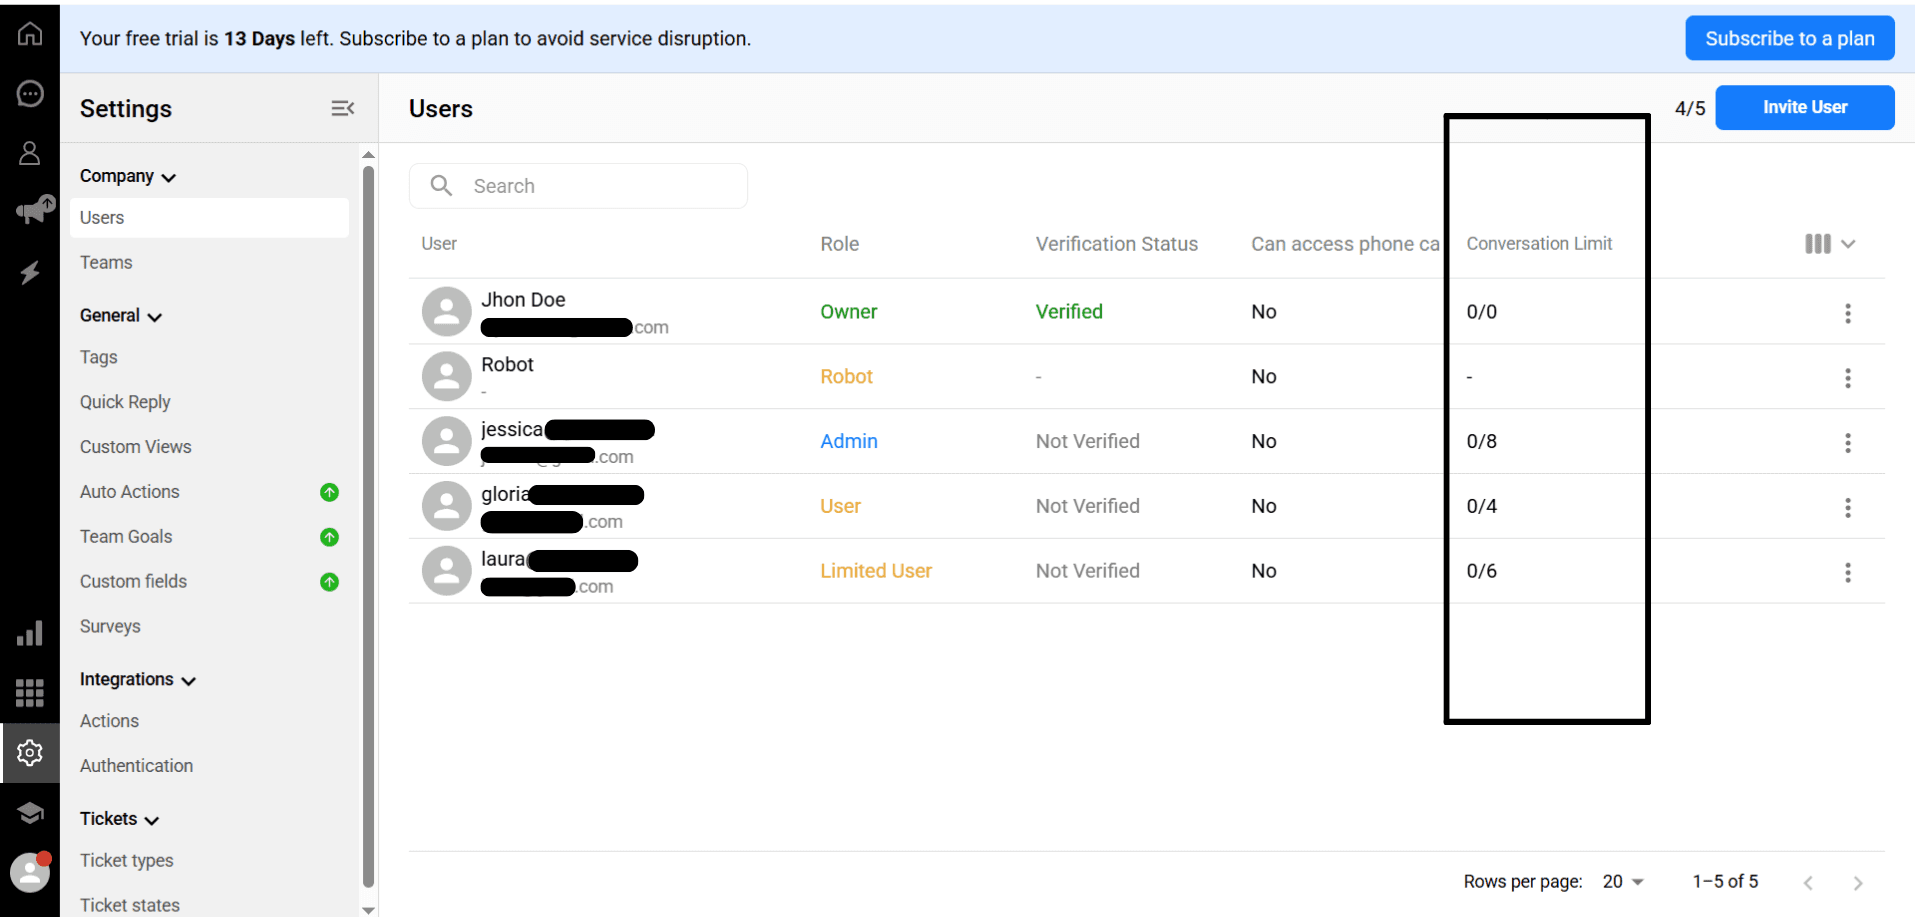
Conversation Limit and Active Conversation
It determines how many chats the user can respond to at the same time. You can also see how many chats are currently open for the user.
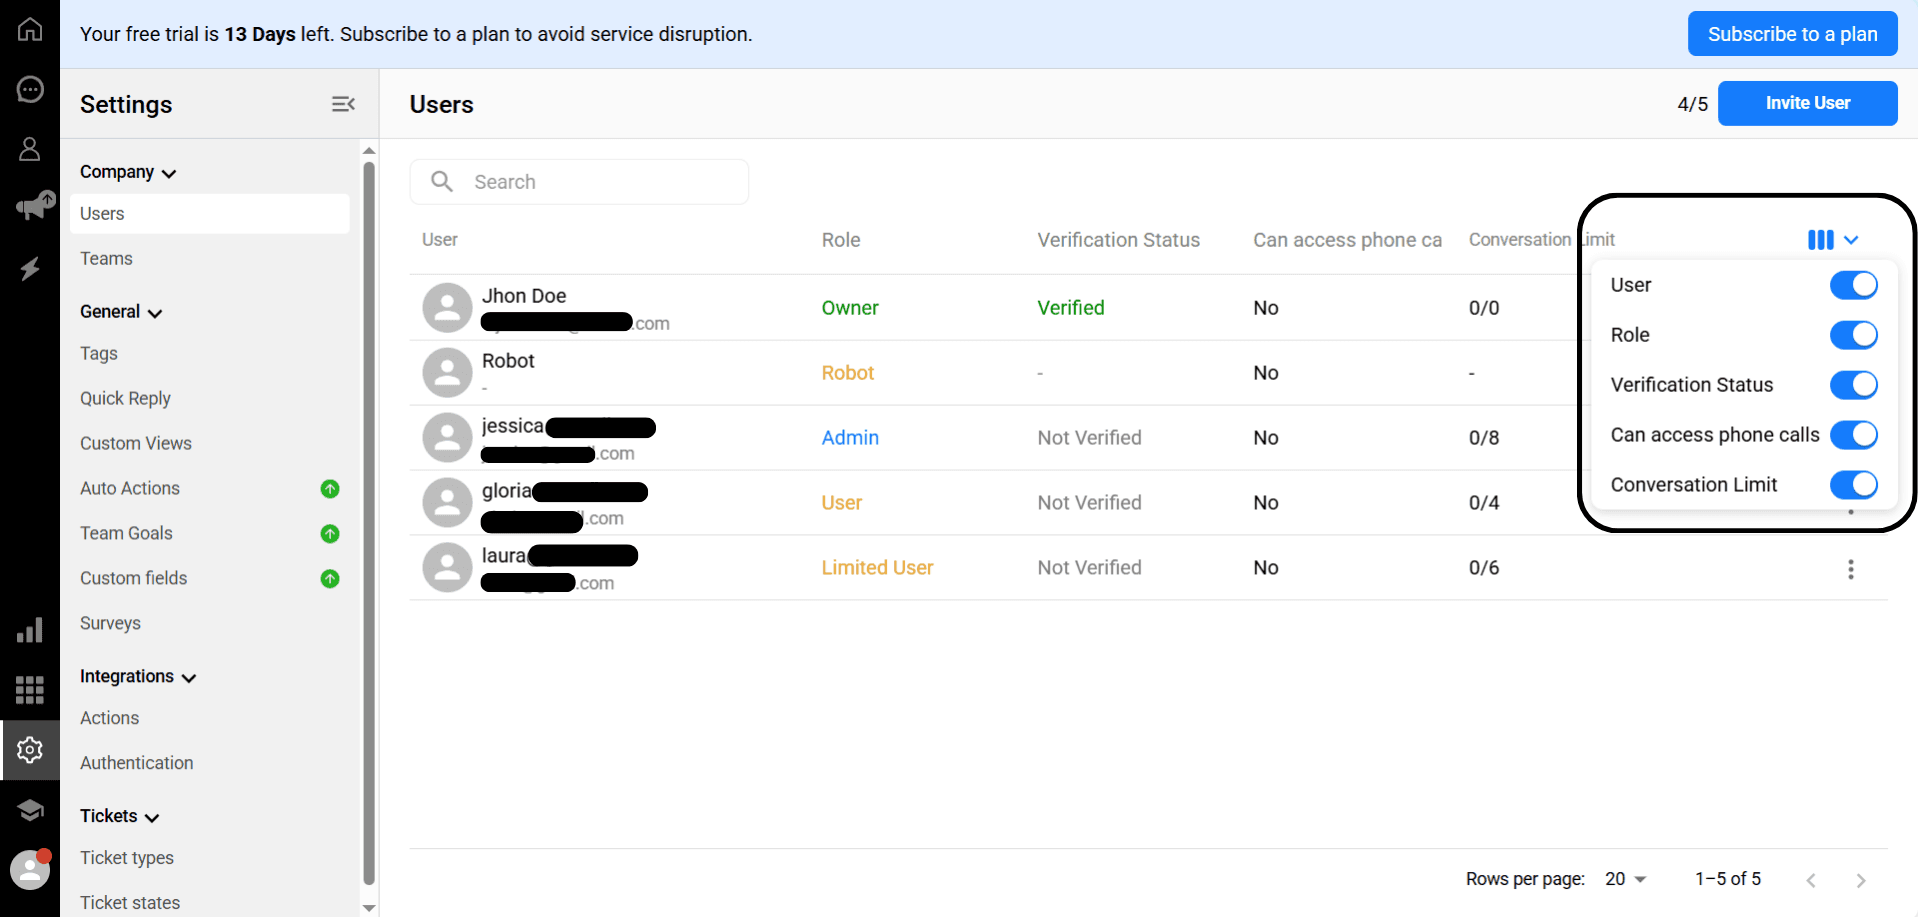
Customizing the User List View
You can customize the list view by opening and closing the columns in the user list as you wish.
For example:
When you close the Role column, users roles will no longer be displayed in the list.
Similarly, you can close or reopen columns such as verification status, call permission, and chat limit.
This way, you can create a simpler user list by viewing only the information you need.
Inviting and Onboarding New Users
Steps to Invite a New User:
-> Go to Settings and select the Users section.
-> Click the Invite User button.

-> Add Email➝ Enter the company email address of the person you want to add as a user.
-> Role Selection➝ Determine the role the user will have.
-> Send Invitation ➝ Complete the user addition process by clicking the “Invite” button.
-> Use "Add More" to invite multiple members simultaneously.
Onboarding: The invite must click "Join The Team" in their email. They will then set up their profile or log in with an existing account to gain access.
Note that in this photo, we have selected “User” as the role.
What to Do When You Receive an Invitation Email
-> Check your email inbox
Open the Qpien invitation email sent to you.
If you can't find it in your inbox, also check your “Spam / Junk” folder.
-> Click on the invitation link
Click on the “Join The Team” button in the email to go to the redirect page.

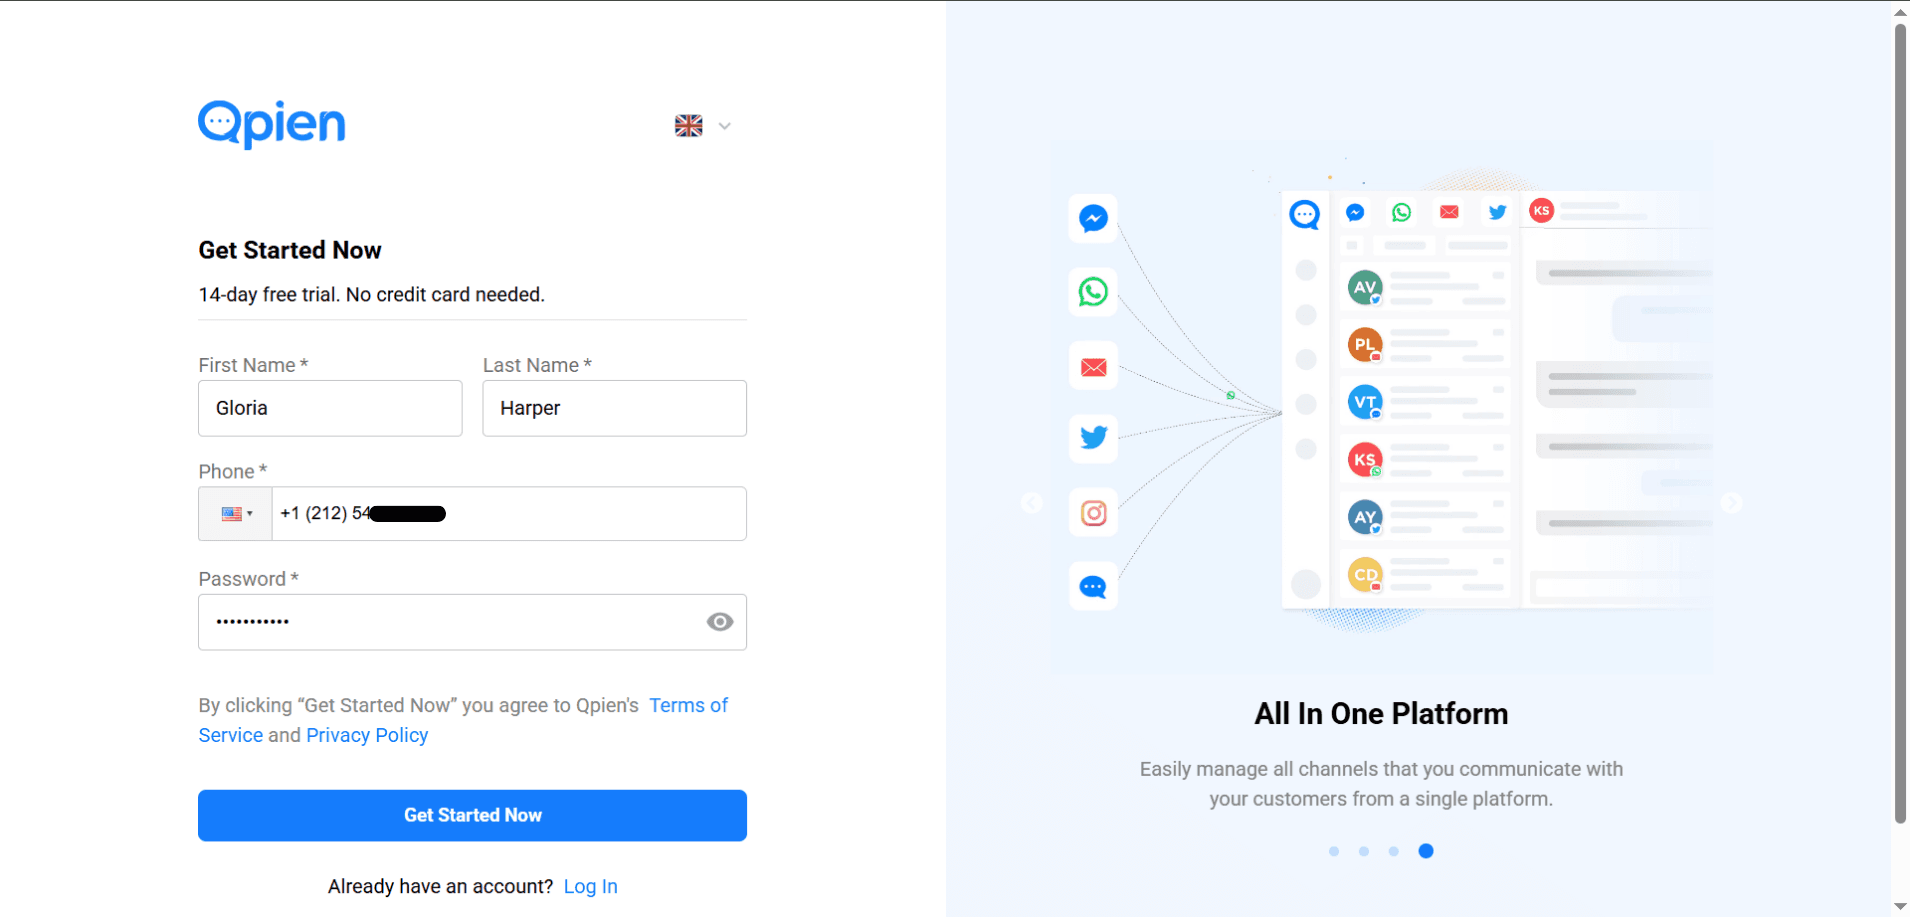
Complete your account information
If you don't have a Qpien account yet, enter your first name, last name, phone number, and password to open your free Qpien account.
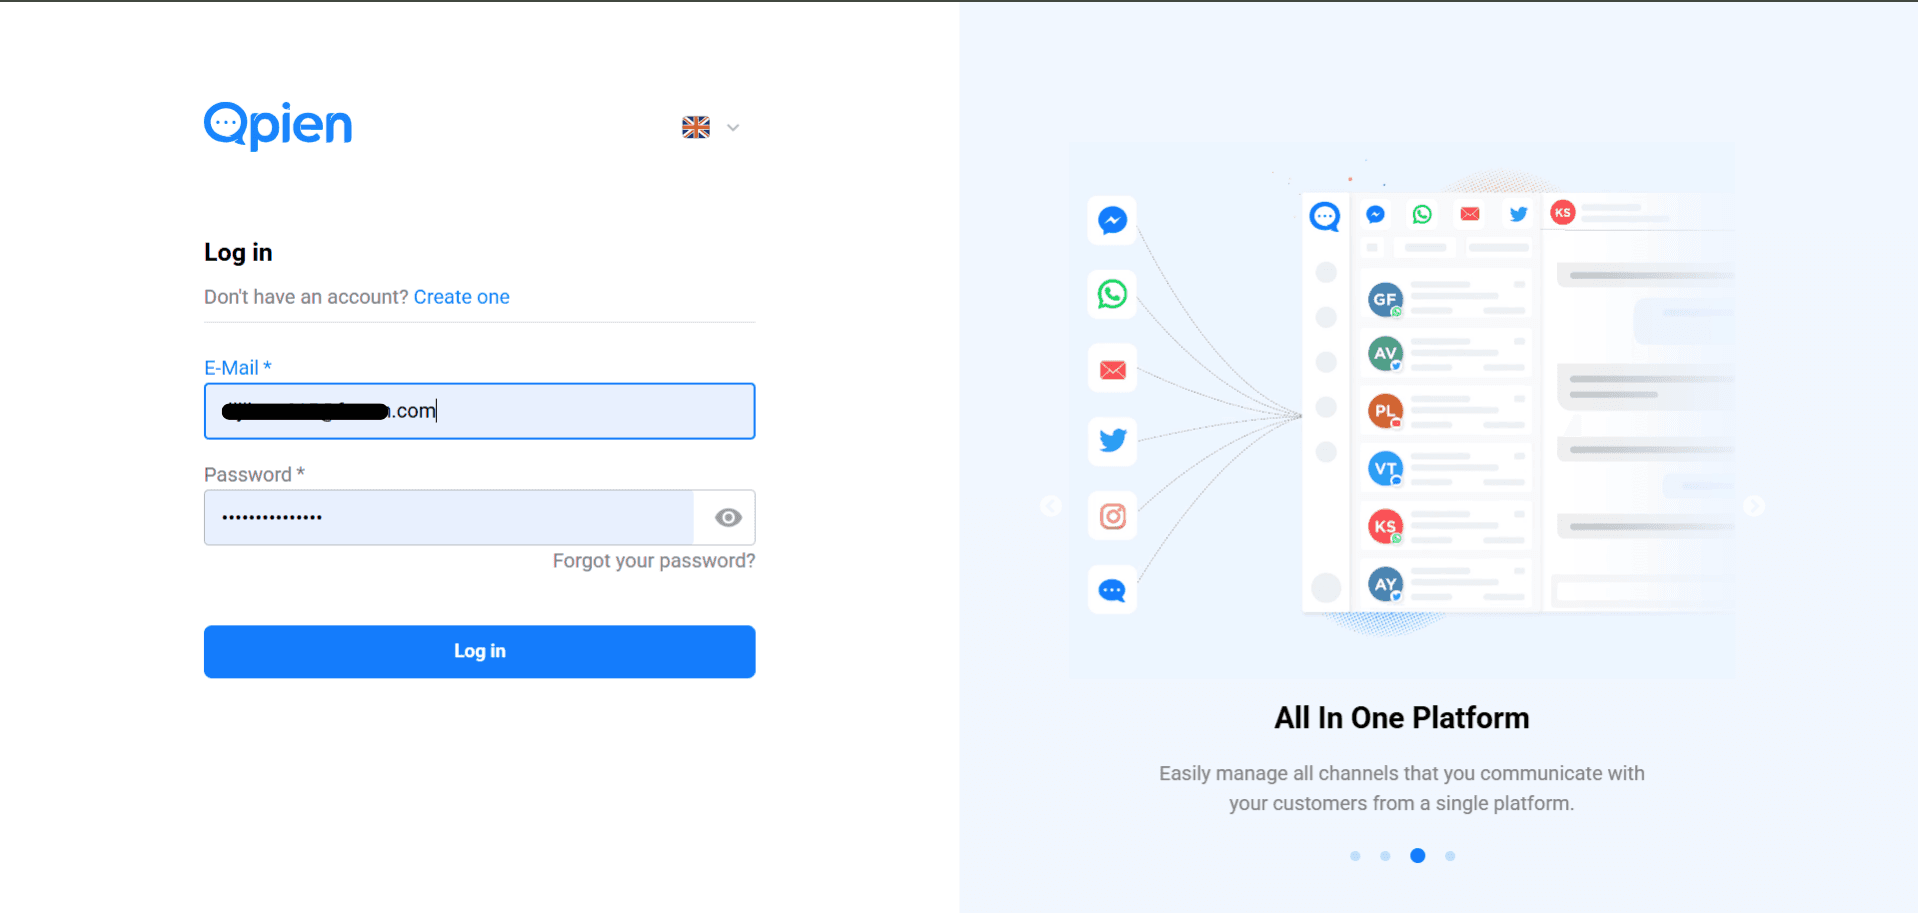
If you already have a Qpien account, you can log in with your existing information.
Then click the “Log In” button to log in to Qpien.
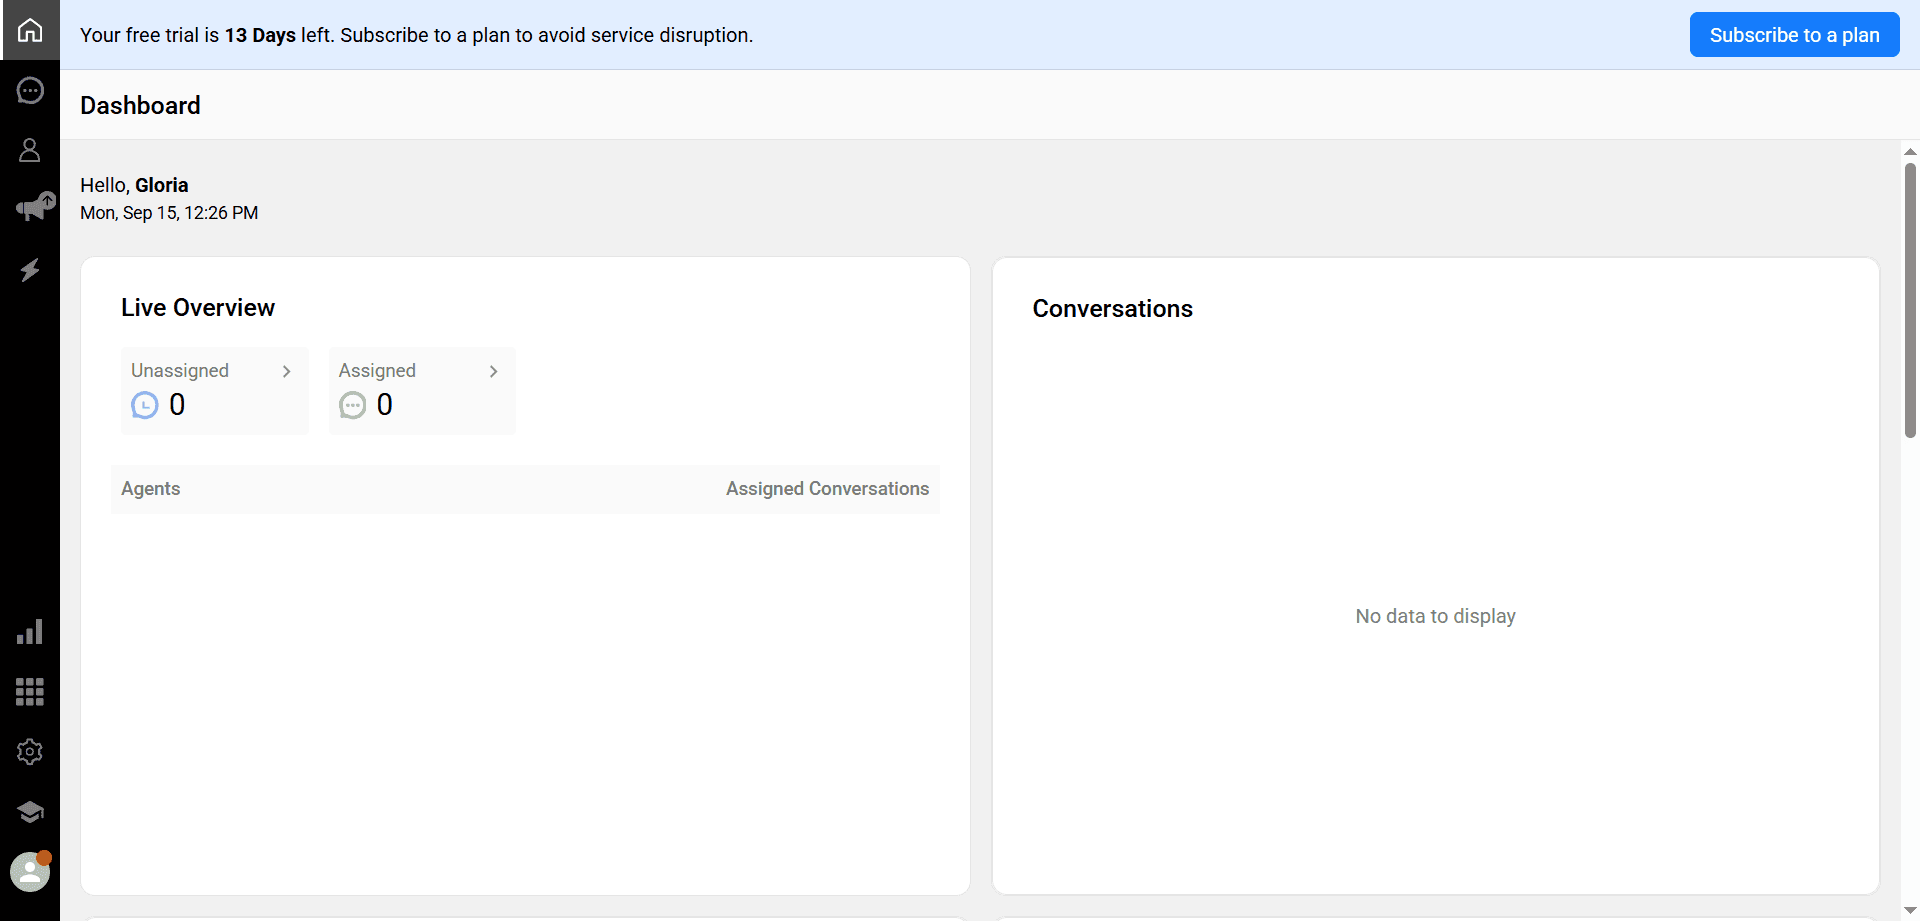
Your account has now been created and you have logged into Qpien with user role.
You can now use the Qpien panel, view messages, and reply to them according to the permissions assigned to you.
💡Roles consist of 3 different categories:
Admin:
Has the same privileges as the account owner. All access is permitted and all changes can be made.
User:
Can only view the Chat Page and Dashboard.
Sees all messages sent to their own team.
Can assign chats to themselves or others.
Limited User:
Similar to the User role, can only see the Chat Page and Dashboard.
However, can only respond to chats assigned to them.
Cannot view chats in the pool (chats not yet assigned to anyone).
💡➝ You can open a new row with the “Add more” option and enter the email and role information for multiple people at the same time.
💡➝ If the user's email address is verified, they can log in.
➝ If the email is not verified, the user cannot log in to the system.
Deleting Users
Click the Settings icon in the menu to go to the page where users are listed.
Click on the three dots (⋮) icon located on the far right of the row containing the user you want to delete.
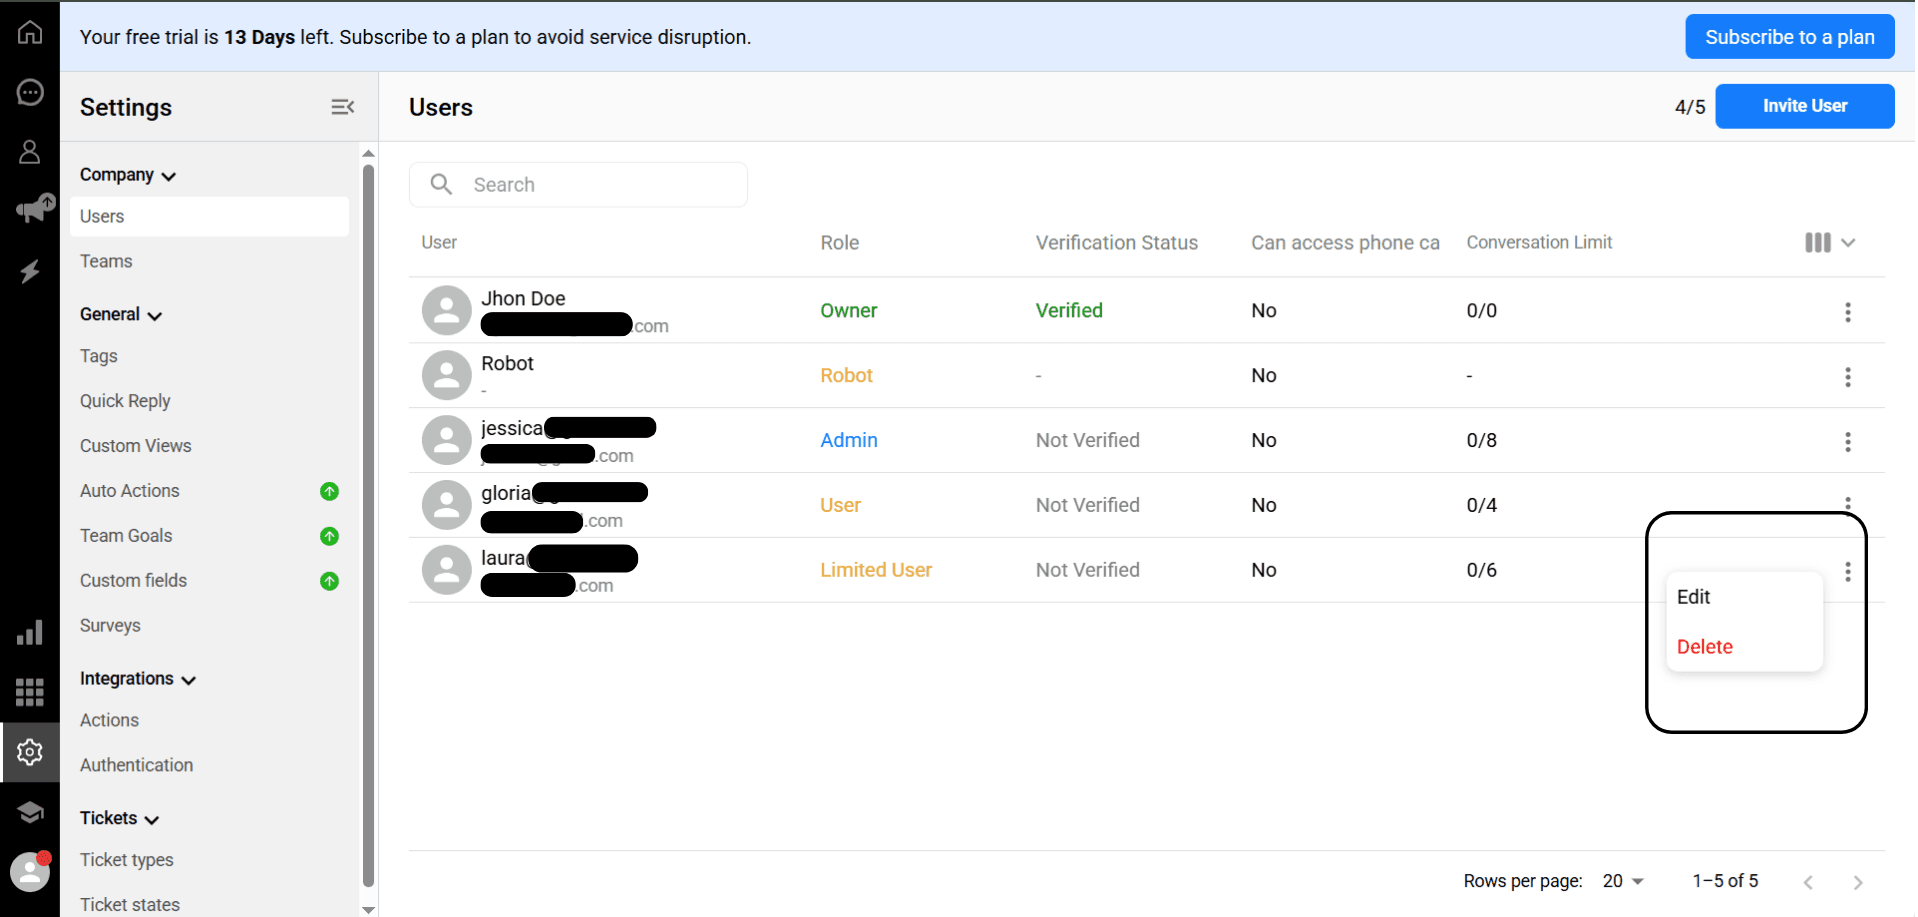
We click the “Delete” option from the list that opens.
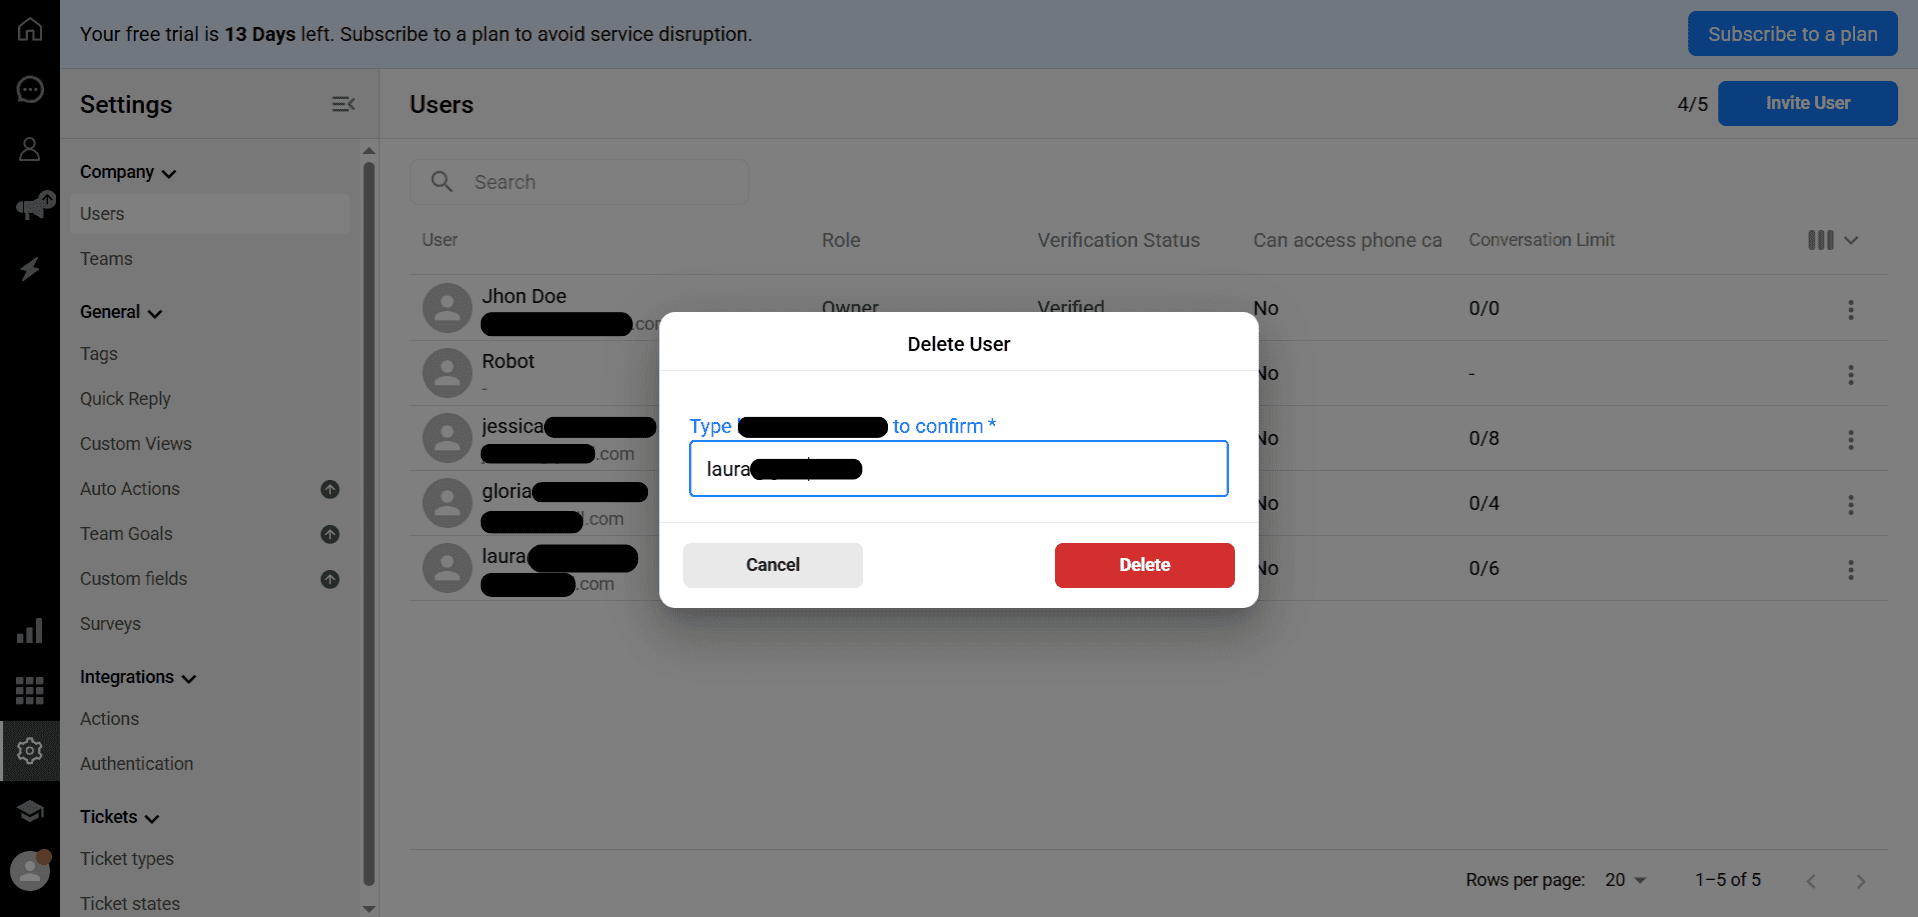
The window that appears will display the confirmation text that needs to be entered. We enter this text into the box.
Finally, we remove the user from the system by clicking the “Delete” button.
💡You can also edit users by clicking the Edit button here.
User Editing
Click the Settings icon in the menu to go to the page where we list users.
On the row containing the user we want to edit, we click on the three dots icon located on the far right.
From the list that appears, we click on the “Edit” option.
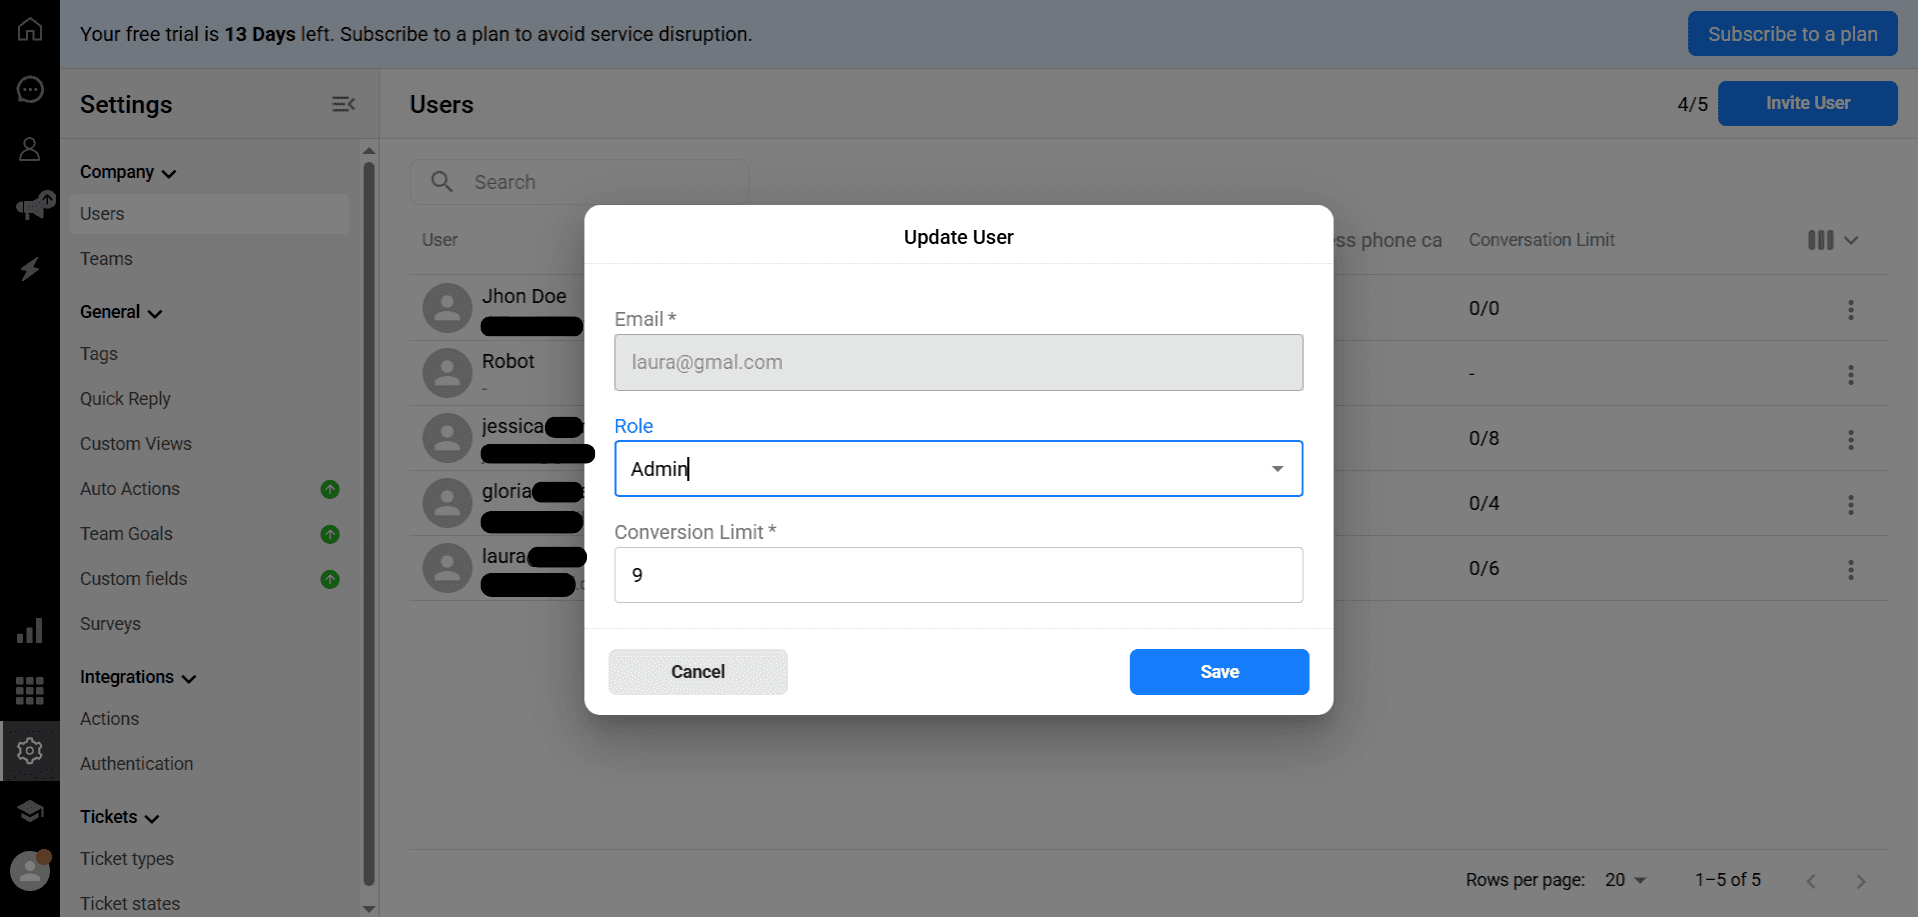
From here, you can update the user's role and conversion limit information.
Finally, click the “Save” button to confirm the changes.
User Roles
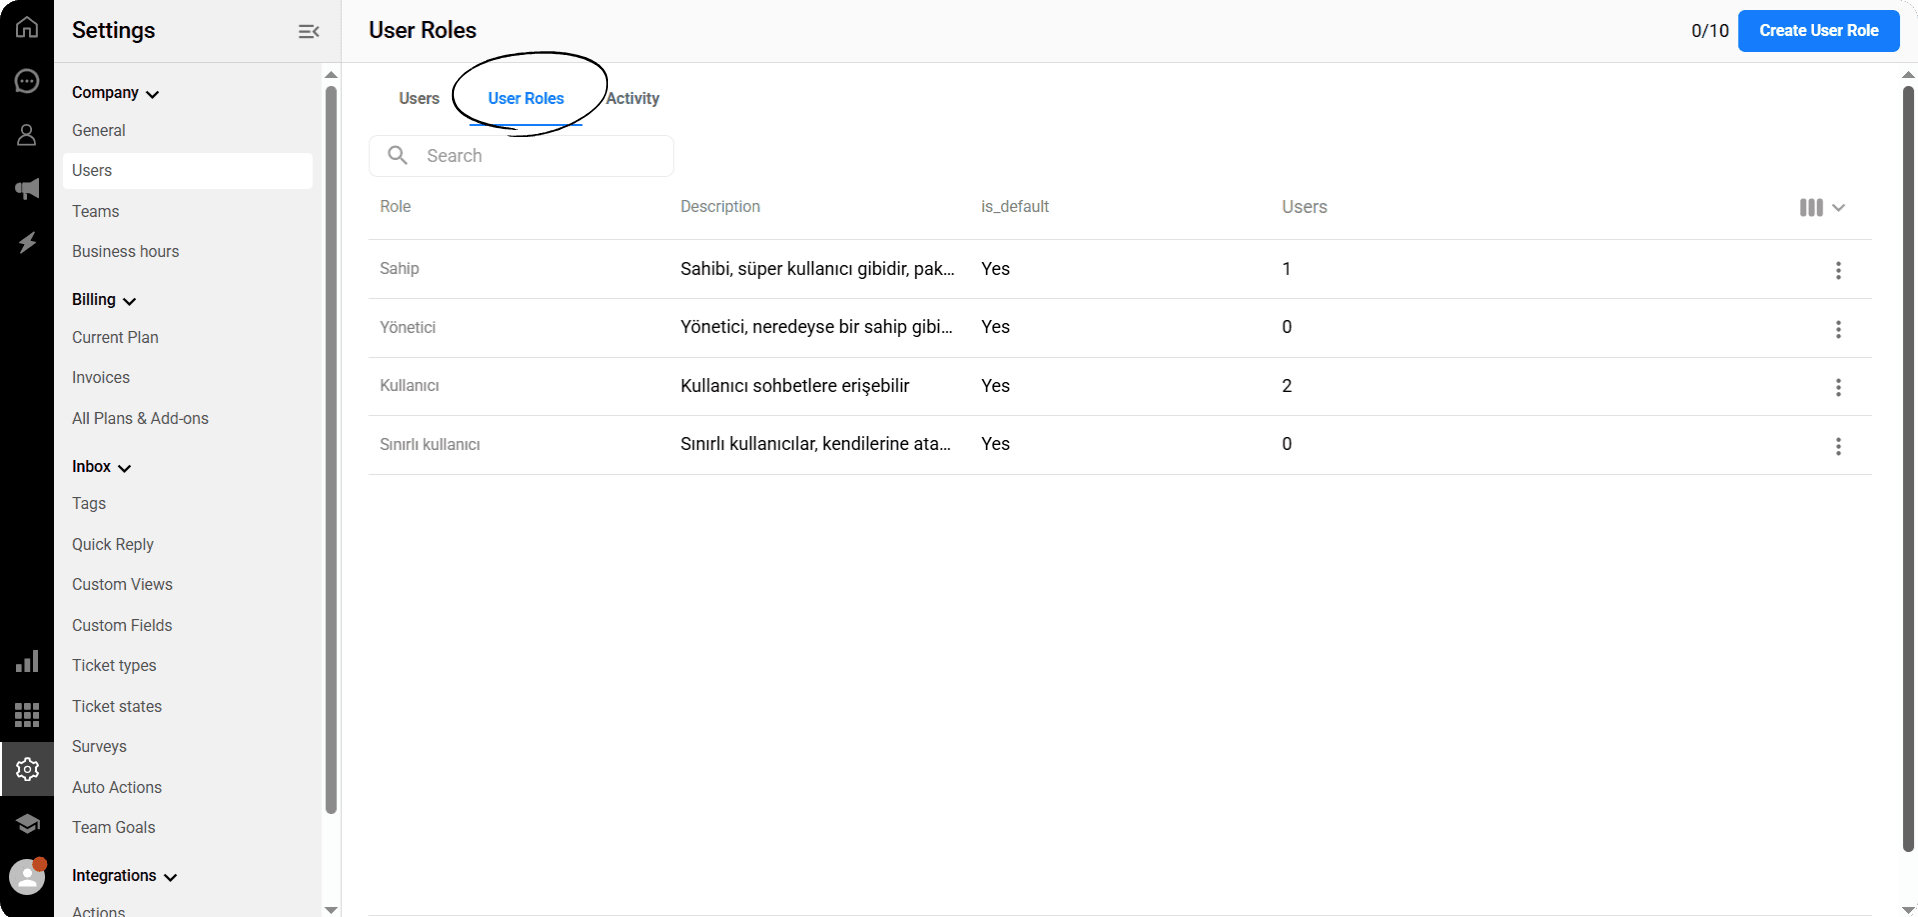
In this section, you can view a list of existing user roles. For each role, you can see its name, description, whether it is a default role, and the number of users assigned to it.
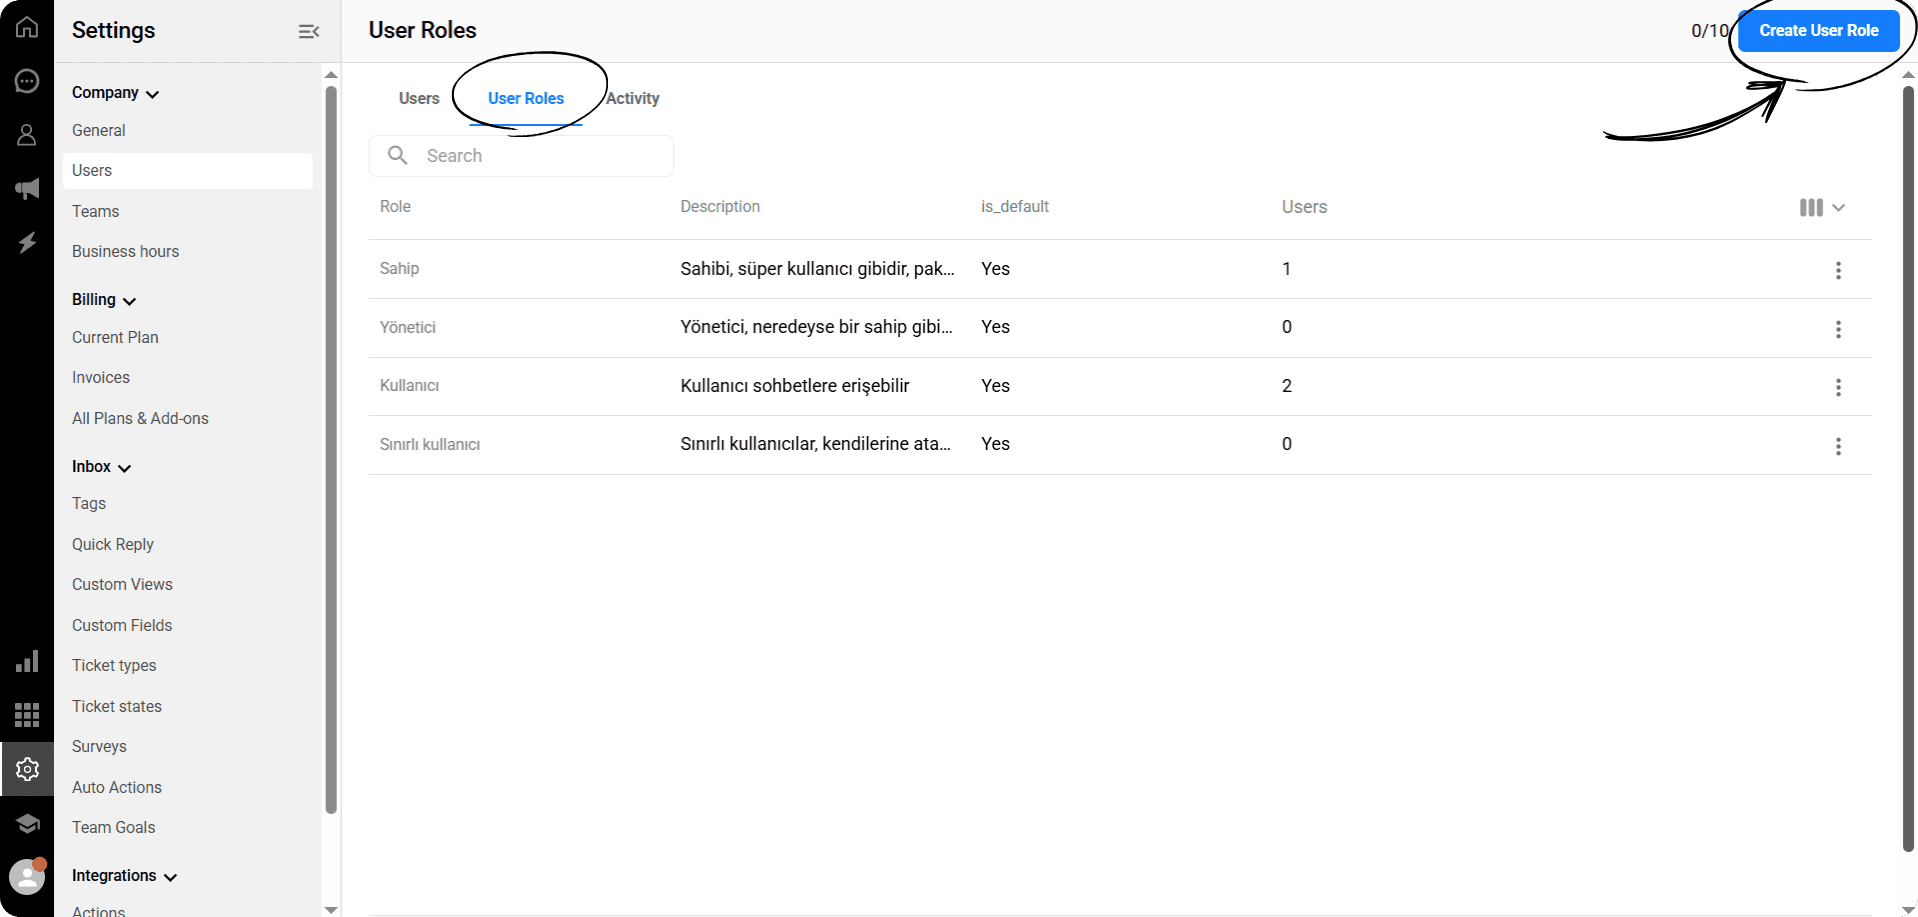
If you want to assign a role with custom-defined permissions to a user, click the "Create User Role" button.

In the panel that opens, fill in the Name and Description fields.
Then, from the list of available permissions, select the ones you want to include in this role.
Finally, click the "Save" button to complete the process.
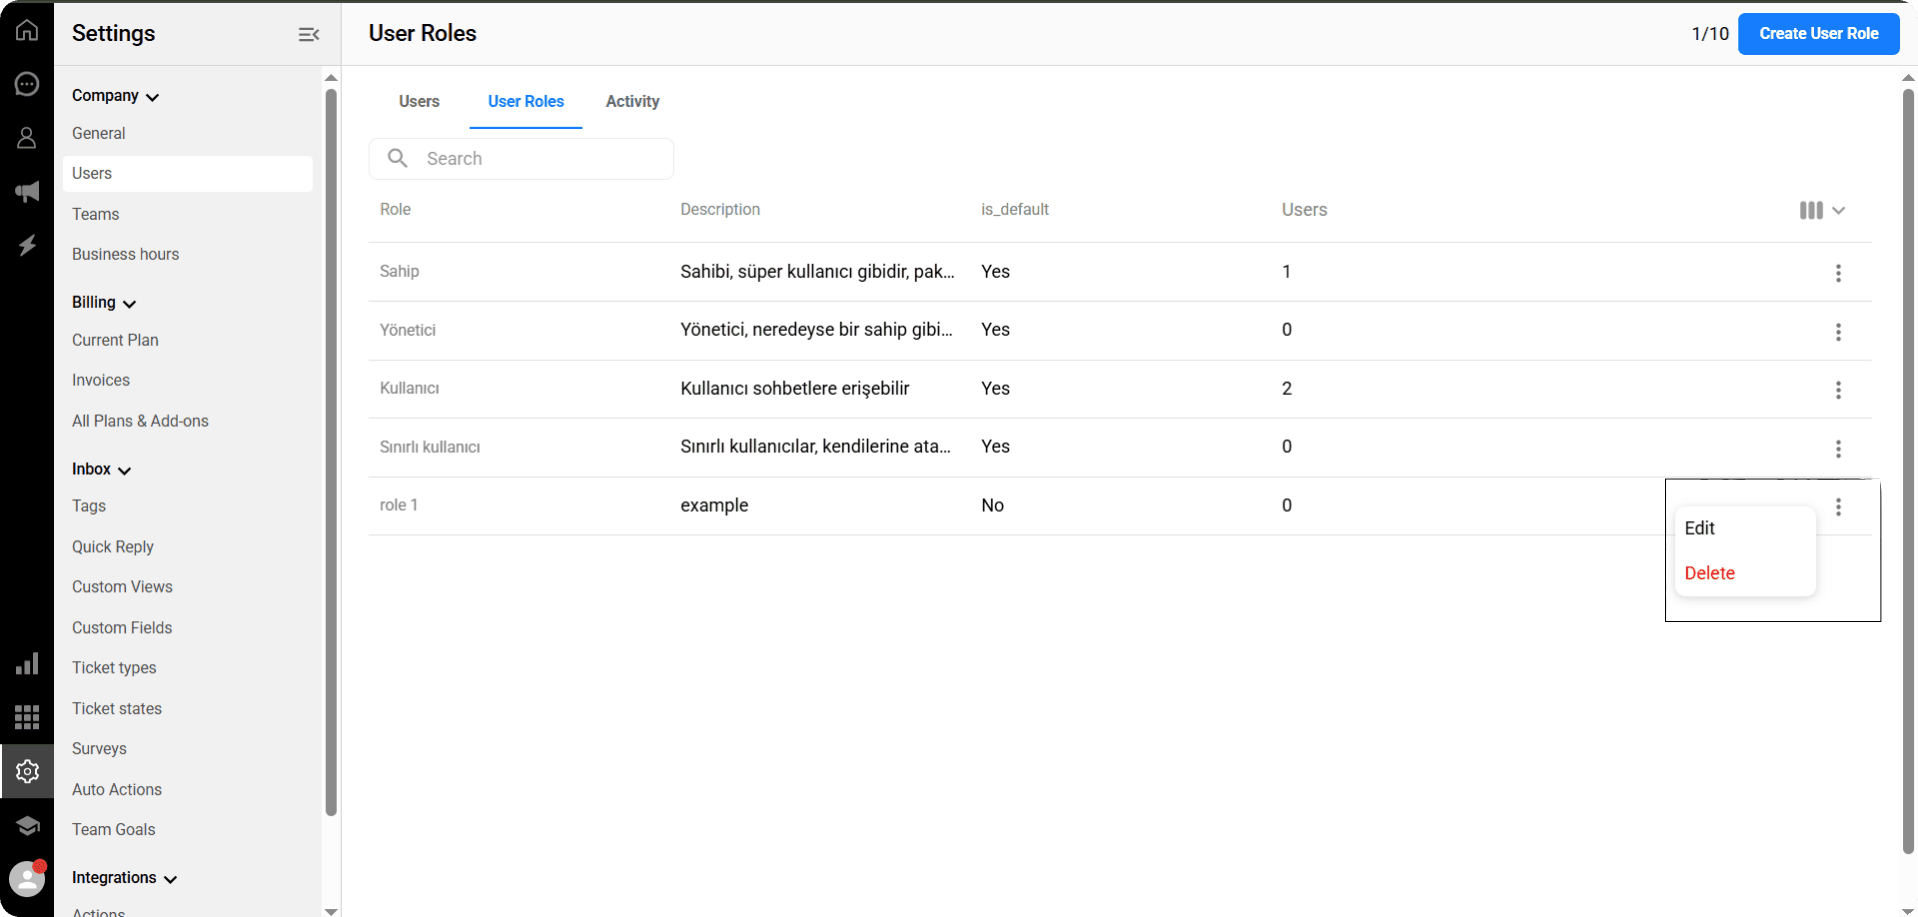
If you want to edit or delete the example role named Role 1, click the three-dot (⋮) button on the far right.
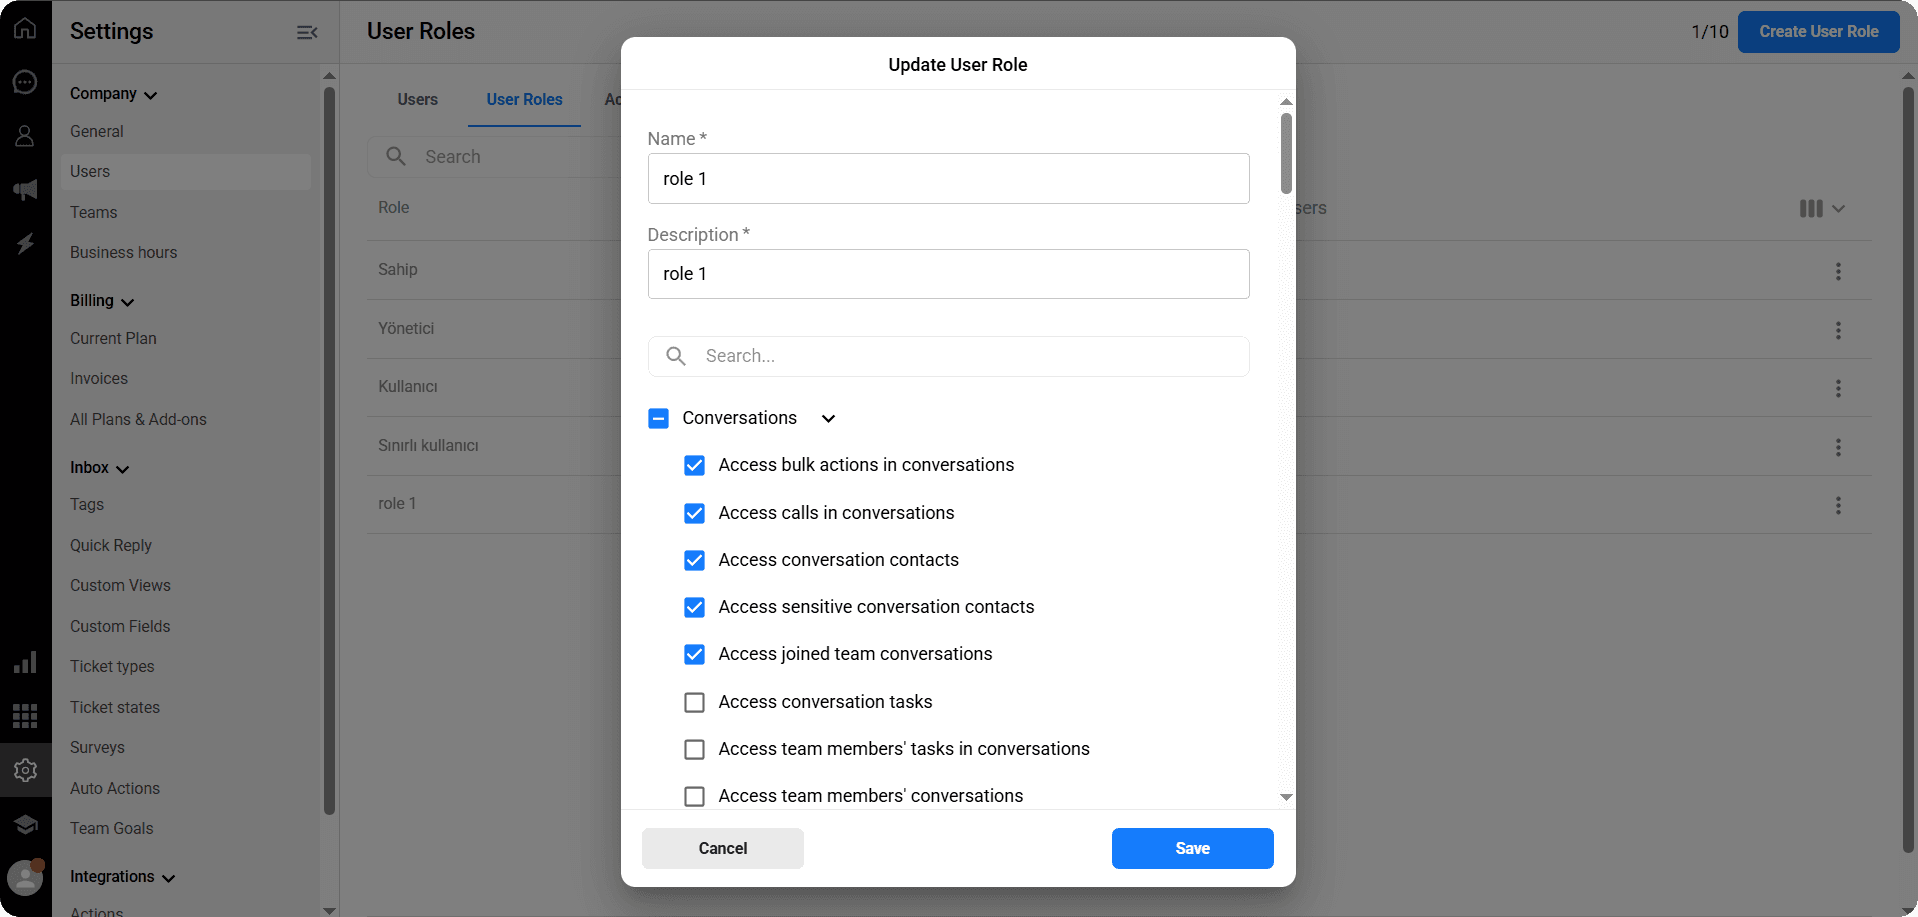
When you click the Edit button, the panel shown in the image will open.
Make the changes you want in this panel.
Then, click the "Save" button to save your changes.
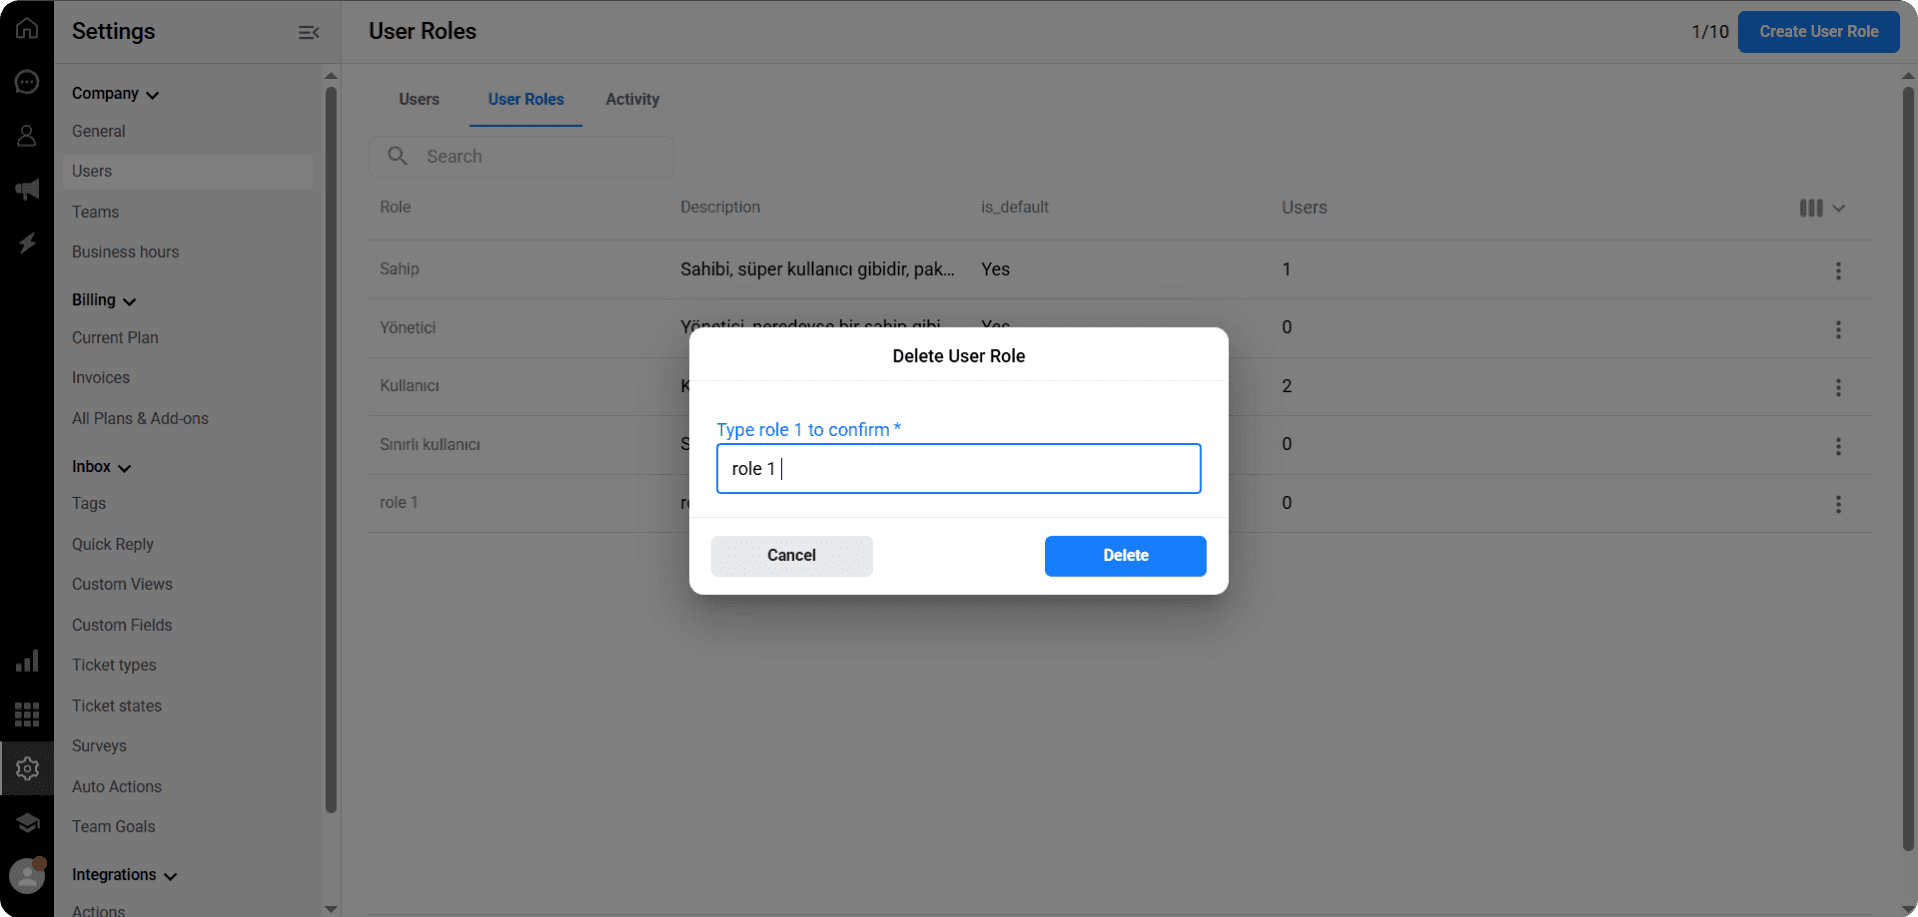
When you click the Delete button, the panel shown in the image will open.
Enter the required confirmation text in the panel.
Then, click the "Delete" button to remove the role you want to delete.
Activity
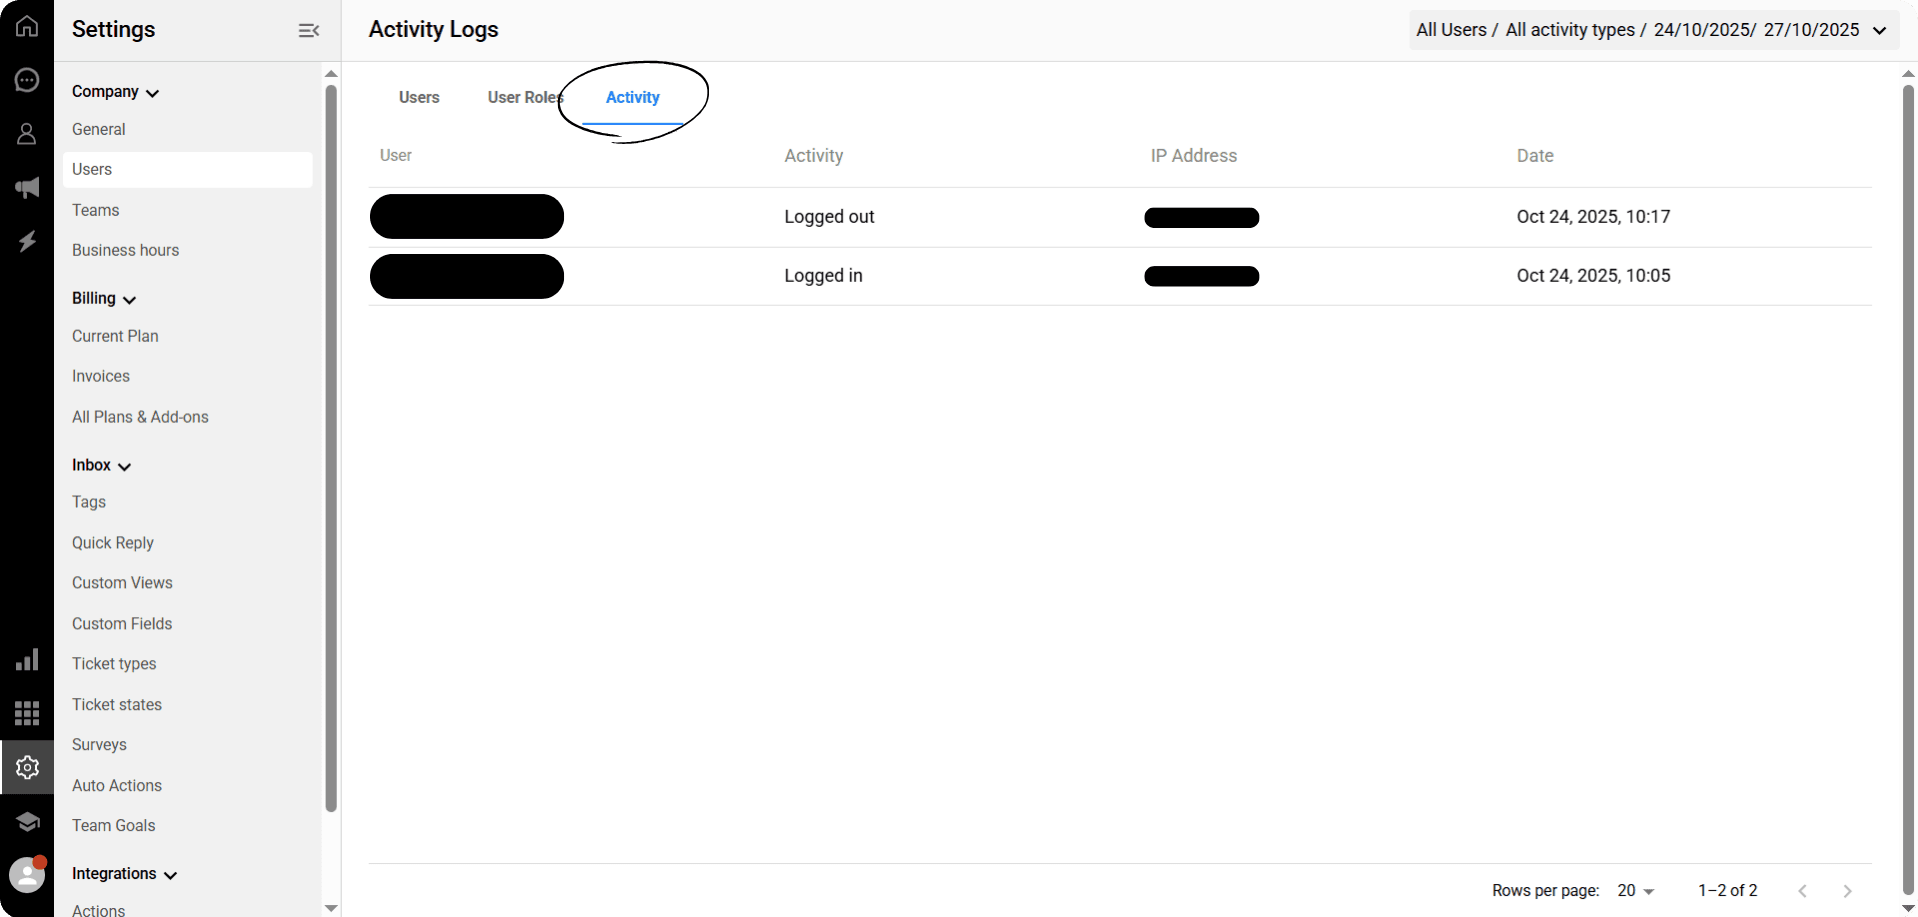
In the Activity section, you can view each user’s actions along with their IP address and the date and time when the activity was performed.
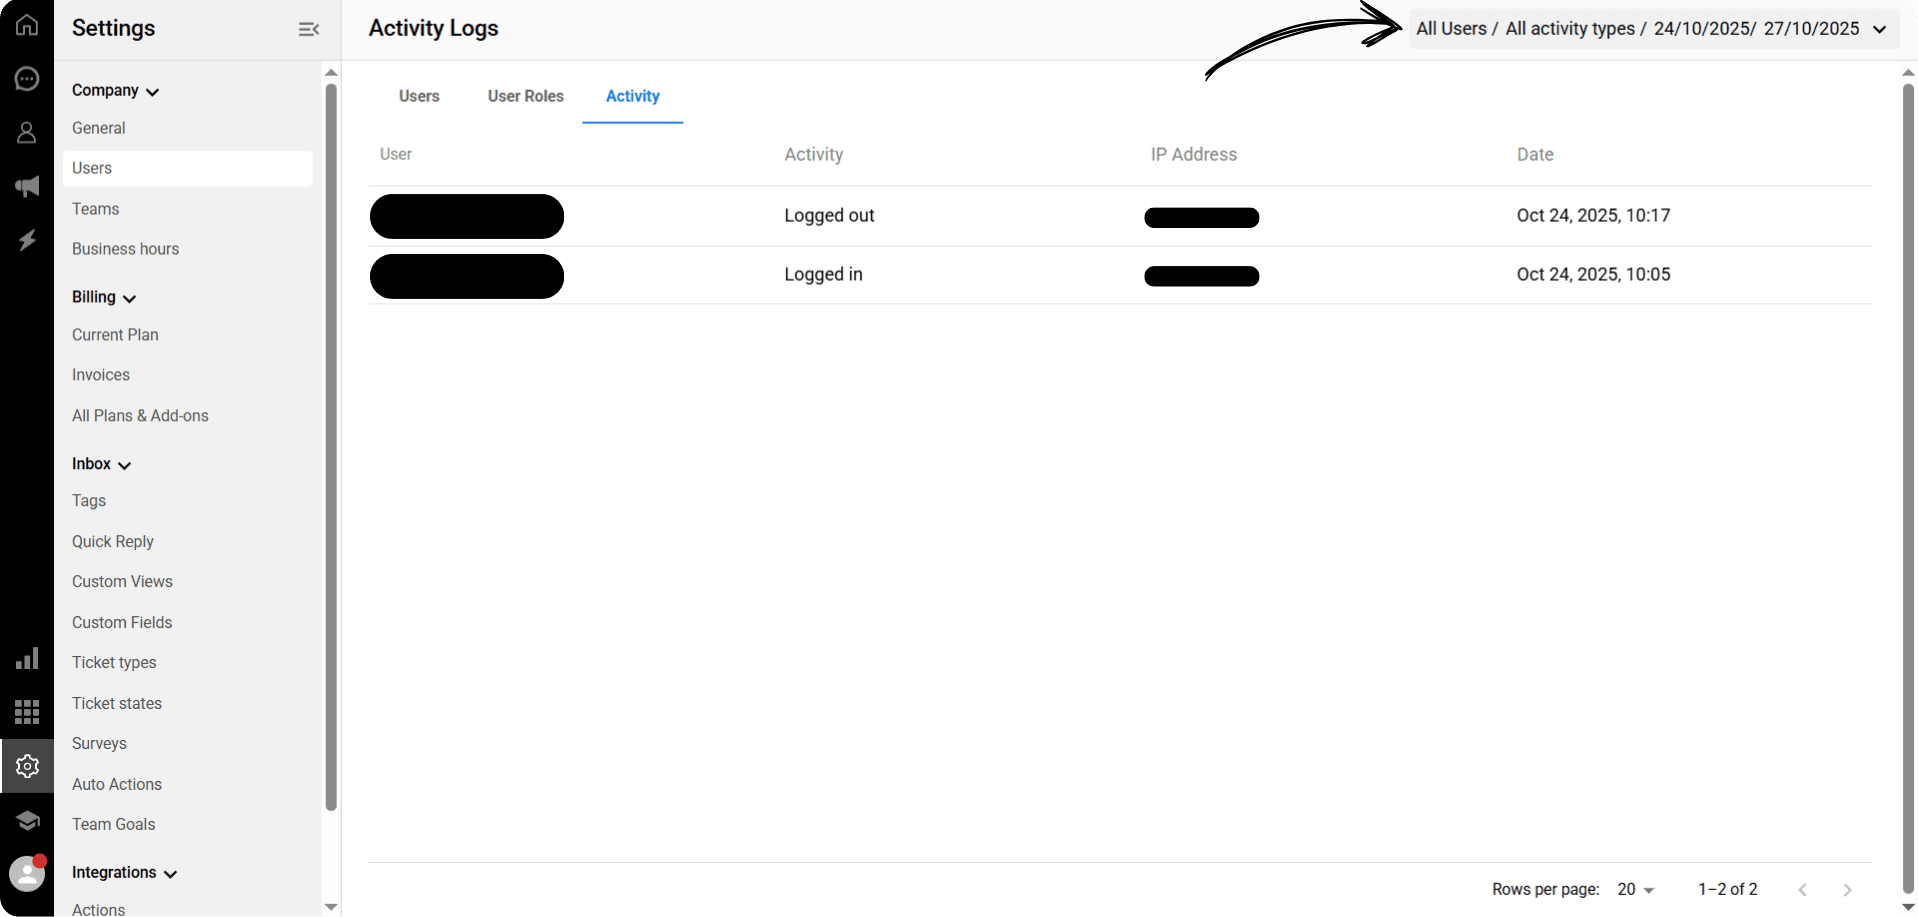
If you want to apply filters, click the Filter button in the top right corner.
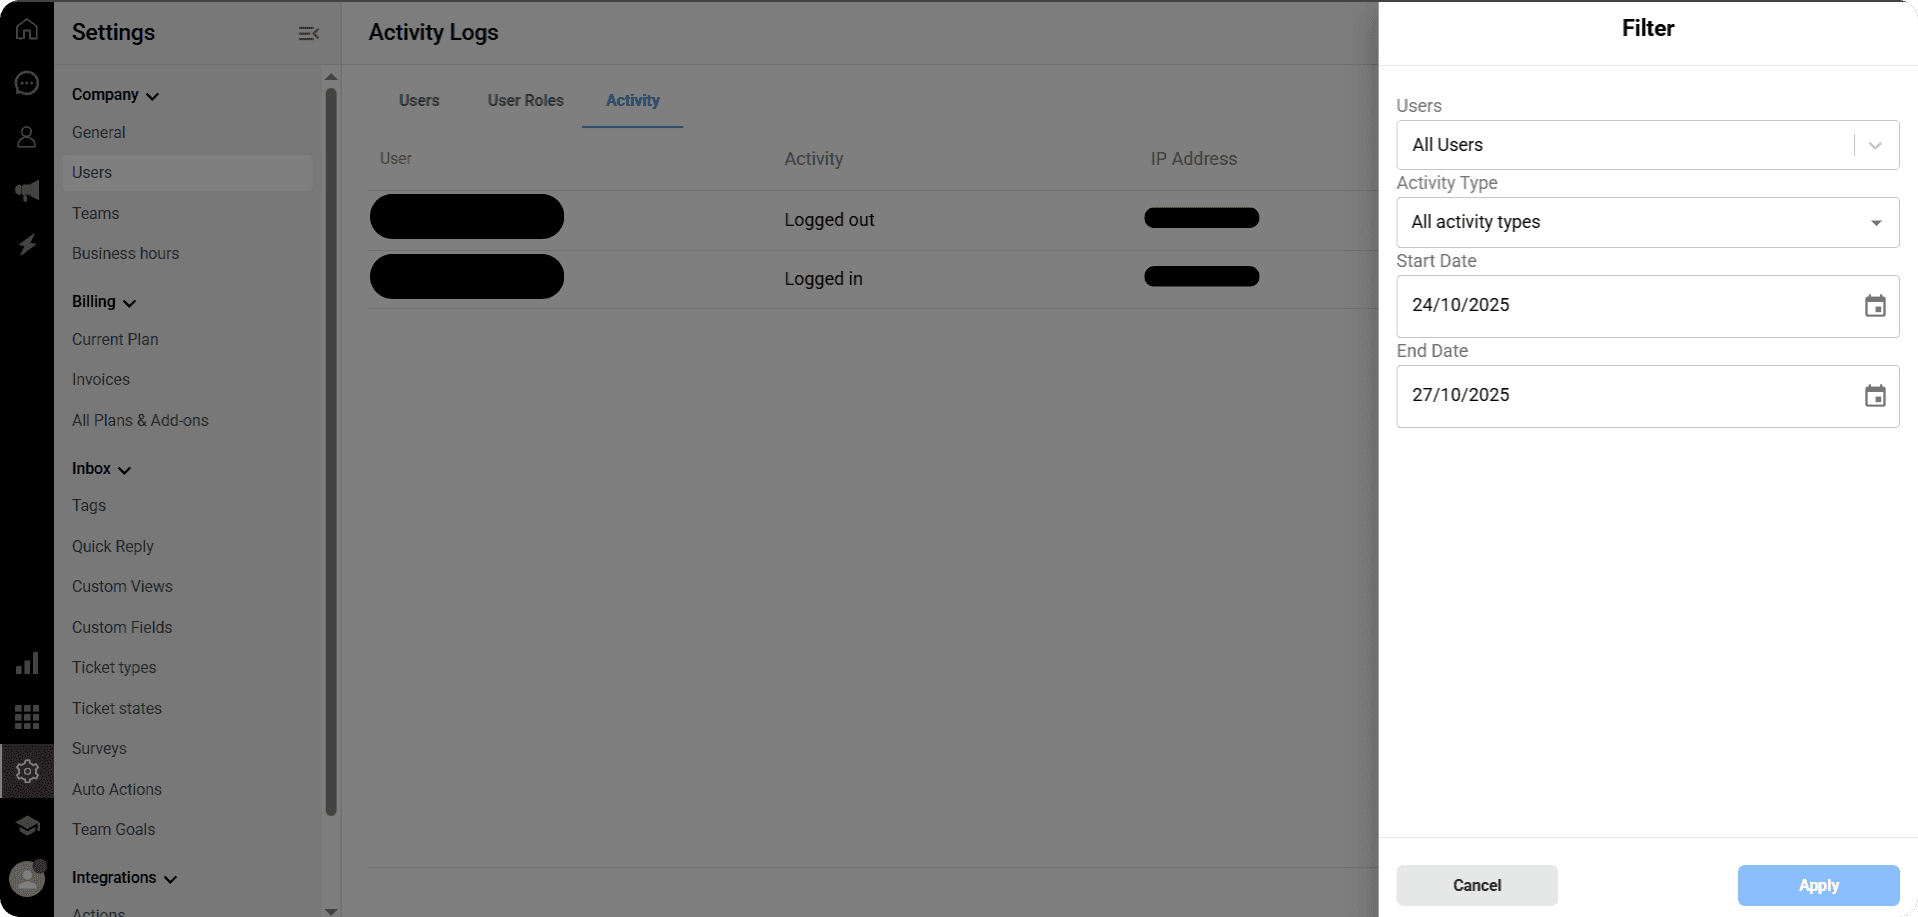
From the filter panel, you can filter the activity list by user, activity type, or a specific start and end date range to display the activities accordingly.
Efficient team management is the backbone of superior customer success. Qpien provides administrators with robust tools to invite team members, define granular access permissions, and monitor system activities. This guide covers everything from adding new users to creating custom roles and tracking audit logs.
Get To Know The "Roles"
Before inviting your team, it is essential to understand the access levels available:
Admin: Full access to all settings, billing, and management tools.
User: Can access the Dashboard and Chat Page. They can view all messages in their assigned teams and manage assignments.
Limited User: Restricted to viewing and responding only to chats specifically assigned to them. They cannot see the general message pool.
Manage The Users Dashboard
In this section, you can view the list of people who use the system with you. The user list provides a high-level overview of your team's status and capacity:
Verification Status
You can check whether users' email addresses have been verified or not.
Unverified users cannot log in.
Phone Call Permission
You can see whether users have permission to answer incoming phone calls on the system.
Conversation Limit and Active Conversation
It determines how many chats the user can respond to at the same time. You can also see how many chats are currently open for the user.
Customizing the User List View
You can customize the list view by opening and closing the columns in the user list as you wish.
For example:
When you close the Role column, users roles will no longer be displayed in the list.
Similarly, you can close or reopen columns such as verification status, call permission, and chat limit.
This way, you can create a simpler user list by viewing only the information you need.
Inviting and Onboarding New Users
Steps to Invite a New User:
-> Go to Settings and select the Users section.
-> Click the Invite User button.
-> Add Email➝ Enter the company email address of the person you want to add as a user.
-> Role Selection➝ Determine the role the user will have.
-> Send Invitation ➝ Complete the user addition process by clicking the “Invite” button.
-> Use "Add More" to invite multiple members simultaneously.
Onboarding: The invite must click "Join The Team" in their email. They will then set up their profile or log in with an existing account to gain access.
Note that in this photo, we have selected “User” as the role.
What to Do When You Receive an Invitation Email
-> Check your email inbox
Open the Qpien invitation email sent to you.
If you can't find it in your inbox, also check your “Spam / Junk” folder.
-> Click on the invitation link
Click on the “Join The Team” button in the email to go to the redirect page.
Complete your account information
If you don't have a Qpien account yet, enter your first name, last name, phone number, and password to open your free Qpien account.
If you already have a Qpien account, you can log in with your existing information.
Then click the “Log In” button to log in to Qpien.
Your account has now been created and you have logged into Qpien with user role.
You can now use the Qpien panel, view messages, and reply to them according to the permissions assigned to you.
💡Roles consist of 3 different categories:
Admin:
Has the same privileges as the account owner. All access is permitted and all changes can be made.
User:
Can only view the Chat Page and Dashboard.
Sees all messages sent to their own team.
Can assign chats to themselves or others.
Limited User:
Similar to the User role, can only see the Chat Page and Dashboard.
However, can only respond to chats assigned to them.
Cannot view chats in the pool (chats not yet assigned to anyone).
💡➝ You can open a new row with the “Add more” option and enter the email and role information for multiple people at the same time.
💡➝ If the user's email address is verified, they can log in.
➝ If the email is not verified, the user cannot log in to the system.
Deleting Users
Click the Settings icon in the menu to go to the page where users are listed.
Click on the three dots (⋮) icon located on the far right of the row containing the user you want to delete.
We click the “Delete” option from the list that opens.
The window that appears will display the confirmation text that needs to be entered. We enter this text into the box.
Finally, we remove the user from the system by clicking the “Delete” button.
💡You can also edit users by clicking the Edit button here.
User Editing
Click the Settings icon in the menu to go to the page where we list users.
On the row containing the user we want to edit, we click on the three dots icon located on the far right.
From the list that appears, we click on the “Edit” option.
From here, you can update the user's role and conversion limit information.
Finally, click the “Save” button to confirm the changes.
User Roles
In this section, you can view a list of existing user roles. For each role, you can see its name, description, whether it is a default role, and the number of users assigned to it.
If you want to assign a role with custom-defined permissions to a user, click the "Create User Role" button.
In the panel that opens, fill in the Name and Description fields.
Then, from the list of available permissions, select the ones you want to include in this role.
Finally, click the "Save" button to complete the process.
If you want to edit or delete the example role named Role 1, click the three-dot (⋮) button on the far right.
When you click the Edit button, the panel shown in the image will open.
Make the changes you want in this panel.
Then, click the "Save" button to save your changes.
When you click the Delete button, the panel shown in the image will open.
Enter the required confirmation text in the panel.
Then, click the "Delete" button to remove the role you want to delete.
Activity
In the Activity section, you can view each user’s actions along with their IP address and the date and time when the activity was performed.
If you want to apply filters, click the Filter button in the top right corner.
From the filter panel, you can filter the activity list by user, activity type, or a specific start and end date range to display the activities accordingly.
Try Qpien free for 14 days! 🎉
Ready to take control of all your support channels?
Empower your customer interactions with Qpien! Boost sales and elevate satisfaction with every conversation.
Try Qpien free for 14 days! 🎉
Ready to take control of all your support channels?
Empower your customer interactions with Qpien! Boost sales and elevate satisfaction with every conversation.
Try Qpien free for 14 days! 🎉
Ready to take control of all your support channels?
Empower your customer interactions with Qpien! Boost sales and elevate satisfaction with every conversation.