
Smart Inbox
Creating, Editing, and Deleting Tags
In Qpien, tags allow you to organize chats, customers, or campaigns into specific categories for more efficient and streamlined management.
Using tags correctly helps you filter customer chats and campaigns more easily.
From the main menu, click → Settings to access the settings page.
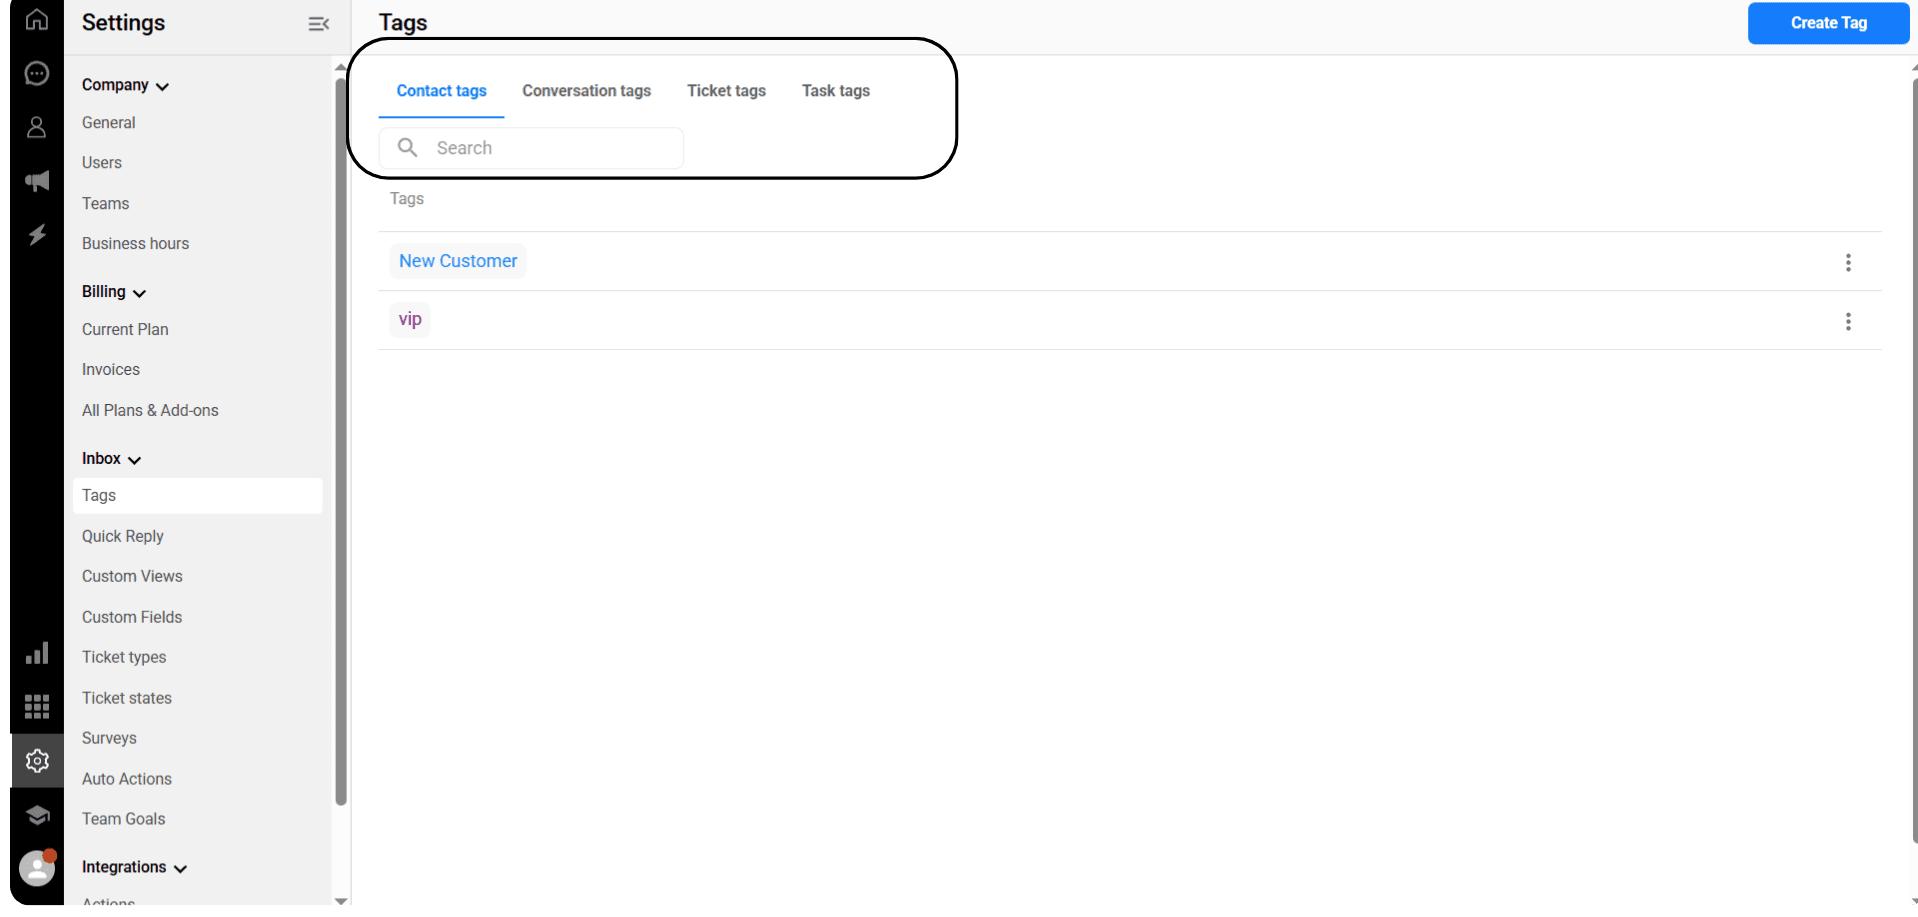
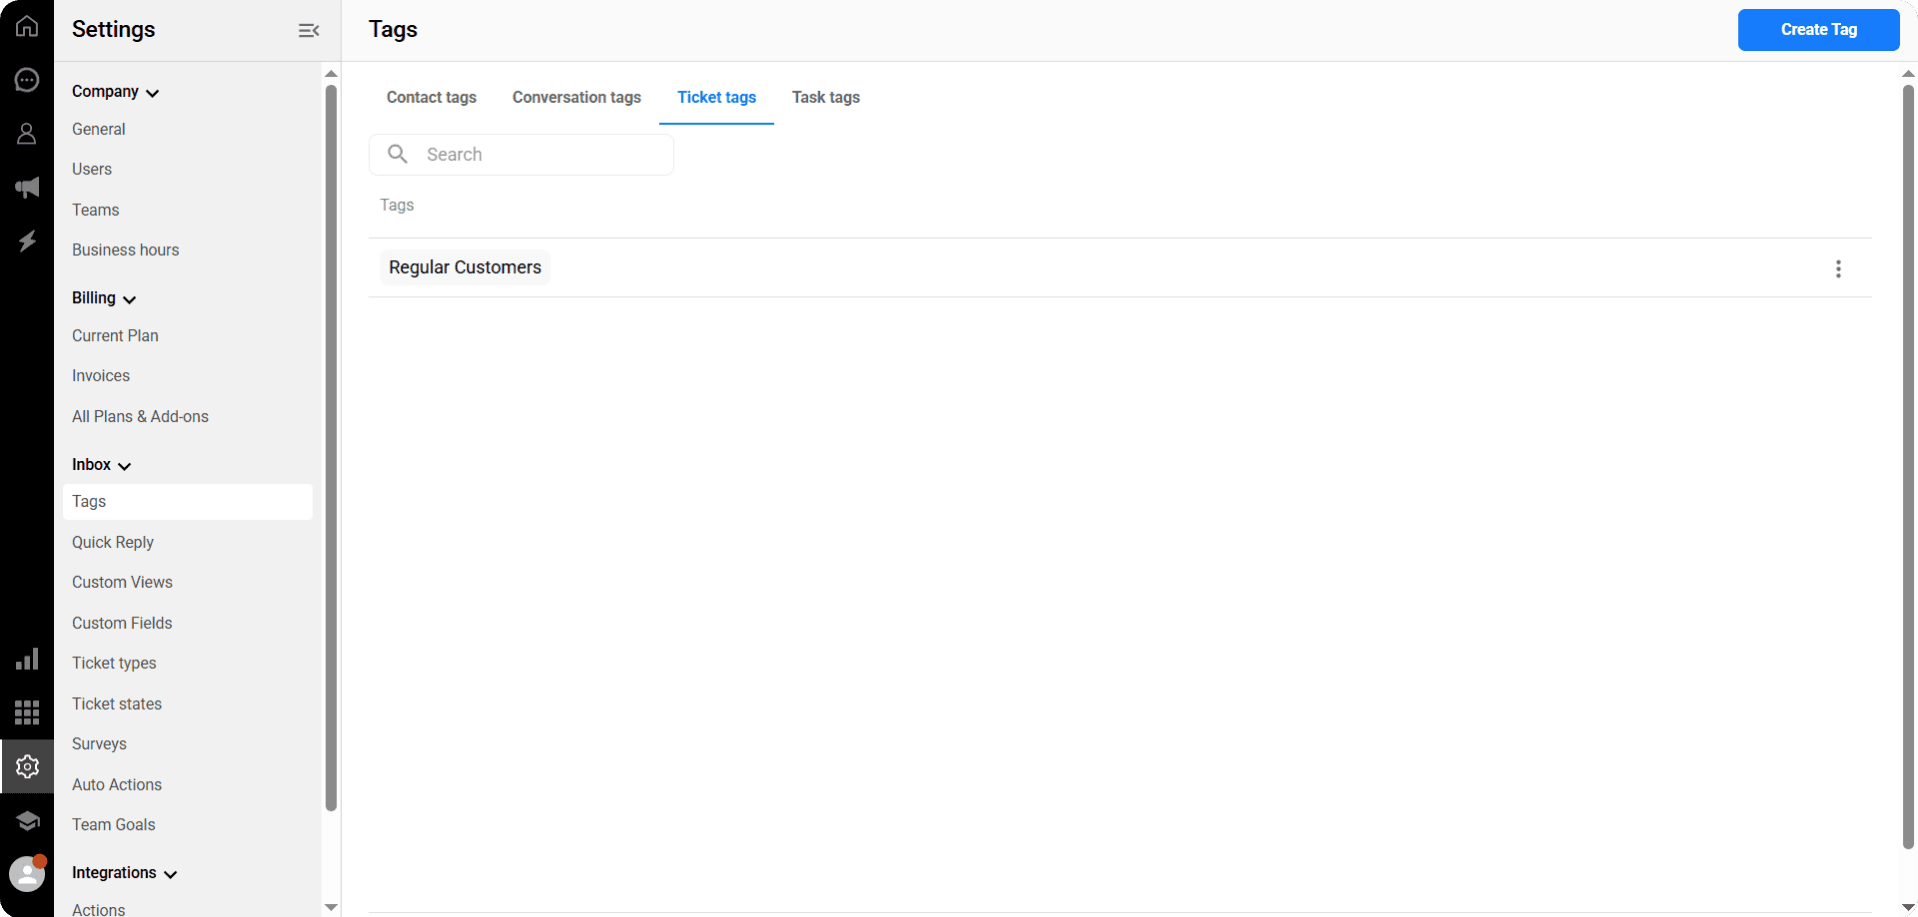
Click the “Tags” option in the side menu to open the page listing all tags.
At the top of the page, you can see the different tag types.
By clicking on any of the options—Contact Tags, Chat Tags, Support Request Tags, or Task Tags—you will see a list of tags created for that specific type.
The image shows the list of Contact Tags.
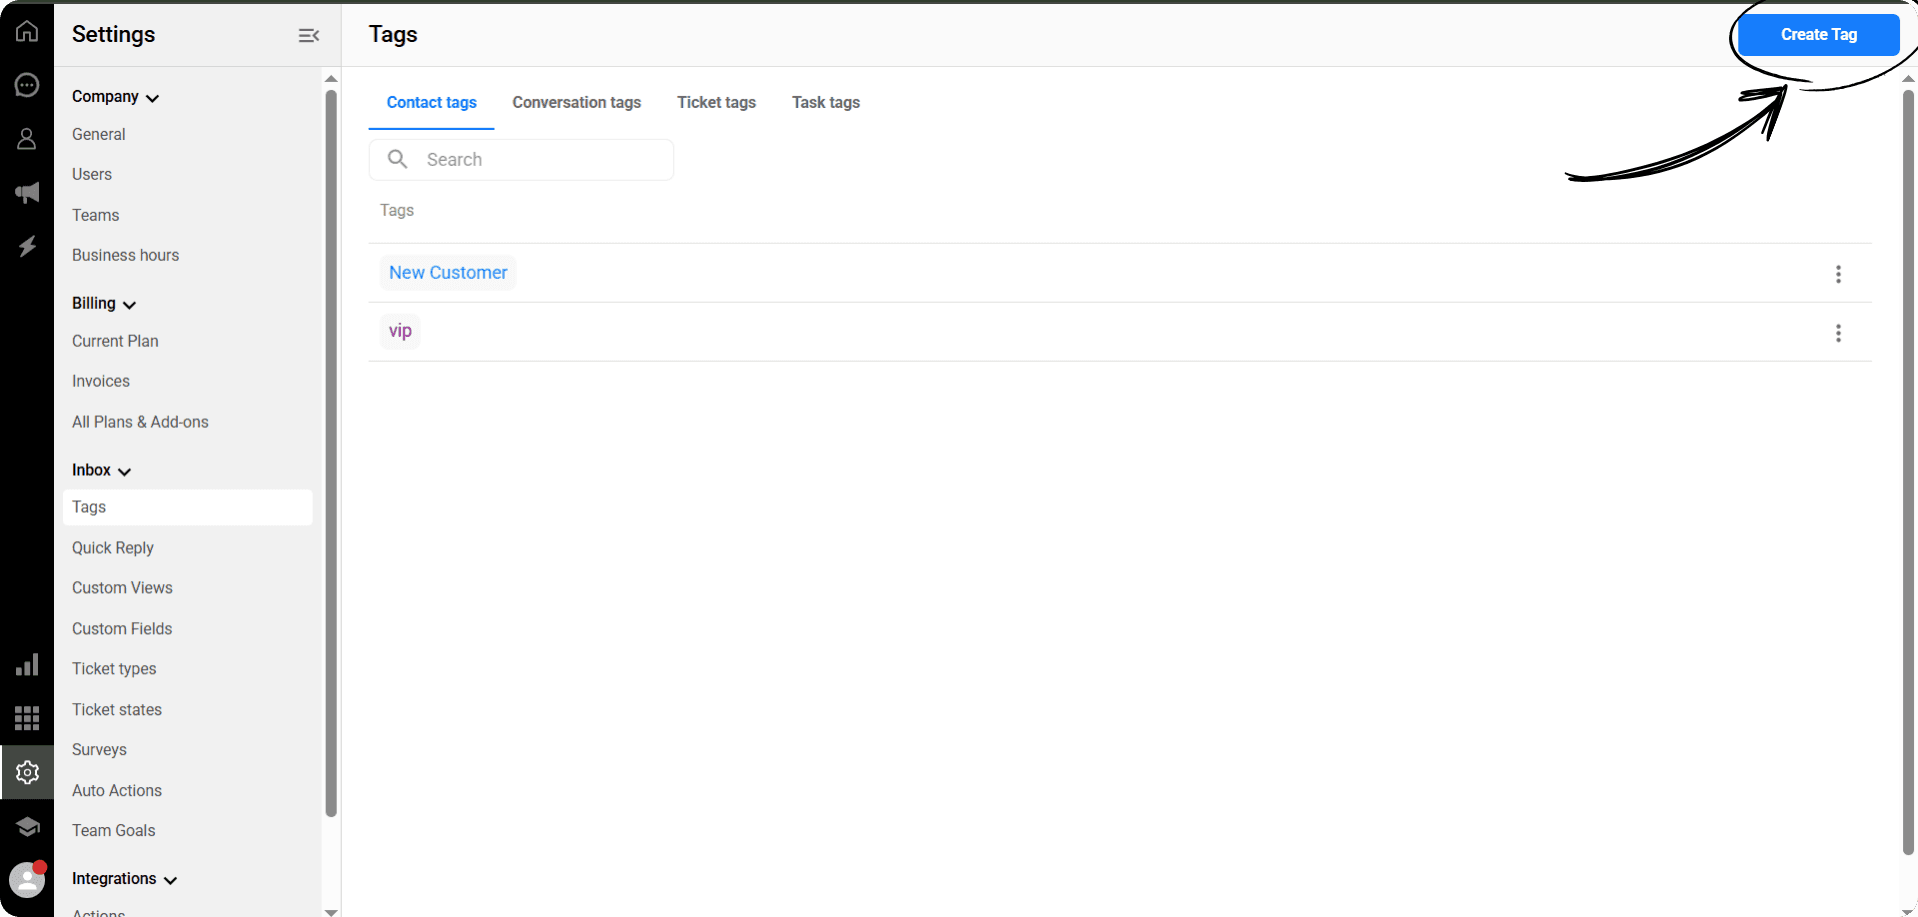
To create a new tag, click the "Create Tag" button in the top right corner.
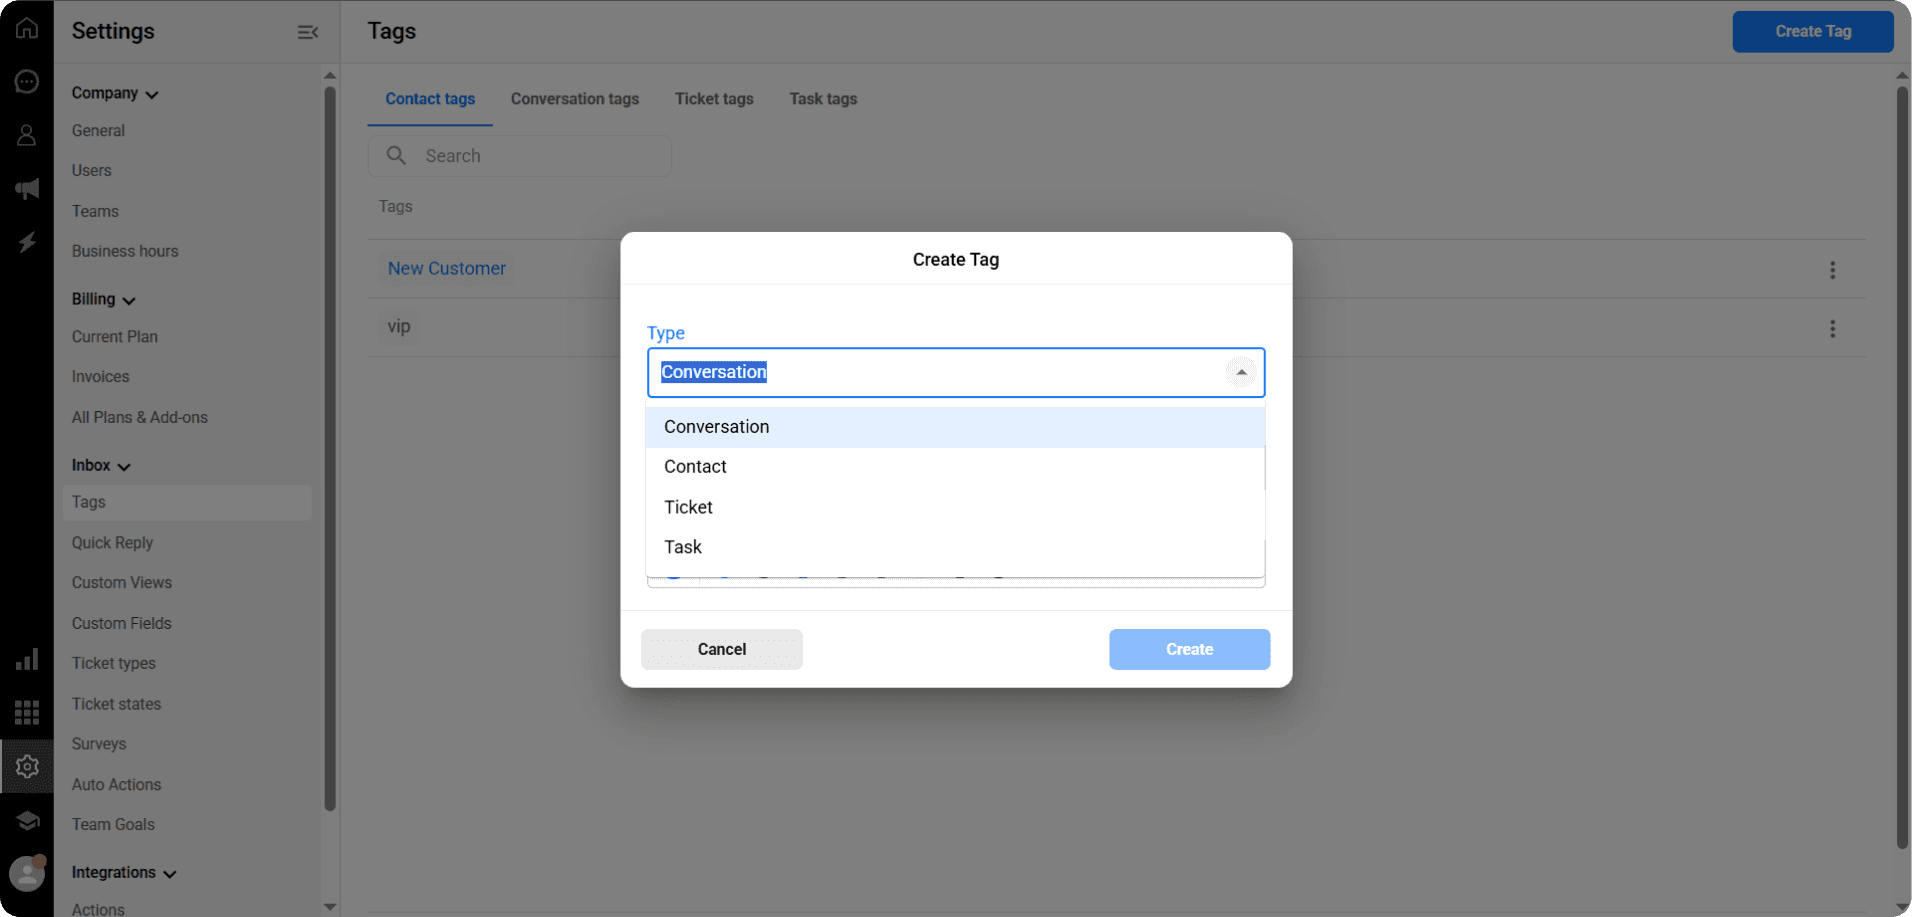
In the panel that opens, first select the tag type from the list.
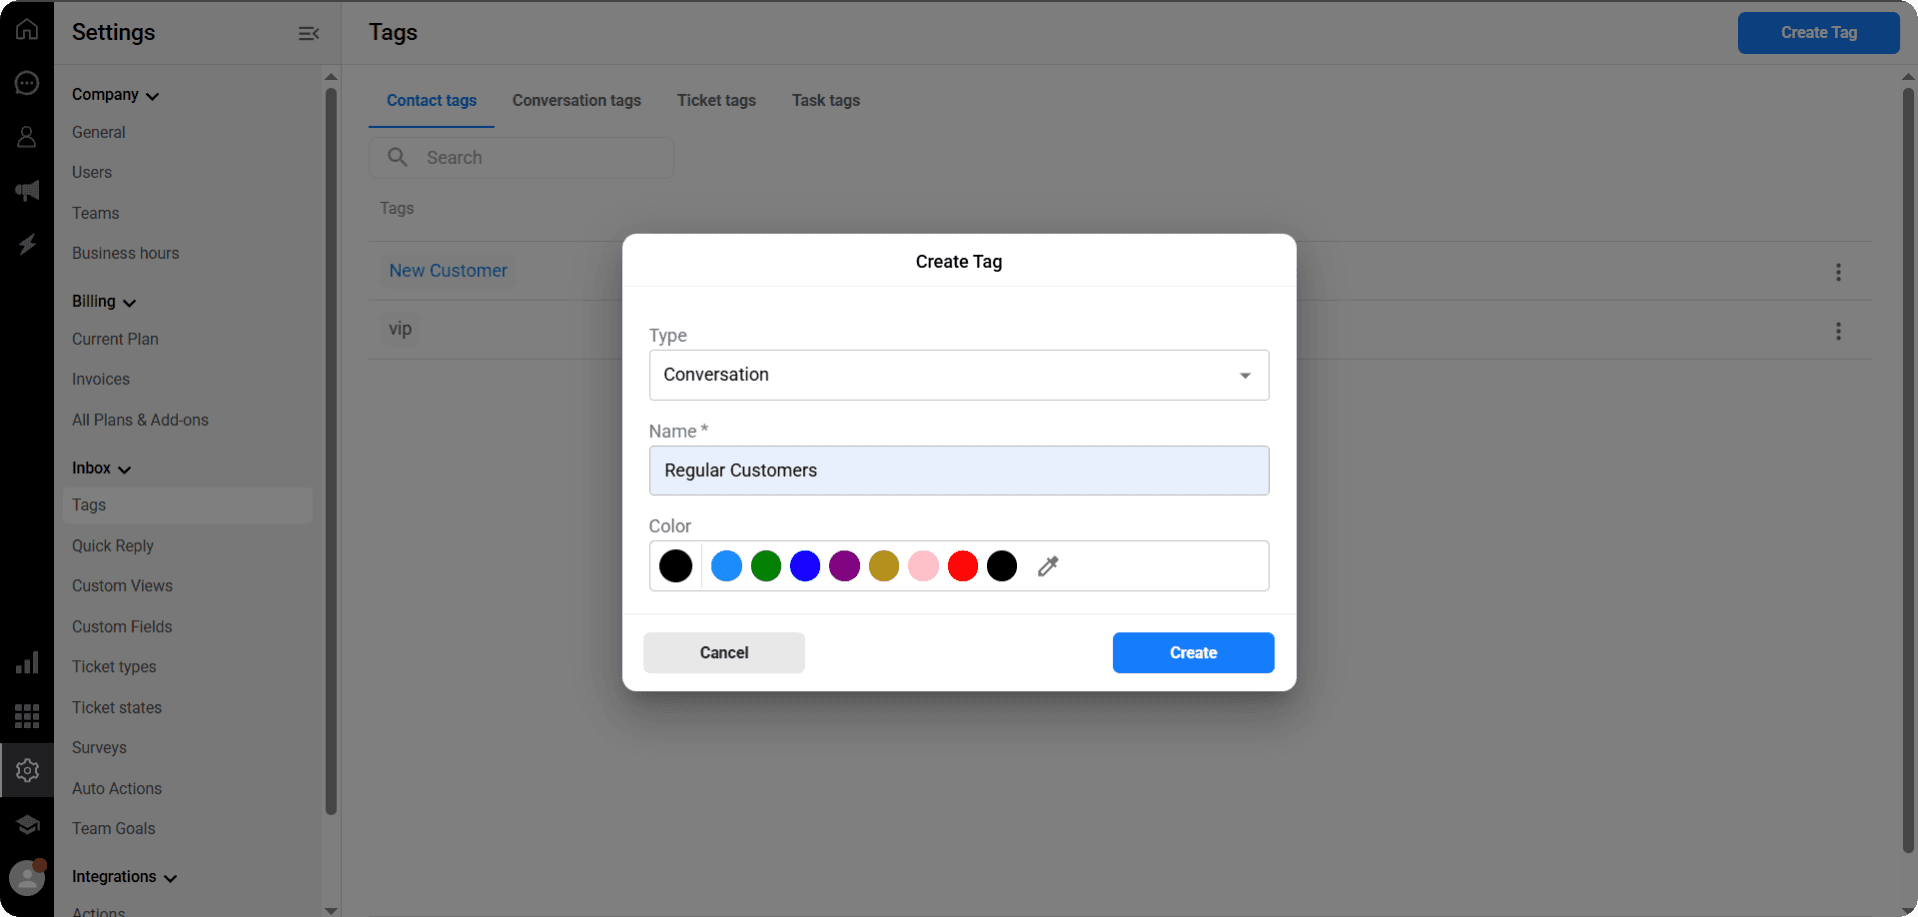
Next, name your tag and choose a color.
Finally, click the "Create" button.
Your tag has been created with the name you provided under the list of the type you selected.
Edit Tag

Click the three-dot (⋮) icon on the far right of the row for the tag you want to edit.
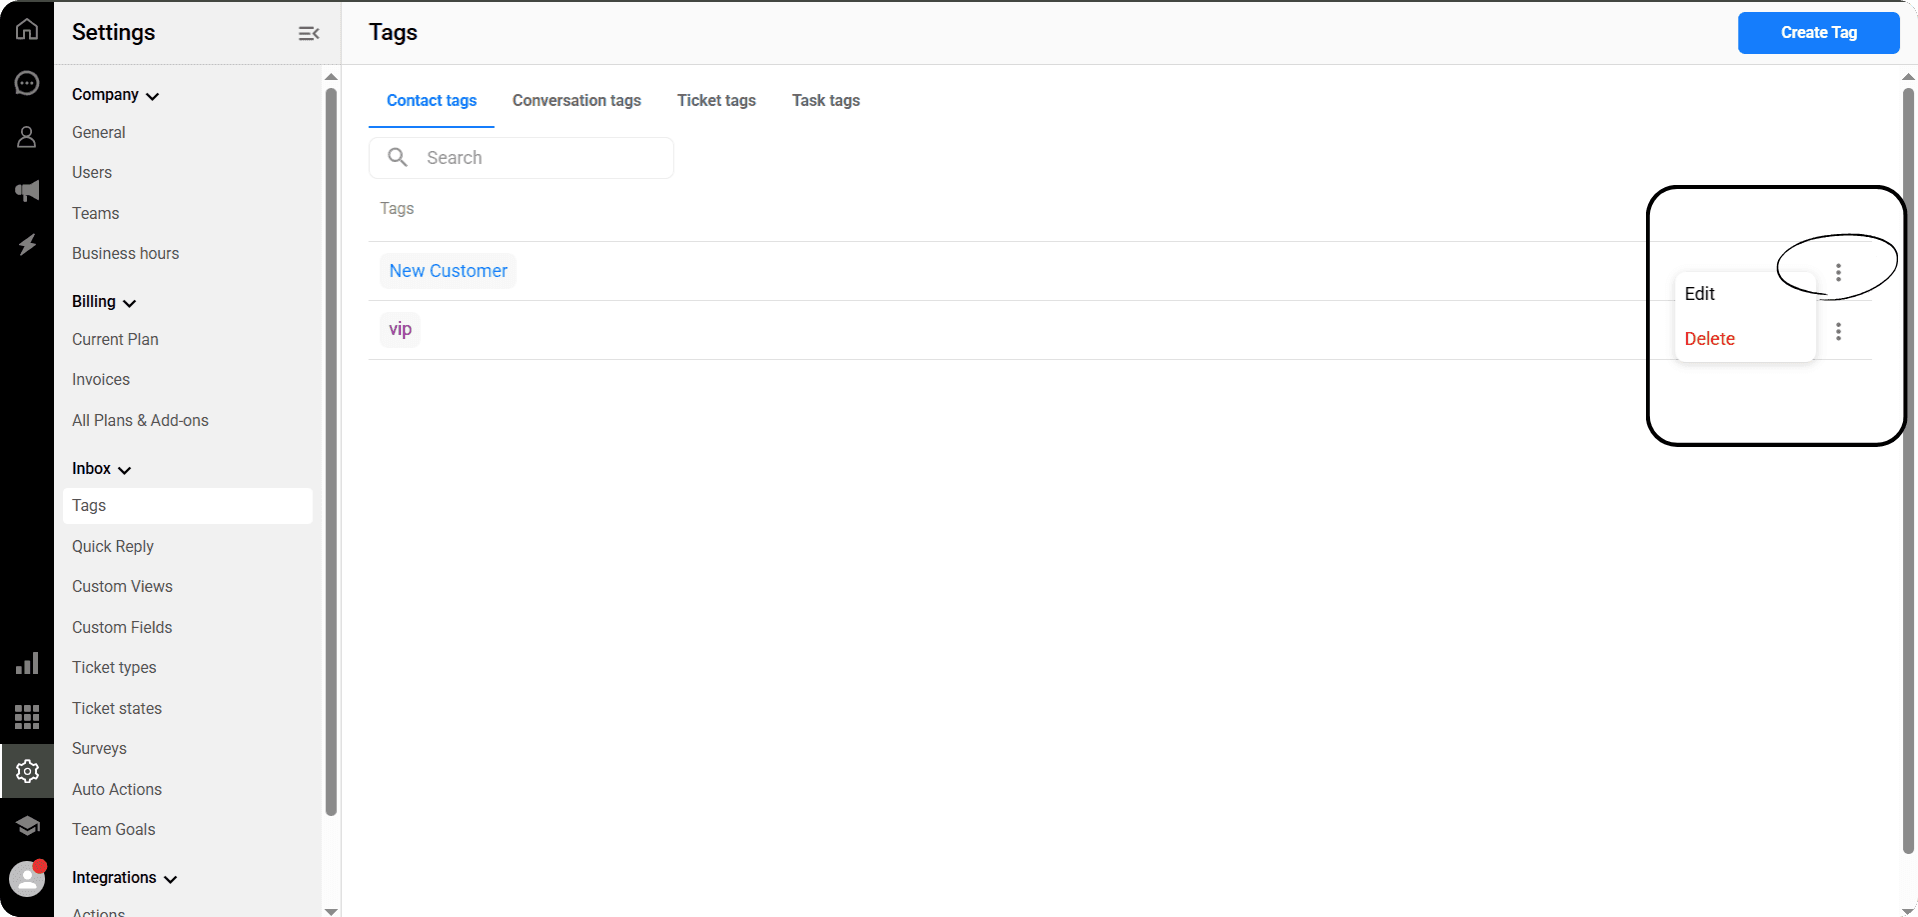
You can make changes to the label by selecting the “Edit” option from the menu that opens.
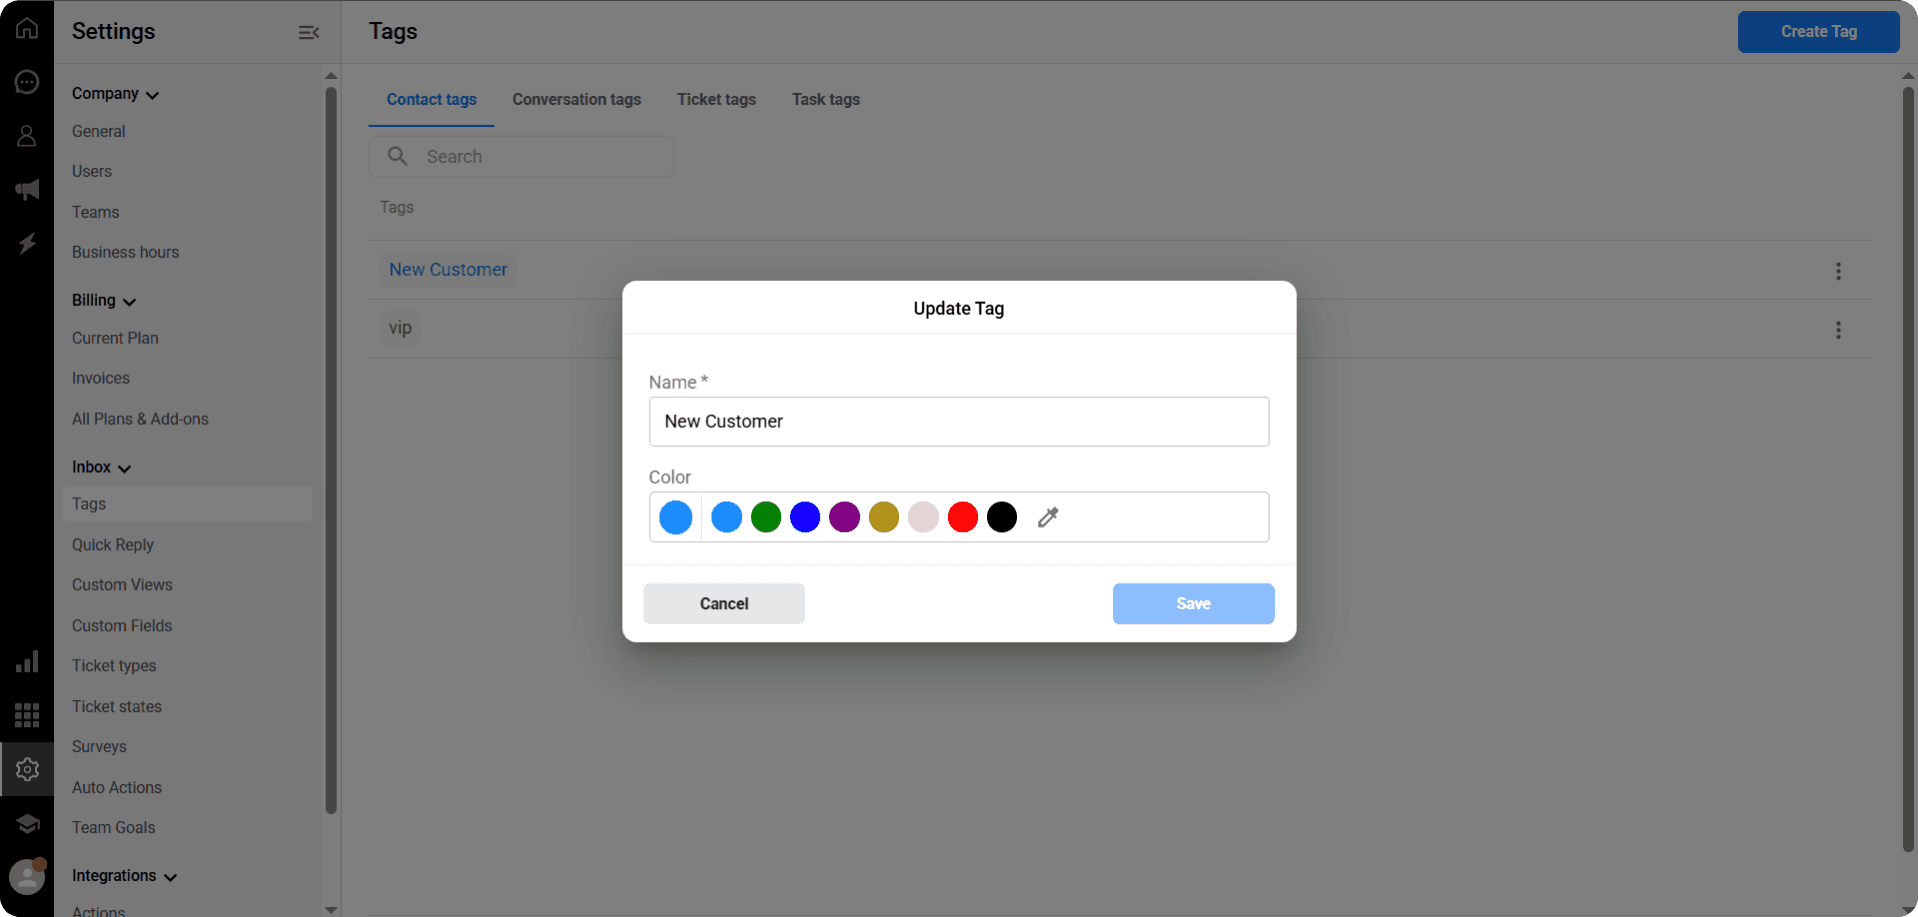
On the editing screen;
Label name
Color
You can change this information.
After completing your updates, click the “Save” button.
Deleting Tags
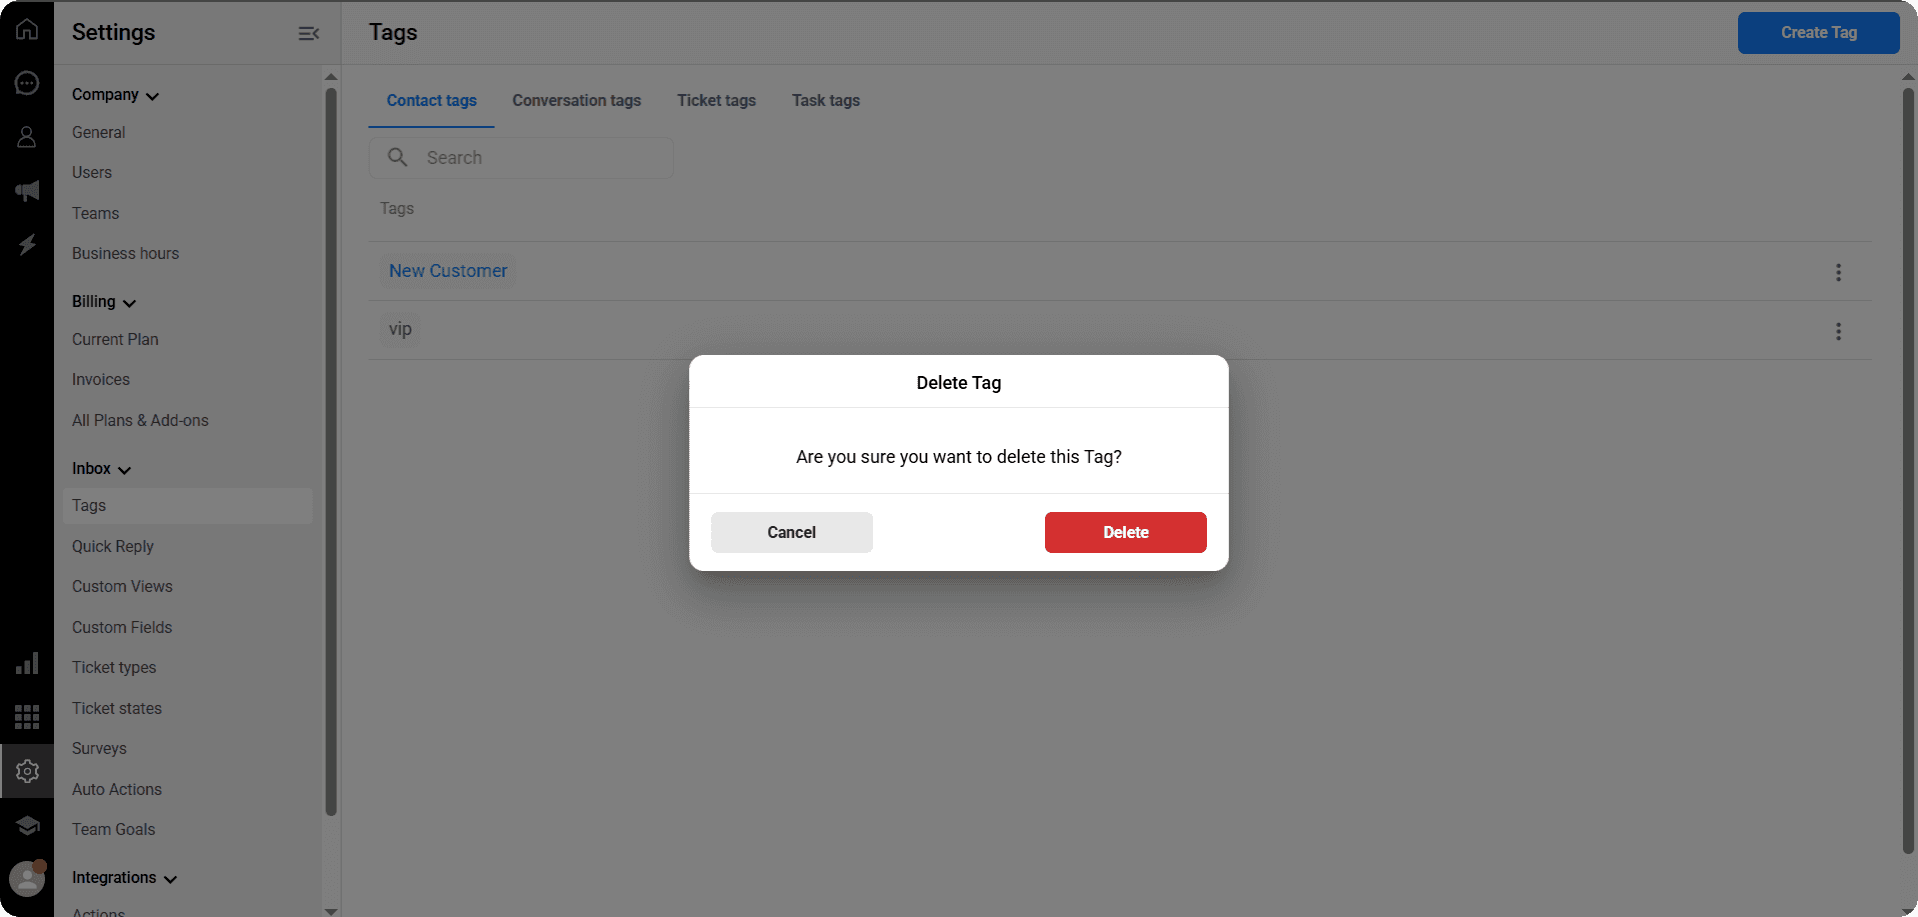
Click the three-dot (⋮) menu on the far right of the row for the tag you want to delete.
Finally, click the “Delete” button to complete the process.
Finally, click the "Delete" button to complete the process.
Using tags correctly helps you filter customer chats and campaigns more easily.
From the main menu, click → Settings to access the settings page.
Click the “Tags” option in the side menu to open the page listing all tags.
At the top of the page, you can see the different tag types.
By clicking on any of the options—Contact Tags, Chat Tags, Support Request Tags, or Task Tags—you will see a list of tags created for that specific type.
The image shows the list of Contact Tags.
To create a new tag, click the "Create Tag" button in the top right corner.
In the panel that opens, first select the tag type from the list.
Next, name your tag and choose a color.
Finally, click the "Create" button.
Your tag has been created with the name you provided under the list of the type you selected.
Edit Tag
Click the three-dot (⋮) icon on the far right of the row for the tag you want to edit.
You can make changes to the label by selecting the “Edit” option from the menu that opens.
On the editing screen;
Label name
Color
You can change this information.
After completing your updates, click the “Save” button.
Deleting Tags
Click the three-dot (⋮) menu on the far right of the row for the tag you want to delete.
Finally, click the “Delete” button to complete the process.
Finally, click the "Delete" button to complete the process.
Previous
New Call, WhatsApp Message, Email
Next
Next
Is Qpien right for your business?
Try Qpien free for 14 days! 🎉
Ready to take control of all your support channels?
Empower your customer interactions with Qpien! Boost sales and elevate satisfaction with every conversation.
Try Qpien free for 14 days! 🎉
Ready to take control of all your support channels?
Empower your customer interactions with Qpien! Boost sales and elevate satisfaction with every conversation.
Try Qpien free for 14 days! 🎉
Ready to take control of all your support channels?
Empower your customer interactions with Qpien! Boost sales and elevate satisfaction with every conversation.