
Managing User Seats
How to increase or decrease the number of users in your plan
Managing User Seats
Add or remove user seats in your Qpien plan based on your team’s needs. To do this, you'll need to complete a few setup steps before purchasing additional seats.
Step-by-Step: How to Add a User Seat
Log in to your Qpien account.
From the bottom of the left-hand menu, click Account, then select Billing from the pop-up window.
Under the Current Plan section, click the Buy Additional User Seat button on the right-hand side.

⚠️ Before You Continue:
You must complete your billing information and payment method before proceeding. These are mandatory.
Required Billing Information
Click the pencil icon on the far-right of each section to edit, Required field:
First Name / Last Name
Country / Province / City / ZIP Code
Address Line
Company Legal Name
Tax City
Tax Number

Payment Method
You’ll also need to add a payment method. Required fields:
Cardholder Name
Card Number
Expiration Date
CVV
☑️ Don’t forget to allow Stripe to securely store your card details.
Editing or Deleting Billing and Payment Information
To edit or delete your billing or payment details:
Navigate to Account > Billing from the bottom of the left-hand menu.
In the Billing screen, scroll to the Billing Information or Payment Method sections.
Locate the billing or payment entry you'd like to change or remove.
Click the pencil icon on the far right of that entry.
From there, you can edit the existing details or delete them entirely.
🔒 All billing and payment data is securely processed via Stripe.
Make sure to update these details before purchasing additional user seats or subscribing to a plan to avoid any interruptions in service.
Once billing details and payment information are saved, continue with the user seat purchase.
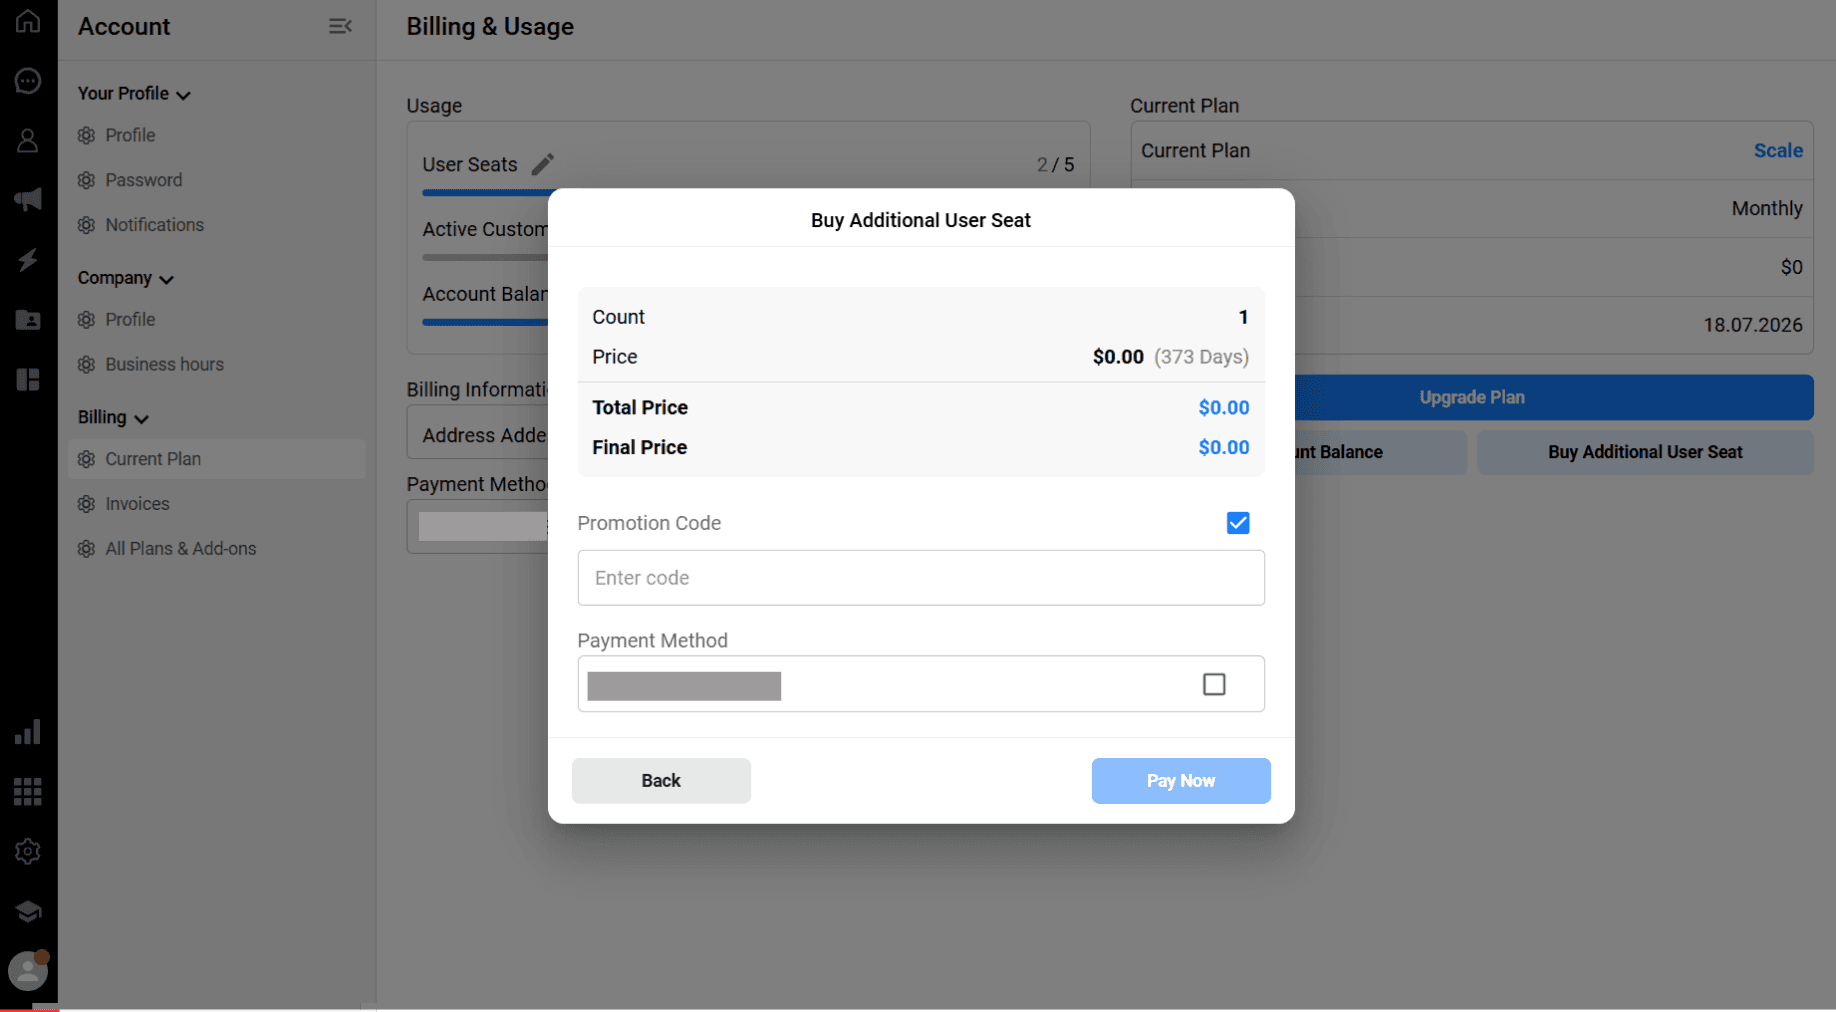
Buying an Additional Seat

After clicking Buy Additional User Seat, confirm the following:
Current Plan: Scale (Monthly)
Current Seats: 1
Additional User Seat Count: Select how many seats you want to add
Click Next to proceed.
On the next screen, review:
Seat Count
Price
Total & Final Price
Promotion Code (if applicable)
Select your payment method from the dropdown.
Click Pay Now to complete the purchase.
That’s It
Your new seat(s) will be added and ready to assign. Changes will reflect in your active subscription.
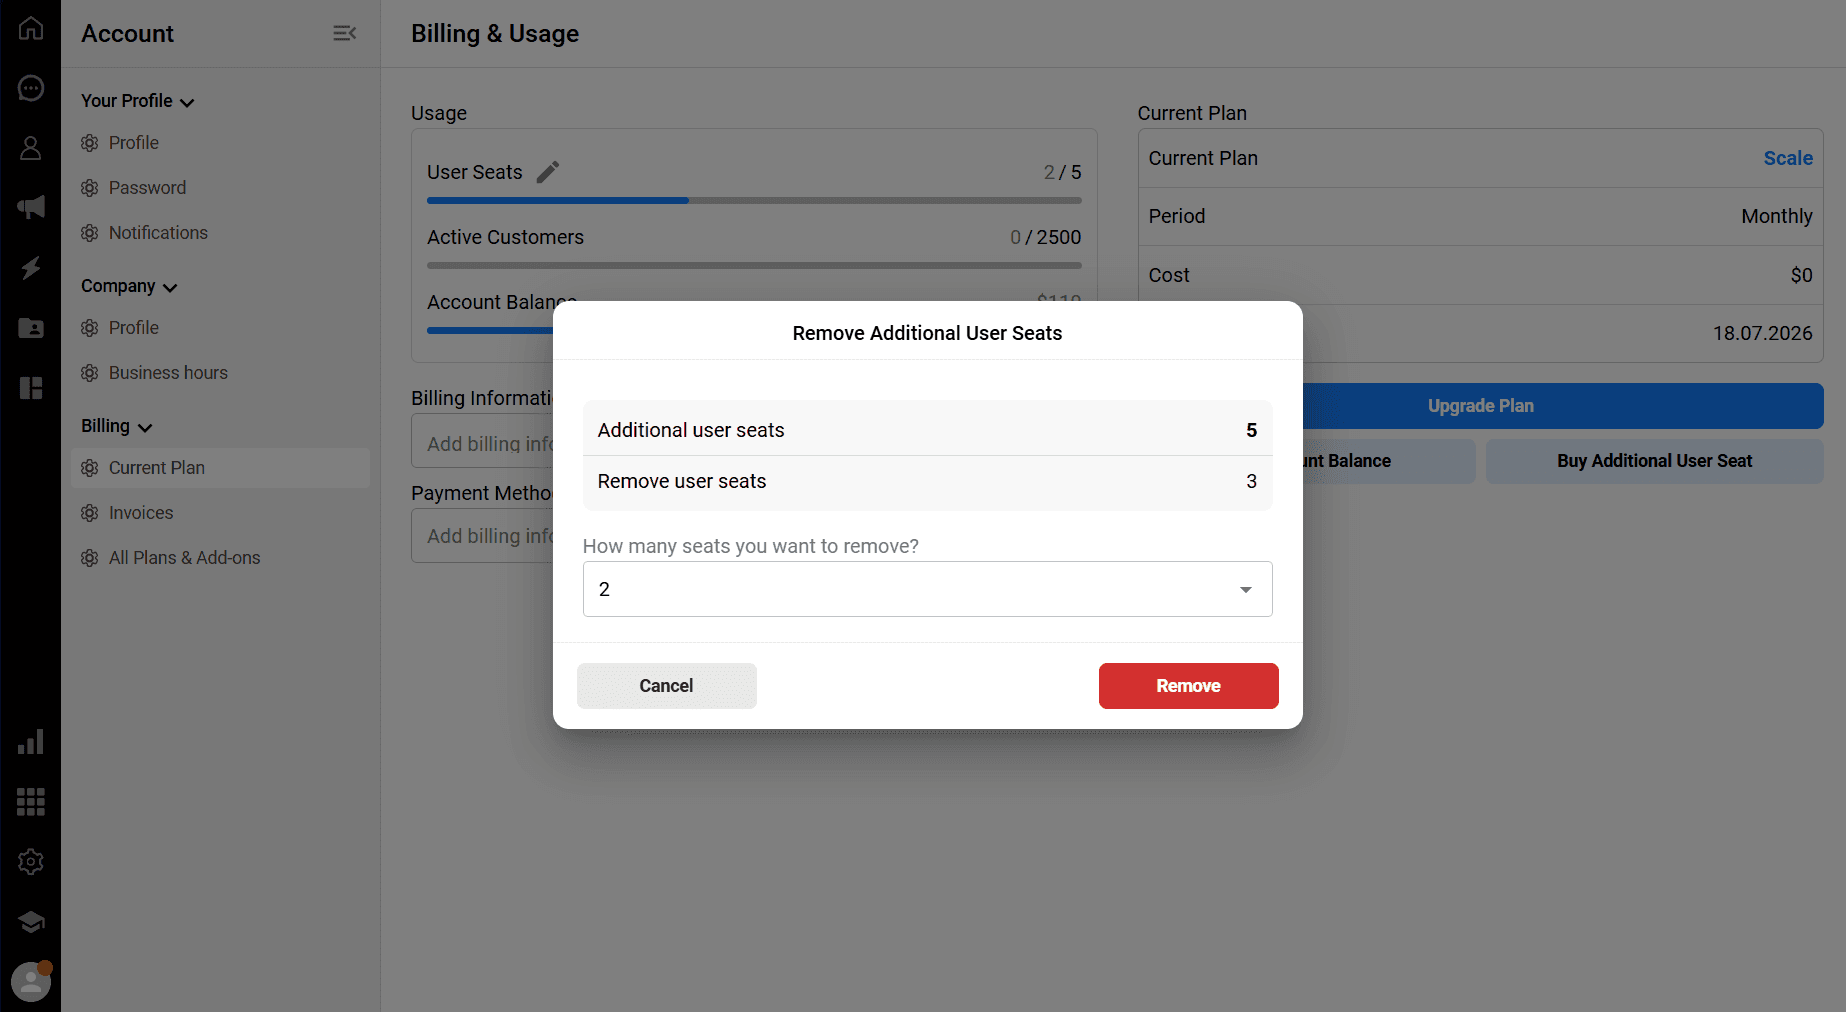
Removing User Seats
To reduce the number of user seats in your plan:
Go to the Billing section via Account > Billing from the left-hand menu.
At the top of the billing screen, locate the User Seats row.
Click the pencil icon on the right-hand side.
In the pop-up window, you’ll see the field: How many seats do you want to remove?
Enter the number of seats you wish to remove and confirm.
Need help? Visit our Contact Page or reach us through WhatsApp support.